
Alice Partington
FE UAL Foundation in Design and Media at Ravensbourne University
Final Major Project

project proposal


CONTEXT

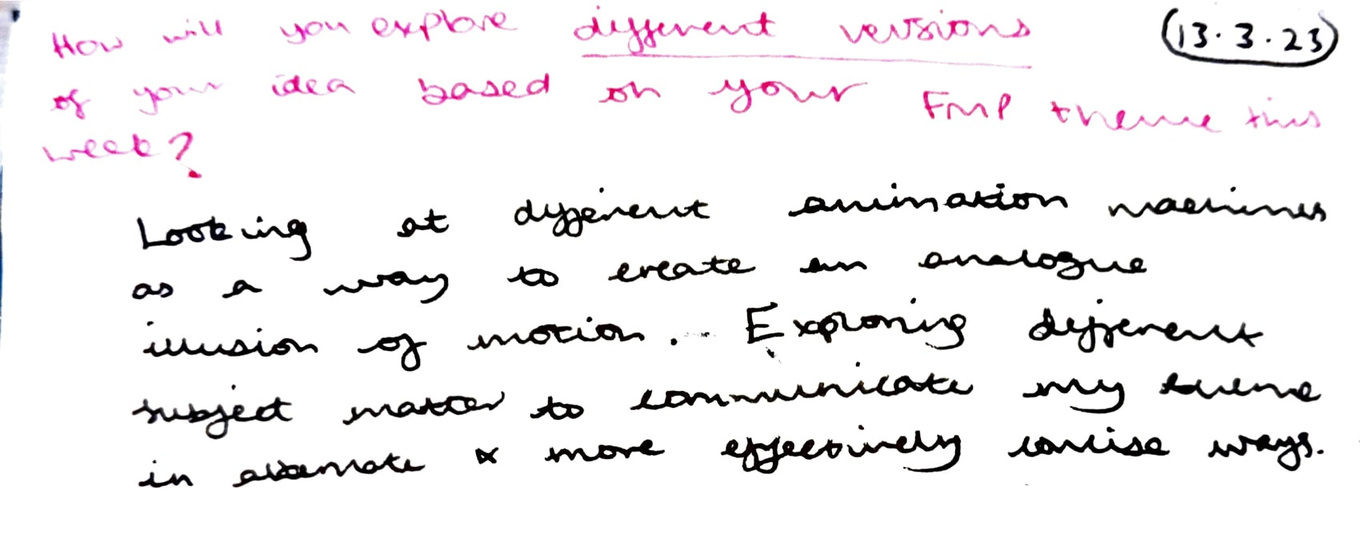
Week 1
pecha kucha
Context
research
planning & production
*Re-organised for clearer communication in website format.
Project Idea:
CONTEXT
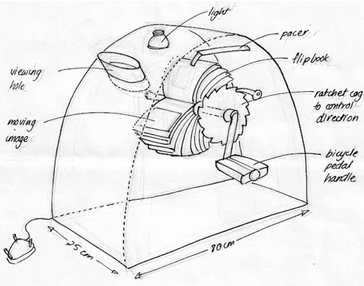
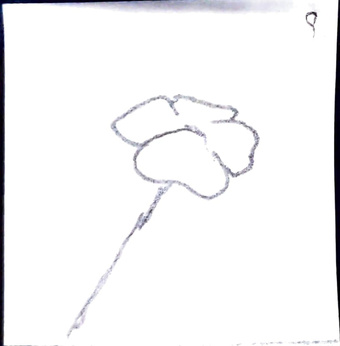
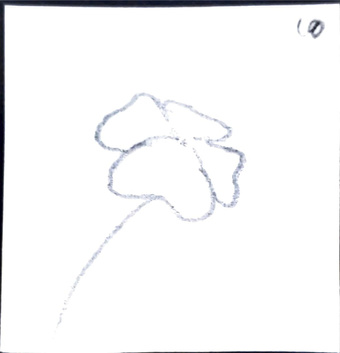
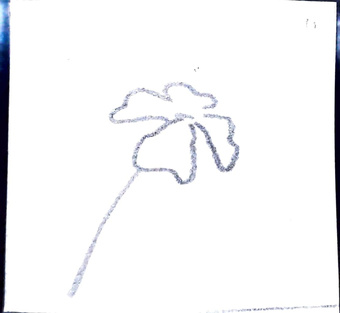
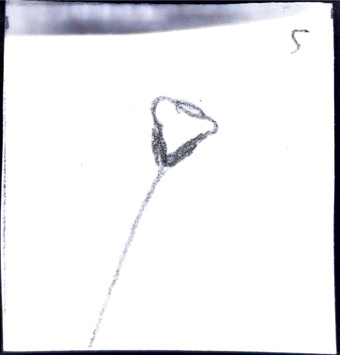
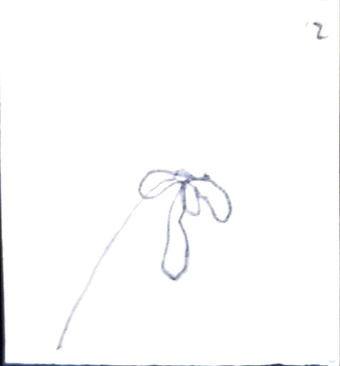
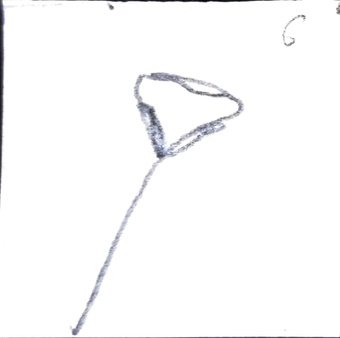
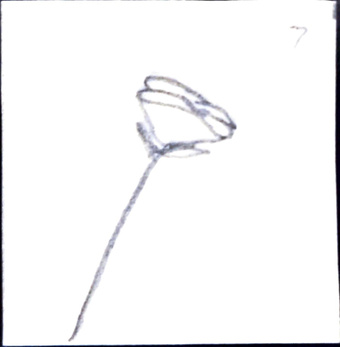
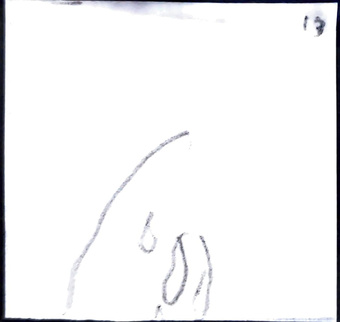
initial sketches and project concept.
My initial idea to combine traditional portraiture with analogue animation in the form of an immersive exhibition experience, tackling the viewer's relationship with time through physically placing them between the frames of animation.
RESEARCH
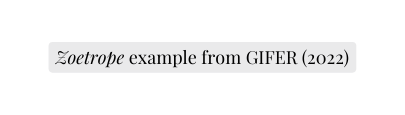
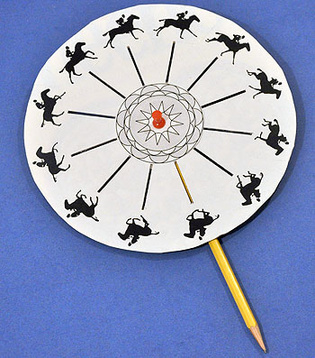
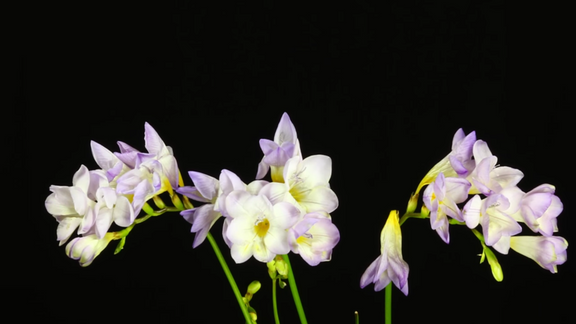
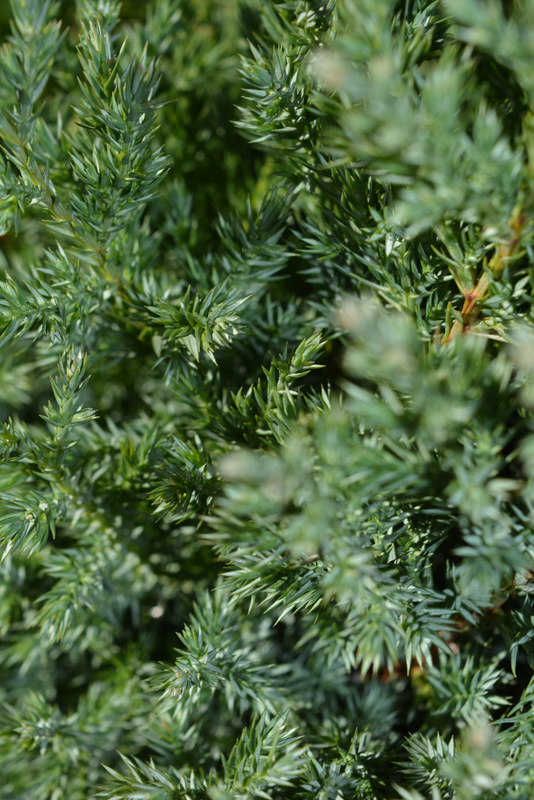
Zoetropes, "The Wheel of Life":
investigative research into zoetropes: history, functionality, and context.
What is a Zoetrope?
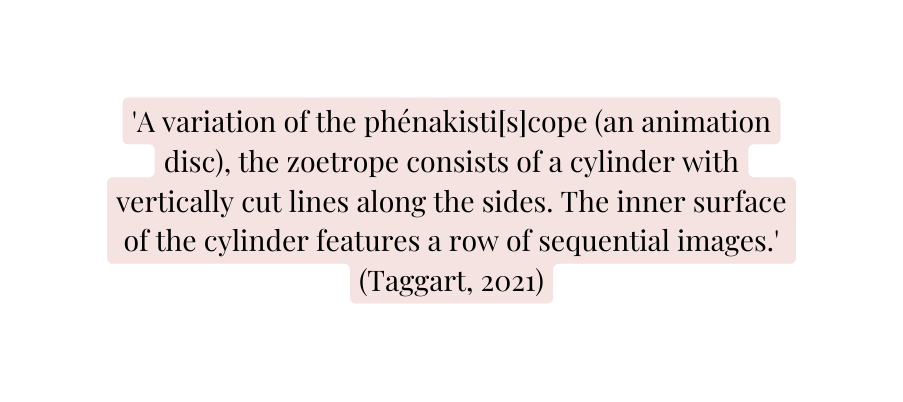
How does it work?
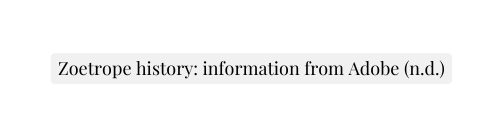
'A zoetrope is a cylinder with vertical slits down the sides. The inside of the cylinder displays a band with a set of sequenced images. When the cylinder spins, the user can see the pictures inside as they look through the slits, which prevent the images from blurring together. Combined with the rapid succession of images, the illusion of motion in a continuous loop is created. As with other motion simulation inventions, the illusions created by the zoetrope rely on the human retina retaining an image for roughly a tenth of a second. If a new image appears in that time, the brain merges them and the sequence appears continuous.' Information from Adobe (n.d.).
The work of Eric Dyer: Zoetropes as Fine Art
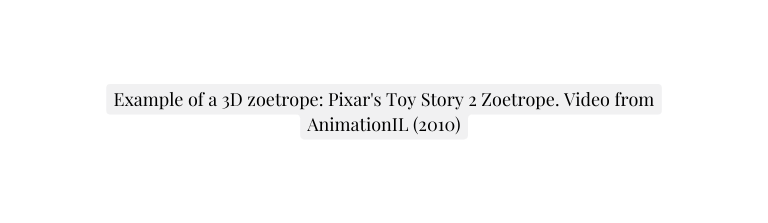
Pixar's Toy Story 2 3D sculptural zoetrope

Alternate Animation Machines:
exploring the alternate methods of analogue animation to better understand the media I am working in.
RESEARCH
Magic Lantern (1659)
Thaumatrope (1825)
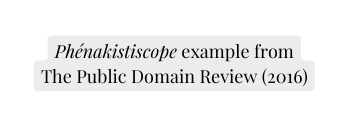
Phenakistoscope (1832)
Kinegraph (1868) + Mutoscope
Image from Kelly (2018).
GIF from hensleyjh (2018).
Image from Stern (2009).
- earliest known animation device
- image projection device
- created by Dutch scientist Christiaan Huygens
- uses a light source and a transparent pane
- "An adept projectionist could quickly change between slides placed together to give the illusion of movement" (Aviram, 2022)
Image from Bardos (n.d.).
GIF from Cannon (2020).
- sequence of images drawn in a book, using your thumb to flick through
- unsure when the first flipbook was invented; "often assumed that it must predate devices like the phenakistoscope, but unfortunately there is no real evidence of this" (Aviram, 2022)
- first recorded kinograph in 1868 with a patent request by John Barnes Linnett
- mechanised into a mutoscope as seen above
- "invented by two different people simultaneously" (Aviram, 2022): Joseph Plateau and Simon Von Stampfer were both inspired by the work of Micheal Faraday
- succession of images become one when disc spins
- name translates from ancient Greek as 'wonder turner'
- images on each side of the disc
- when spins, the images combine into one
- Joyn Ayrton Paris is widely credited as the inventor; he popularised it

All animation machine information from Aviram (2022).
Zoopraxiscope (1879)
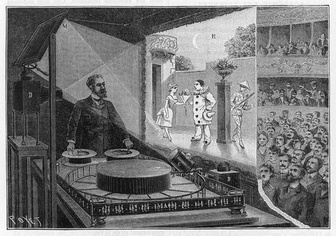
Theatre Optique (1888)
Praxinoscope (1877)

Video from Channel Stop (2013).
- invented by Charles Emile Reynaud in 1888, improving on his praxinoscope
- "Theatre Optique used a long transparent roll of pictures that was wound between two spools" (Aviram, 2022)
- the pictures were hand-painted
- "each roll [...] contained between 300 and 700 different frames" (Aviram, 2022)
- the pictures would be projected onto a background image through mirrors and magic lanterns
- operated by hand to control the speed of the playback
- his shows included sound effects through silver tags that triggered an electromagnetic buzz
- invented by photographer Edweard Muybridge
- "He set up a series of linked cameras to capture animals in motion, and the individual cameras each gave an image of the animal at a different point. These photographs were then animated together using the zoopraxiscope." (Aviram, 2022)
- consists of a lantern with a rotating glass disc with his photos printed on them, working the same way as a phenakistoscope
- the first time movementa had been constructed using photography
- successor to the zoetrope, name roughly translates to 'action viewer'
- invented by Charles-Emile Reynaud
- "The praxinoscope did away with the narrow slits that people viewed the animated elements through on the zoetrope and replaced it with an inner circle of mirrors." (Aviram, 2022)
- "Using mirrors instead of narrow slits meant that the resulting image was brighter and less distorted on the praxinoscope than the zoetrope" (Aviram, 2022)
Functionality of My Piece:
experimenting with audience interaction to make the viewer part of the piece and elevate the temporal significance.
planning & production
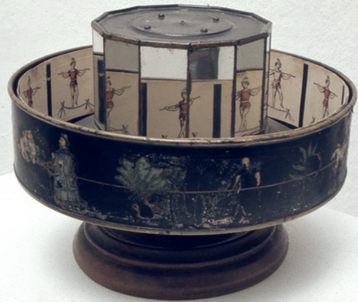
Zoetrope

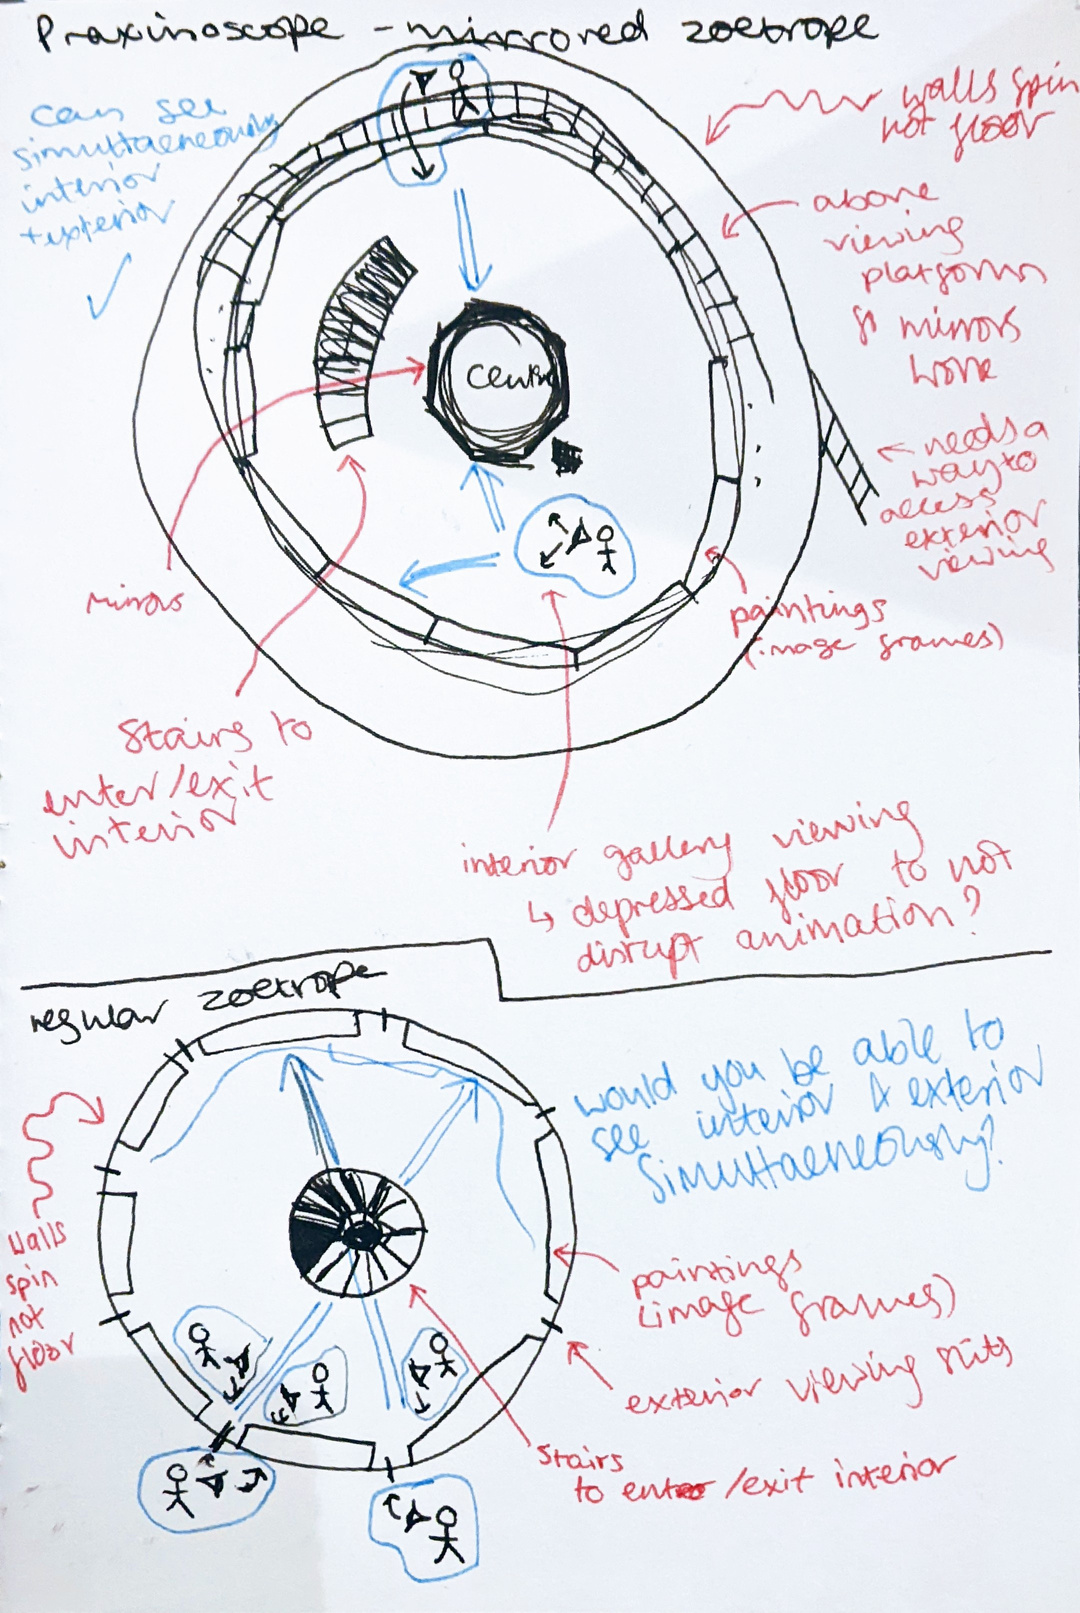
Praxinoscope
- able to view from above or inside
- would people viewing from inside ruin the view from above?
- eye focal point is on the mirrors in the centre so more possible for interior viewing not to affect exterior viewing
- viewing the animation and viewing the paintings is separate due to the mirrors
Contextual Research:
combining media to enhance a creative outcome.
Spiderman: Into the Spiderverse - Bringing a Comic Book to Life
Video from Sony Pictures Animation (2019).
- honouring comics in animation
- combining the look & physicality of comic printing with the technology of 3D animation
- illustrating every frame to be art itself
- working more with illustration than real textures on 3D models
- enhancing the work through contextual methodology mirroring the significance of the project

CONTEXT
RESEARCH
Caroline Walker: Night Feed I & II
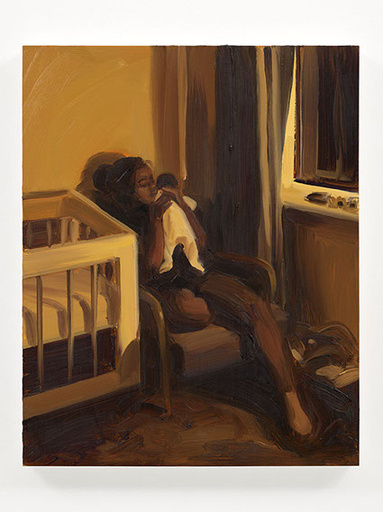
Left: Night Feed I by Walker (2022a). Right: Night feed II by Walker (2022b).
- series of two paintings of the same scene
- photographic quality to her paintings through harsh strokes and bold shadows
- using implied movement through dynamic posing, similar to key framing in animation
- highlighting on the calm energy of the scene through warm tones, dark shadows and expressive poses

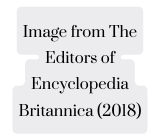
Alexander McQueen Autumn/Winter 2023 Show: ANATOMY
- exploring the anatomy of humans, clothes and flowers
- combining nature as inspiration for the fold and texture of clothes
- using materials for their common use (business suits) and altering them to change the energy and personality of the item
- looking at a person's relationship with clothes and turning to flowers to put more life into the corporate designs
"Human anatomy, the anatomy of clothing, the anatomy of flowers. An exploration of beauty and power through tailoring and tailoring fabrics and a focus on cut, proportion and silhouette. The foundations of fashion, cut on the body and inspired by the body within. The classic subverted: turned inside out and upside down.
Volume is neat – strict – or exploded. Garments are dissected: slashed, sliced and twisted. Shoulders are strong. Waists are narrow. Heeled trousers elongate the leg: the bumster in reverse. The most prominent motif in the collection is the orchid, in its rarer forms cultivated but, after the daisy, the most common flower. It thrives in the air, resists being rooted and grows in the wild. Extraordinarily beautiful and infinitely adaptable, the orchid mimics both predator and prey. In the language of flowers, the orchid is a symbol of love.” Sarah Burton, Creative Director
Video and quote from Alexander McQueen (2023)
Image from Mower (2023)
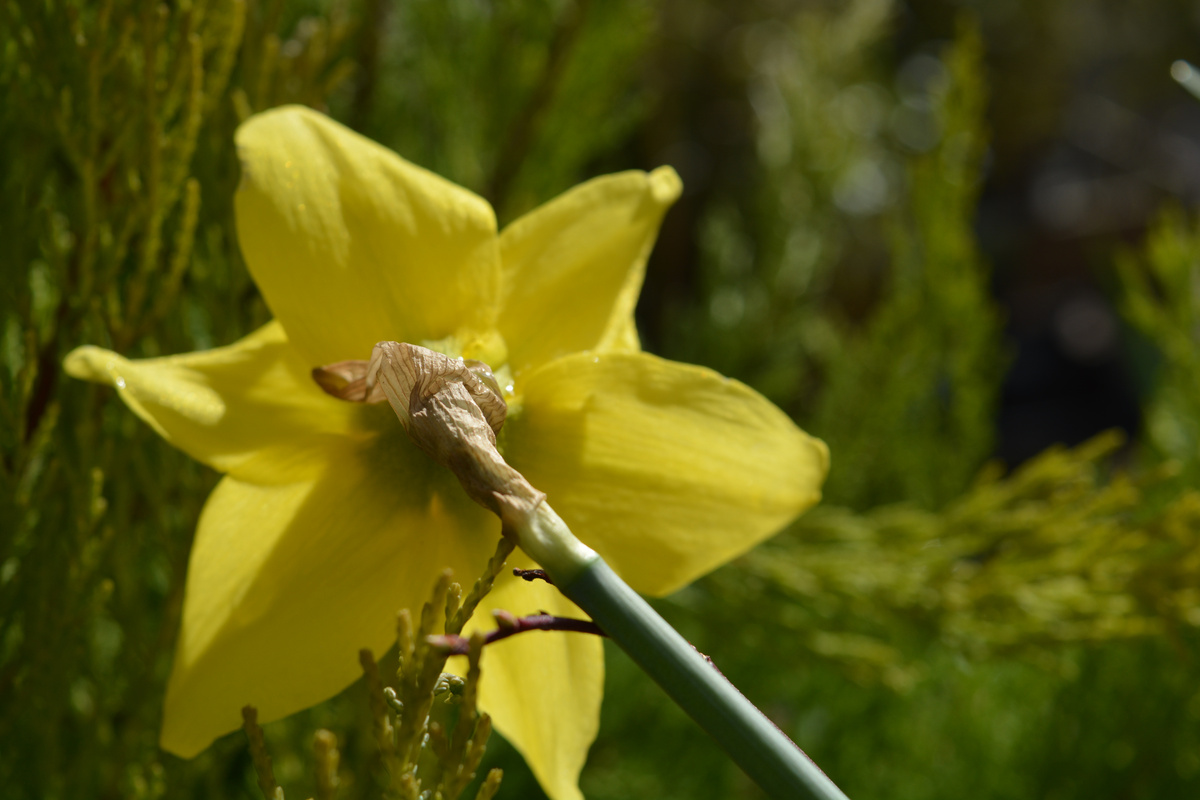
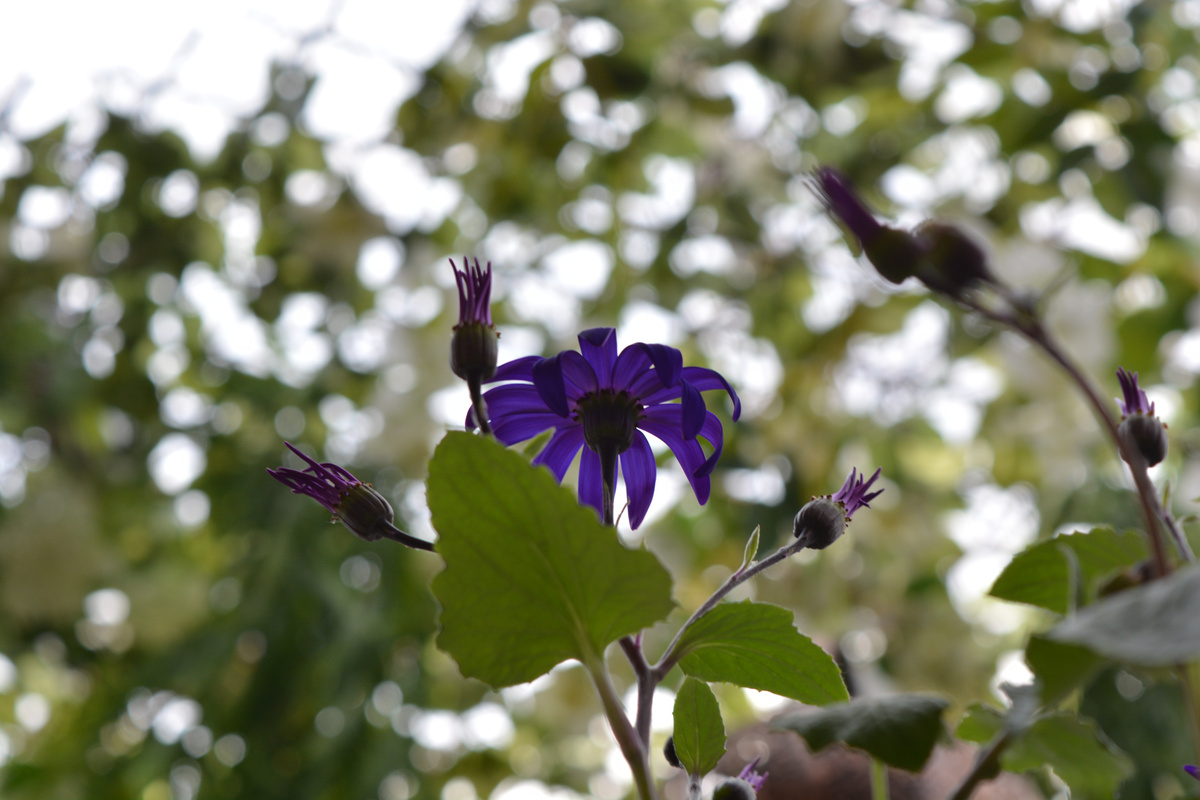
Initial Chosen Subject - Using Portraiture to Create Life:
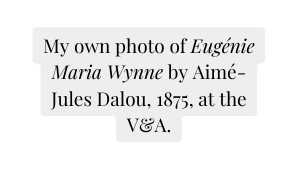
Research into my initial exploration: gallery visit to the V&A
Expressing temporality through portraiture:

planning & production
RESEARCH
- capturing a single moment through the breakdown of motion into animated frames
- showing life through the expressiveness of painting
- creating a narrative through a clear visual persona
V&A VISIT: The technique of and effect from Portraiture:
- creating the impression of emotion through subtle expression
- capturing the likeness of a real person through minute details and accurate shaping
- expressing motion through poses and accurate anatomy of the body


From Portraiture to Flowers - Object Metaphor in My Piece:
changing the visual subject of my piece to better support the project significance and meaning.
RESEARCH
Flowers as a metaphorical image:
- living object as a representative of life and the continuation of time
- decomposition of a living object, breaking down into parts
- the language of flowers and individual flower symbolism to provide further communication
- flowers have a short lifespan compared to humans; utilising flowers to emphasis the ubiquitous and continuous passage of time represents this temporality in a way the audience can plainly see
- using flowers presents the project's inquisition within a conceivable reality for the viewer to examine
Flowers for my Piece:
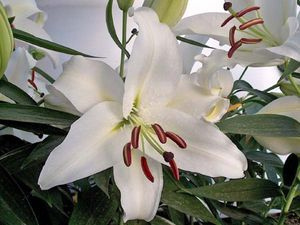
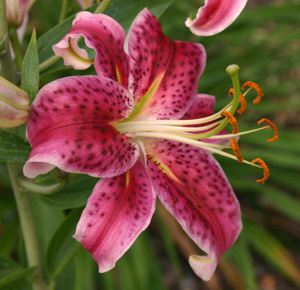
White Stargazer Lilly: 'In terms of floriography, these lilies are said to mean a rejuvenation of the soul, which is why they're linked to the natural balance of life and death.' (Interflora, n.d.)
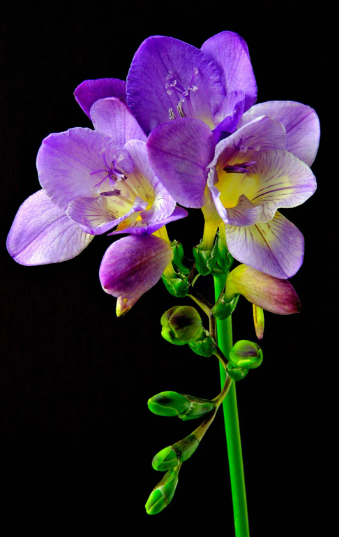
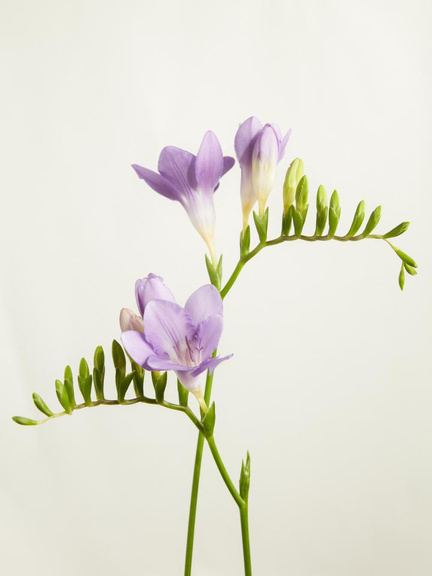
Freesia: 'Delicate freesia is a favourite amongst florists come spring and when it comes to the meaning the flower is said to symbolise thoughtfulness.' (Interflora, n.d.)
The Decaying of Flowers:
visual investigation into the form of living and decaying flowers to inform my visual output with realistic life forms.
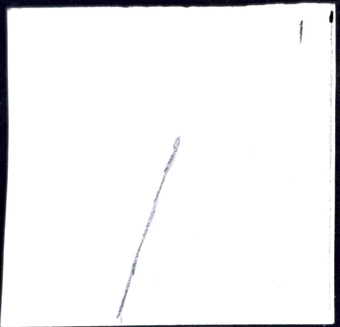
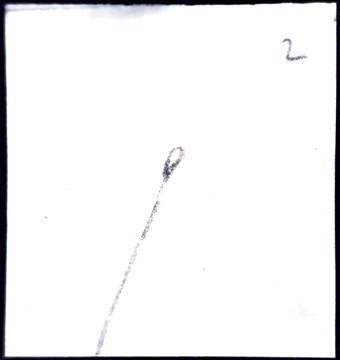
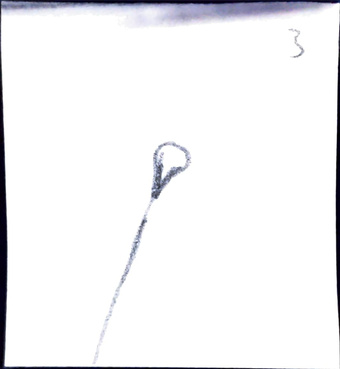
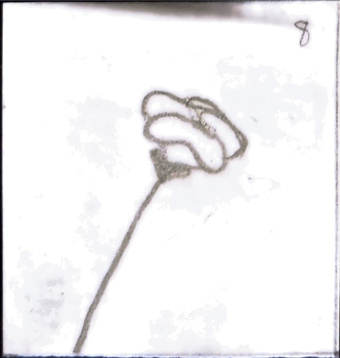
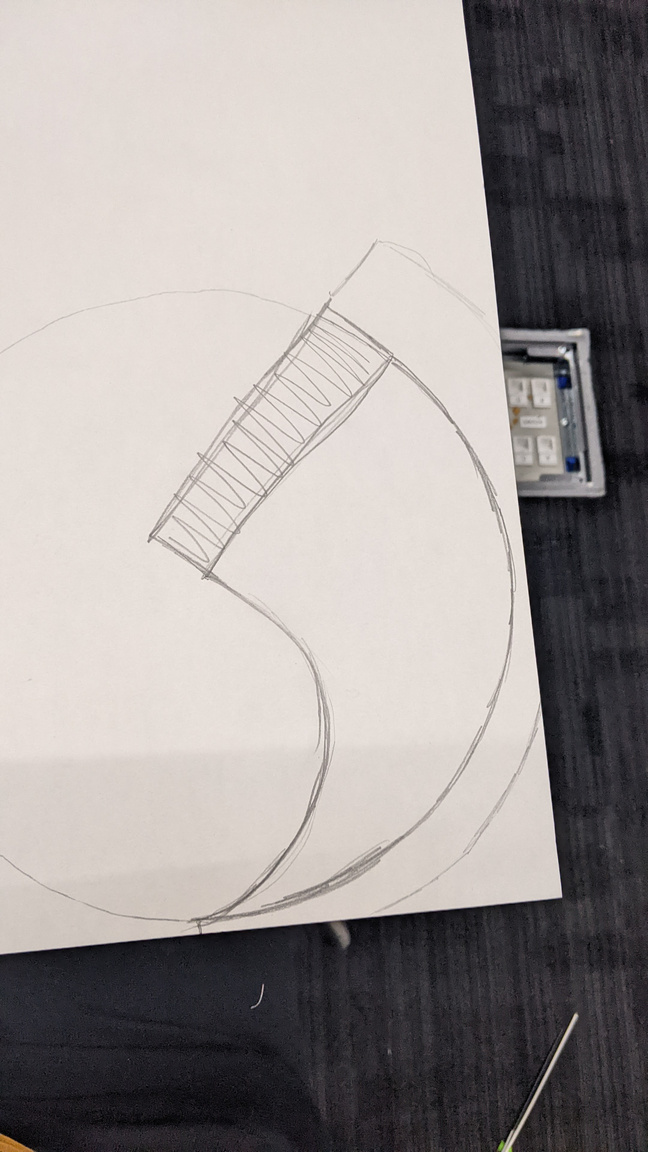
Sketching an Idea for Key Framing
planning & production
RESEARCH
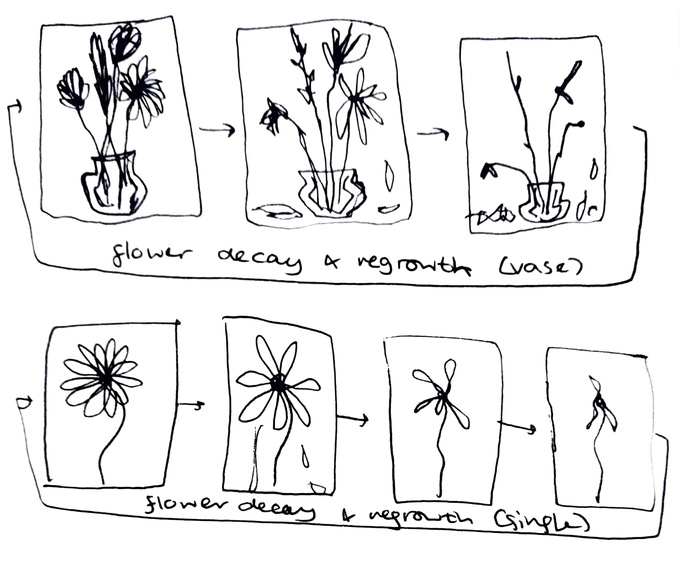
Key Framing the Process of Growth and Decay from a Reference:
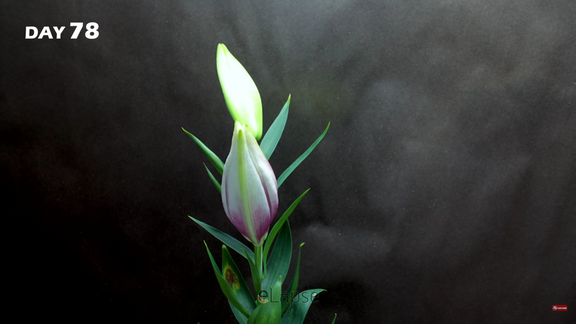
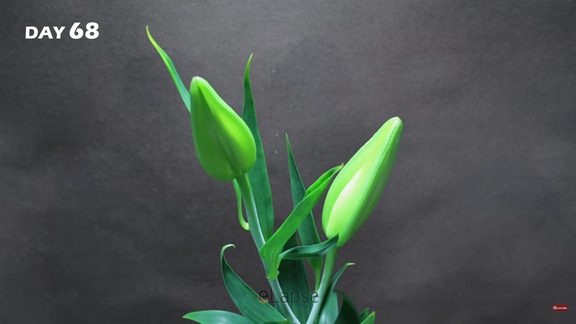
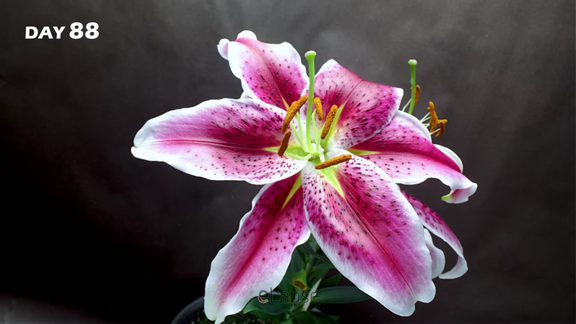
Key framing the timelapses - (Kindow1, 2018) and (eLapse, 2022) respectively - to understand the physical stages of a flower's life.


I turned the keyframe screenshots into a looping GIF to help visualise the growth to decay process with movement.
Initial sketches of flowers decaying as key frames for the animation.

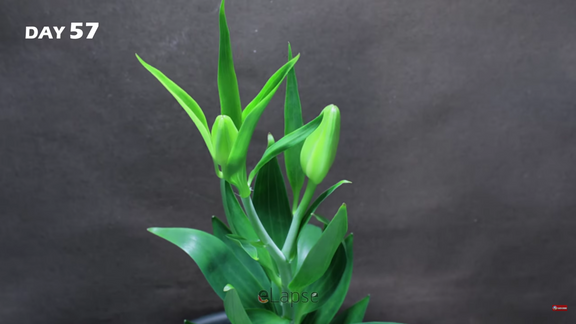
Flower Decay Timelapses


PECHA KUCHA - Bibliography:
ACMI (n.d.). Théâtre Optique | ACMI collection. [online] www.acmi.net.au. Available at: https://www.acmi.net.au/works/100579--theatre-optique/ [Accessed 10 Mar. 2023].
Adobe (n.d.). Zoetrope Animation Explained | Adobe. [online] www.adobe.com. Available at: https://www.adobe.com/uk/creativecloud/animation/discover/zoetrope-animation.html [Accessed 7 Mar. 2023].
Alexander McQueen (2023). ANATOMY | Alexander McQueen Autumn/Winter 2023 Show. [online] www.youtube.com. Available at: https://youtu.be/fxO1hsHzJJc [Accessed 6 Mar. 2023].
AnimationIL (2010). Pixar’s Zoetrope. [online] www.youtube.com. Available at: https://youtu.be/5khDGKGv088 [Accessed 7 Mar. 2023].
Aviram, A. (2022). 8 Early Animation Devices That Made History. [online] Vectornator Blog. Available at: https://www.vectornator.io/blog/early-animation-devices/ [Accessed 8 Mar. 2023].
Bardos, L.C. (n.d.). how to make a phenakistoscope, an animation device, out of paper. [online] www.cutoutfoldup.com. Available at: https://www.cutoutfoldup.com/1136-phenakistoscope.php [Accessed 8 Mar. 2023].
Beverly (2013). Our 19th Century Praxinoscope - *Brought to the top of my photostream in honor of ‘Oz The Great and Powerful’. [online] Flickr. Available at: https://www.flickr.com/photos/20939975@N04/2443643056/in/photostream/ [Accessed 8 Mar. 2023].
Bloom & Wild (n.d.). Bloom & Wild Flower Delivery | Flowers & Gifts. [online] Bloom & Wild. Available at: https://www.bloomandwild.com/floriography-language-of-flowers-meaning [Accessed 7 Mar. 2023].
Cannon, L. (2020). Thaumatrope. [online] Lara Cannon. Available at: http://www.laracannon.com/stayhomemakeart/2020/5/18/thaumatrope [Accessed 8 Mar. 2023].
Channel Stop (2013). The horse in motion (Eadweard Muybridge) 1878 First Film Ever. [online] www.youtube.com. Available at: https://youtu.be/heRuLp7CyTM [Accessed 8 Mar. 2023].
Creative Capital (2015). Eric Dyer, Modern Master of the Zoetrope. [online] www.youtube.com. Available at: https://www.youtube.com/watch?v=oqJut2JDXEQ [Accessed 7 Mar. 2023].
eLapse (2022). Lily Flower Plant Growing Time Lapse - Bulb To Blooms (95 Days). [online] www.youtube.com. Available at: https://www.youtube.com/watch?v=rbBm4RgtVSA [Accessed 10 Mar. 2023].
GIFER (2022). Zoetrope. [online] Gifer.com. Available at: https://gifer.com/en/9ySm [Accessed 7 Mar. 2023].
hensleyjh (2018). Flipbook Animation GIF – Flipbook Flip Book – discover and share GIFs. [online] tenor.com. Available at: https://tenor.com/en-GB/view/flipbook-flip-book-animation-balloon-gif-13079191 [Accessed 8 Mar. 2023].
Interflora (n.d.). The Language of Flowers - Flowers and Their Meanings | Interflora. [online] www.interflora.co.uk. Available at: https://www.interflora.co.uk/page/flower-meanings [Accessed 7 Mar. 2023].
Kelly, K. (2018). The Magic Lantern-Early Form of Slide Projector. [online] America Comes Alive. Available at: https://americacomesalive.com/the-magic-lantern-early-form-of-slide-projector/ [Accessed 8 Mar. 2023].
Kindow1 (2018). Freesia Flowers - Time Lapse. [online] www.youtube.com. Available at: https://youtu.be/bkGlnoZ4kEE [Accessed 10 Mar. 2023].
Lakeland Yard & Garden Centre (n.d.). ‘White Stargazer’ Oriental Lily. [online] lakelandyardandgarden.com. Available at: https://lakelandyardandgarden.com/catalog/product/133053/white-stargazer-oriental-lily [Accessed 7 Mar. 2023].
Mower, S. (2023). Alexander McQueen Fall 2023 Ready-to-Wear Collection. [online] Vogue. Available at: https://www.vogue.com/fashion-shows/fall-2023-ready-to-wear/alexander-mcqueen [Accessed 6 Mar. 2023].
Sony Pictures Animation (2019). Bringing a Comic Book to Life | SPIDER-MAN: INTO THE SPIDER-VERSE. [online] www.youtube.com. Available at: https://youtu.be/rDqgpIHGSd4 [Accessed 6 Mar. 2023].
Stern, B. (2009). HOW TO - Mutoscope. [online] Make: DIY Projects and Ideas for Makers. Available at: https://makezine.com/article/craft/paper-crafts/how_to_mutoscope/ [Accessed 8 Mar. 2023].
Taggart, E. (2021). Circling the Zoetrope, a Victorian Animation Toy That Helped Shape the Future of Cinema. [online] My Modern Met. Available at: https://mymodernmet.com/what-is-a-zoetrope/ [Accessed 7 Mar. 2023].
The Editors of Encyclopaedia Britannica and Petruzzello, M. (n.d.). freesia | Description, Species, & Facts | Britannica. [online] www.britannica.com. Available at: https://www.britannica.com/plant/freesia [Accessed 9 Mar. 2023].
The Editors of Encyclopedia Britannica (2018). moth orchid | Description & Care. In: Encyclopædia Britannica. [online] Available at: https://www.britannica.com/plant/moth-orchid [Accessed 6 Mar. 2023].
The Public Domain Review (2016). Phenakistoscopes (1833). [online] The Public Domain Review. Available at: https://publicdomainreview.org/collection/phenakistoscopes-1833 [Accessed 7 Mar. 2023].
Walker, C. (2022a). Night Feed I. [Oil on board] Available at: https://www.carolinewalker.org/lisa.html [Accessed 6 Mar. 2023].
Walker, C. (2022b). Night Feed II. [Oil on board] Available at: https://www.carolinewalker.org/lisa.html [Accessed 6 Mar. 2023].


Week 2
idea generation
research
practical skill
planning & production
Reflecting on Week 1:
evaluation
Evaluating the usefulness of my research to contribute to my practical outcome:
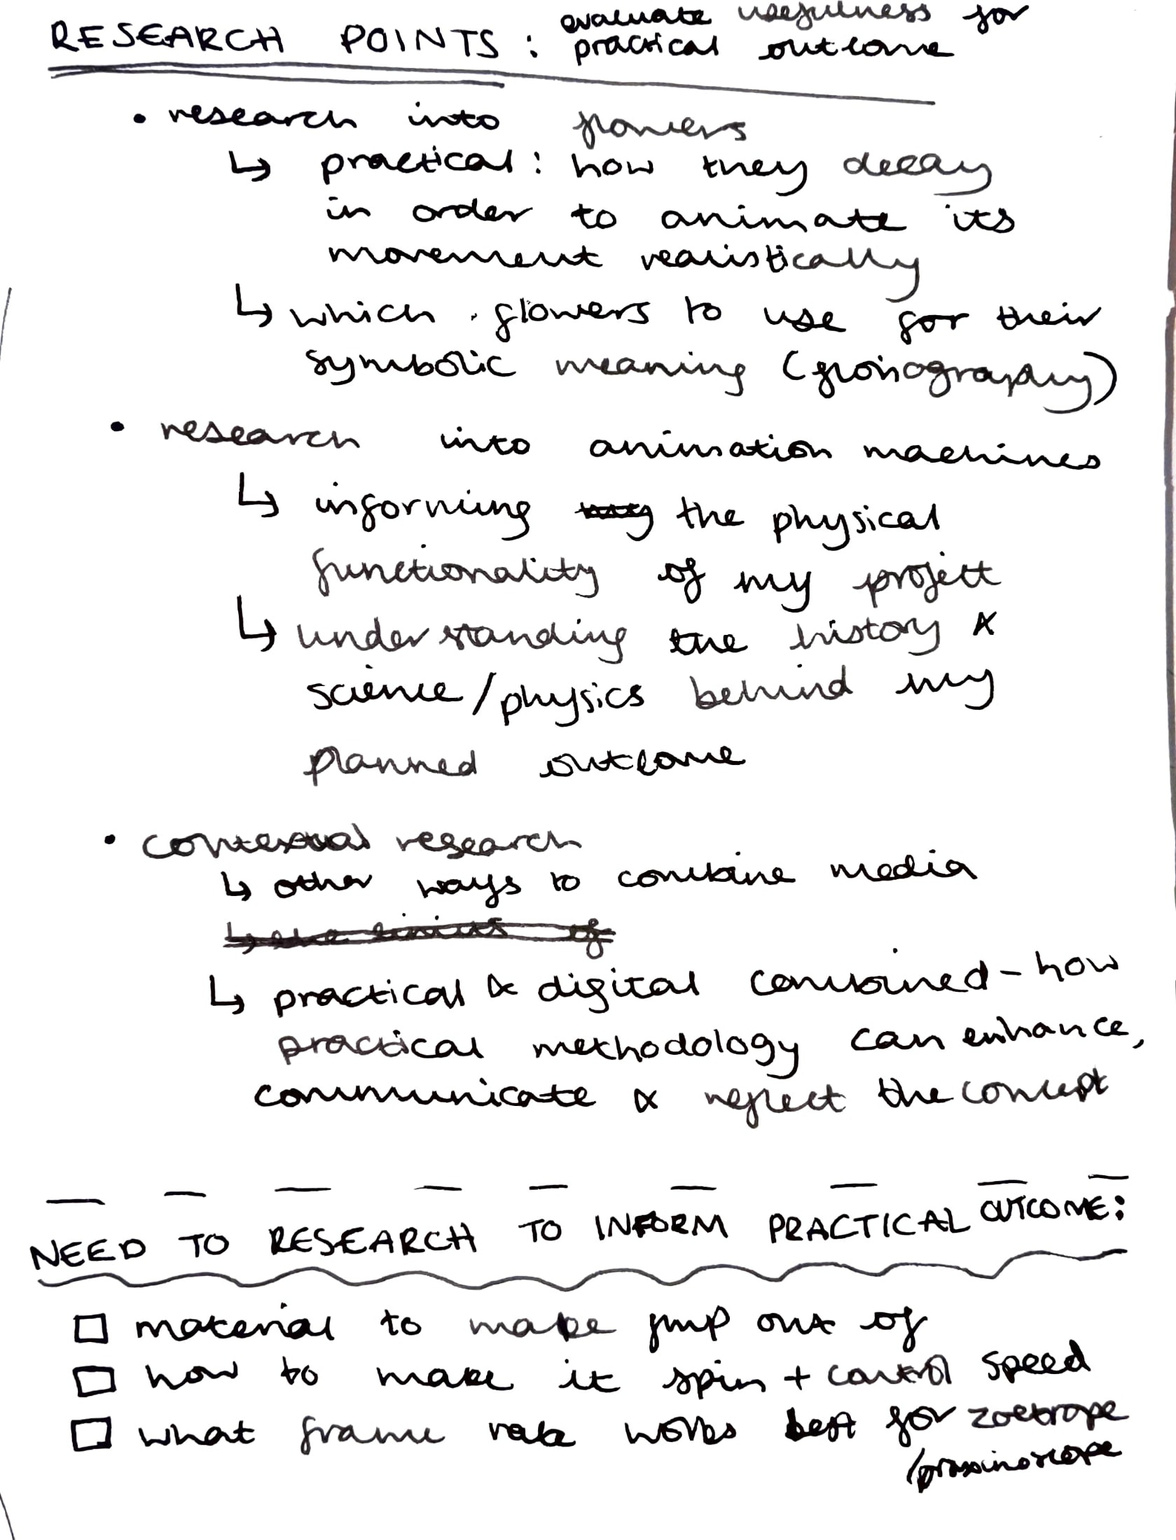
Listing the significance of each piece of research.
planning & production
What I need to research in order to inform my practical final outcome:
Planning my future research and development.

evaluation

practical skill
research


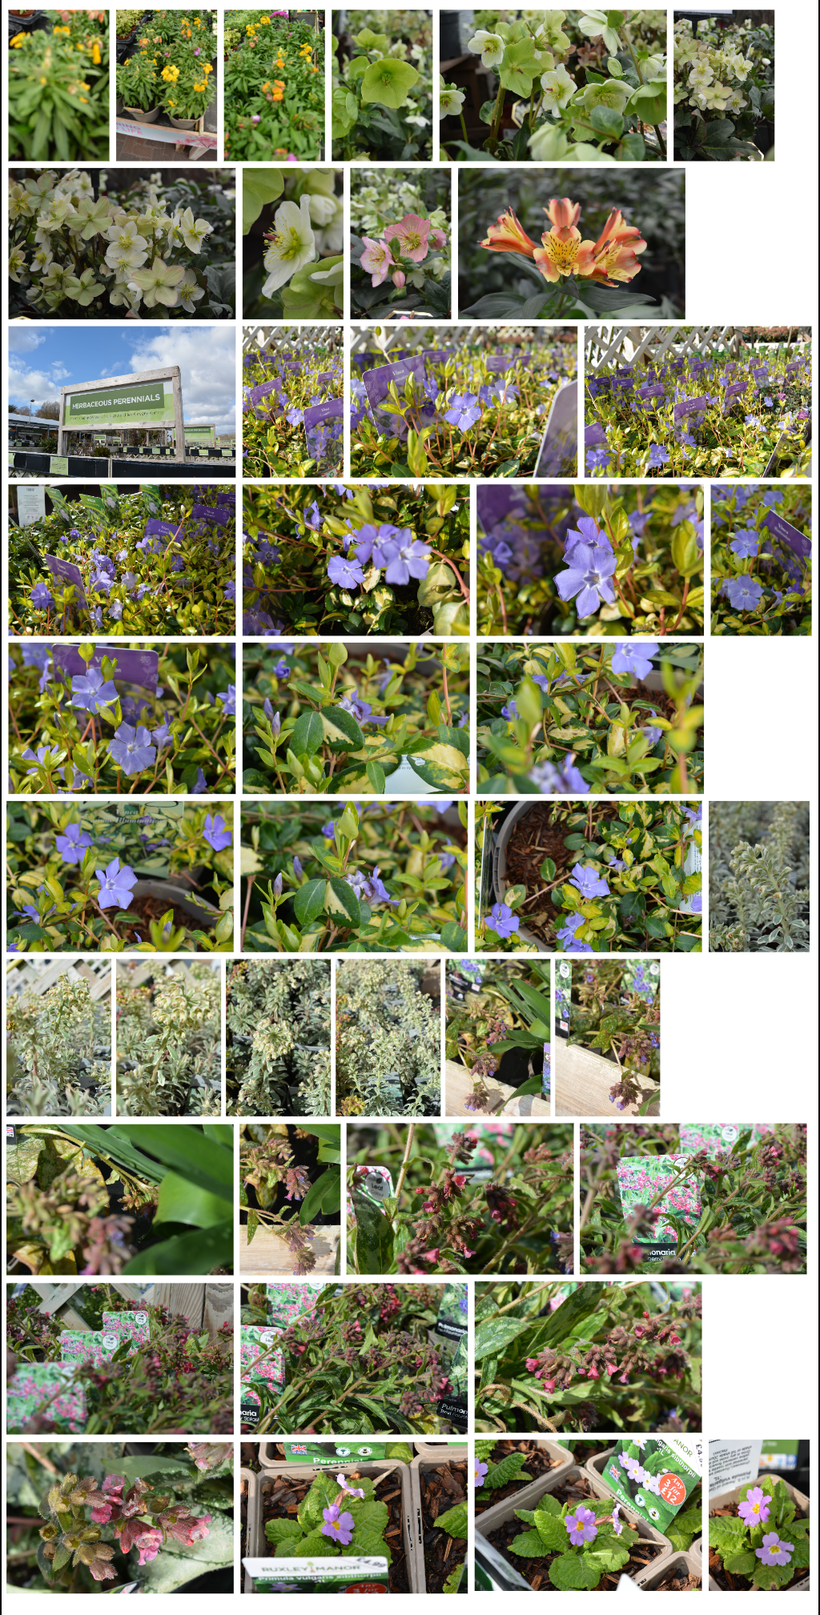
Ruxley Garden centre
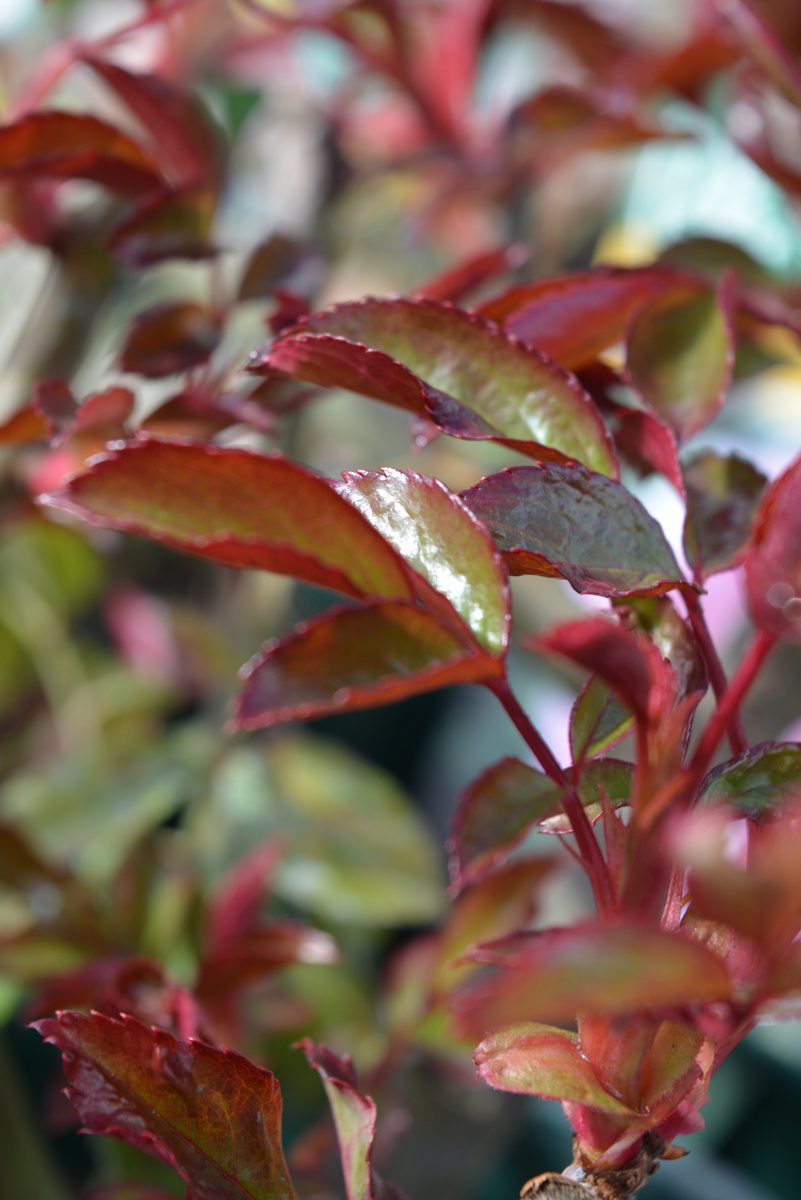
Studying the Anatomy of Flowers through Photography:
I went to Ruxley Garden Centre to study the anatomy of flowers through photography. I tried to find Stargazer Lilies and Freesias, however there were none as it turned out to be the wrong time of year. I instead looked for flowers that looked similar to them, particularly similar to freesias. I then also developed my practical skills by taking photos of various plants and other flowers.


Evaluation:
This photography allowed me to observe the anatomy of flowers from a closer perspective, deepening my understanding of my chosen visual subject. Throughout the photography my skills developed and I had a better understanding of how to use the light to my advantage and with the correct camera settings.

research
planning & production
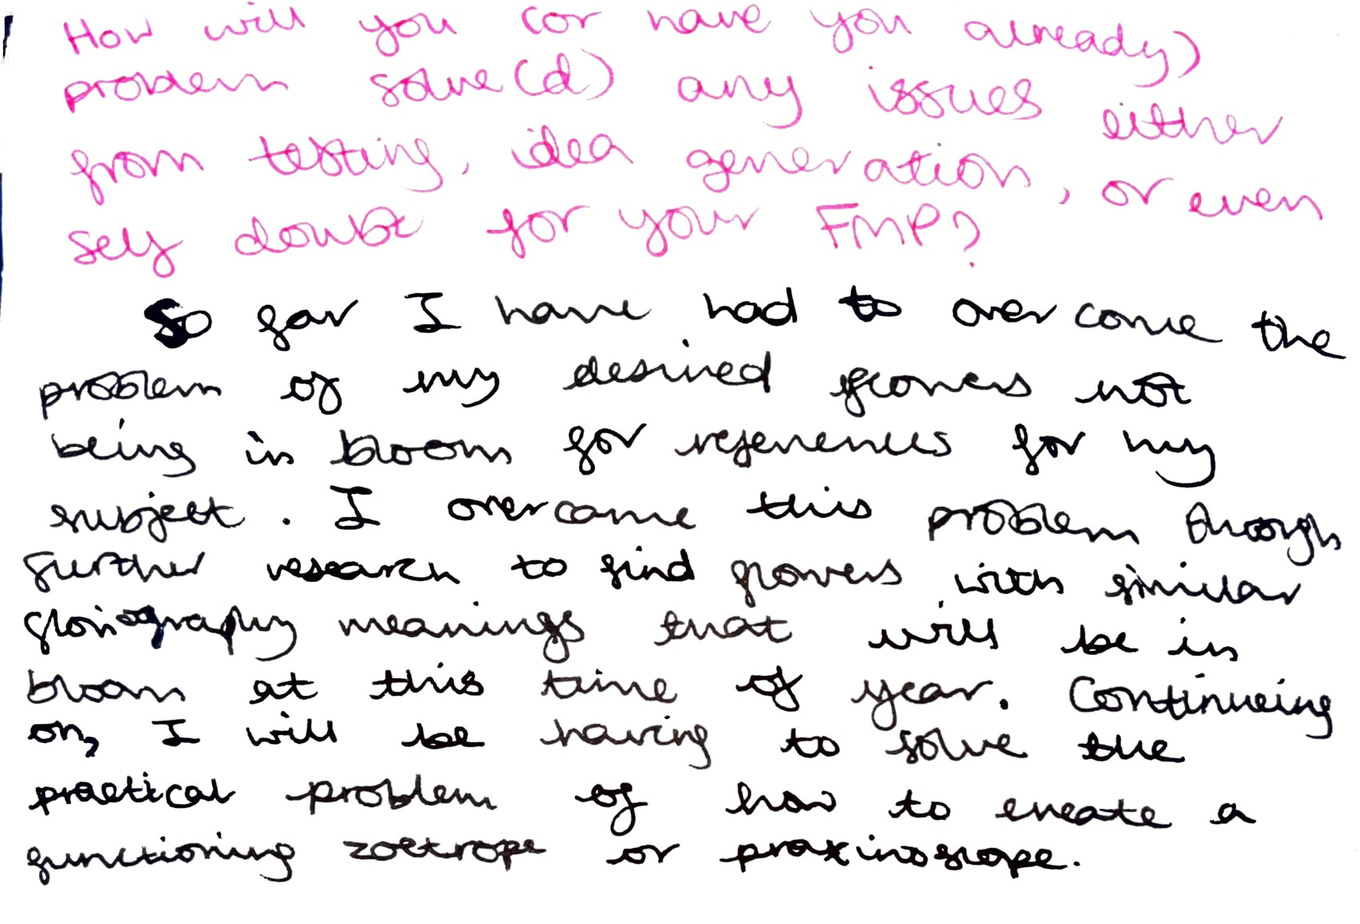
Finding Flowers for References:
problem solving
overcoming seasonal difficulties.
PROBLEM: Failure to find and buy reference flowers at Ruxley.
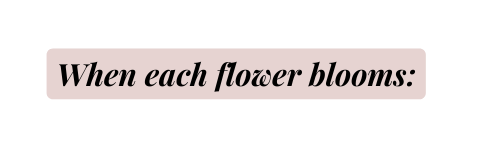
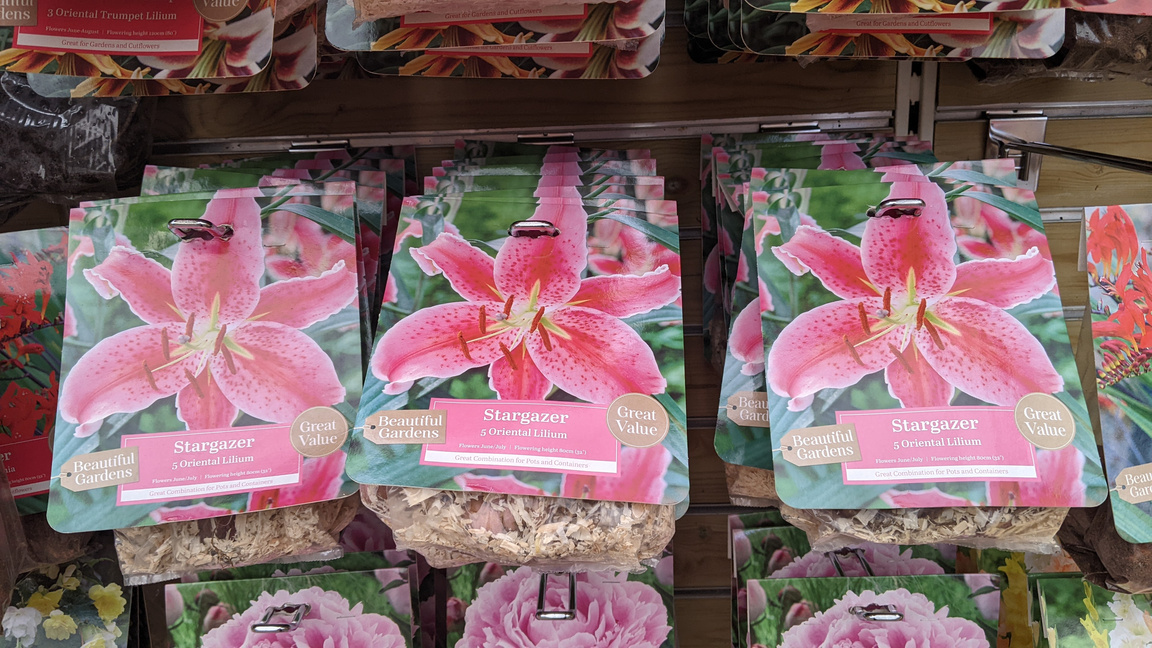
Stargazer Lilies:
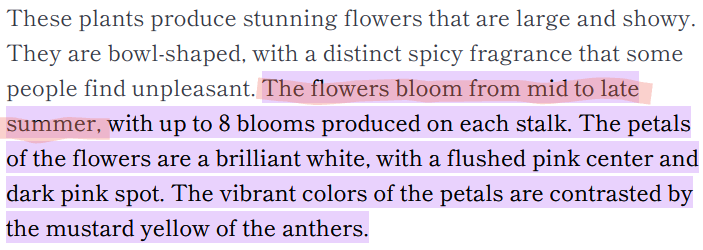
When Stargazer Lilies are in bloom. Information from Cosgrove (2021).
At Ruxley I had planned to buy a Stargazer Lily and a Freesia for reference for my practical outcome, but unfortunately it is not the right season for either of them to grow and bloom.
problem solving
Freesias:

When Freesias are in bloom. Information from Raven (2021).
My own photo: Stargazer lily bulbs available to buy at Ruxley, but won't bloom in time before the end of the project.

RESEArCH
SOLUTION: Research into flowers that bloom in March
I will research flowers that bloom at this time of year, and choose my subjects from them. I will do further research into their symbolic significance to find the right flowers for my piece.

Information from searching "What flowers are in bloom in March?" on Google.
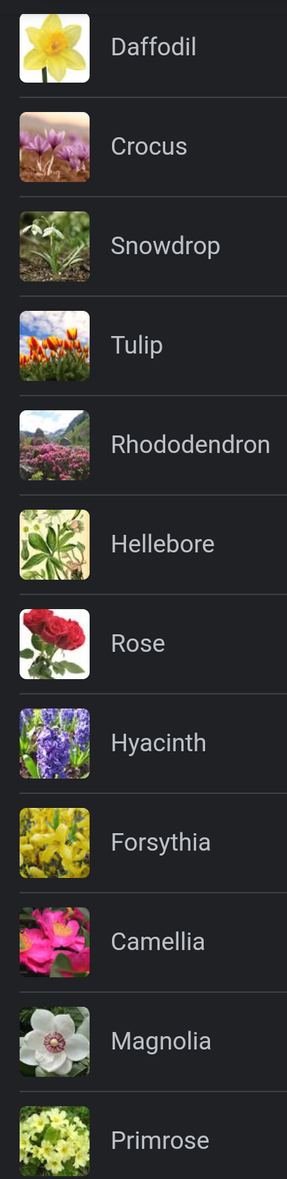
Flowers that are relevant to my investigative theme of temporality:
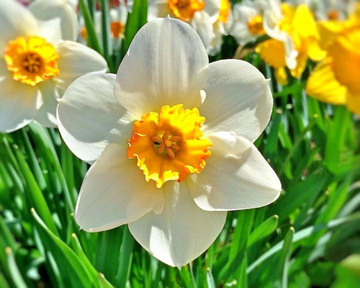
Daffodil
"Because it is one of the first flowers to bloom in spring, daffodils are seen as a representation of rebirth and new beginnings. They are also thought to represent inspiration, forgiveness, and creativity."
Photo & information from The Editors of Almanac.com (2022).
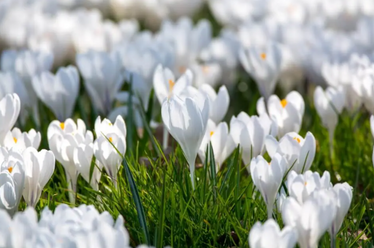
Crocus
"Crocus flowers have a rich symbolism of rebirth, innocence, joy, and new-beginnings thanks to their early blooming flowers in spring."
Photo & information from Gaumond (2021b).
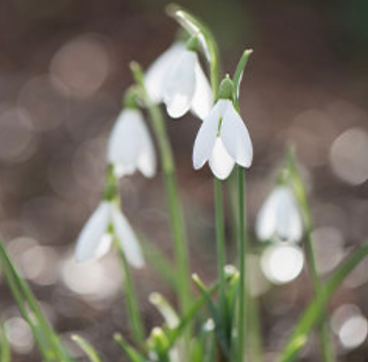

"The small and fragile snowdrop flower is a symbol of rebirth and overcoming obstacles in life."
Photo & information from Phelps (2020).

Rhododendron
"Rhododendrons symboli[s]e a sense of warning and may indicate a dangerous side despite a beautiful appearance."
Photo & information from Gaumond (2022).


"In the Victorian language of flowers, hellebore symboli[s]ed delirium [...] Today, hellebore’s symbolic meanings include peace, serenity, and tranquility in addition to anxiety, stress, and scandal."
Photo & information from The Petal Republic Team (2022a)
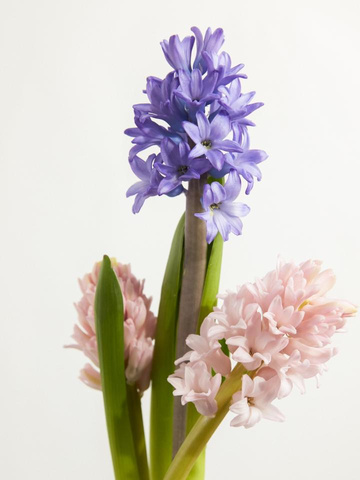
Hyacinth
"The hyacinth is the flower of the sun god Apollo and is a symbol of peace, commitment and beauty, but also of power and pride."
Photo & information from Funny How Flowers Do That (n.d.).

Forsythia
"In the language of flowers, the forsythia flower carries the symbolic meaning of excitement, anticipation, and a new start at the beginning of spring each year."
Photo & information from (Gaumond, 2021c).

Photo & information from The Petal Republic Team (2022b).

"Magnolias flowers represent many qualities, but especially endurance and perseverance."
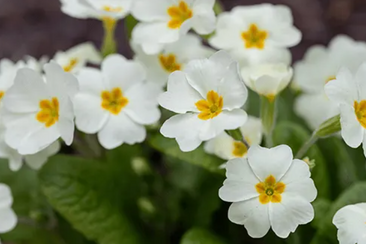
Primrose
"The primrose is one of the first flowers to bloom in spring. [...]So, many believe that it has a meaning of youth, renewal and optimism."
Photo & information from Bloom and Wild (n.d.).
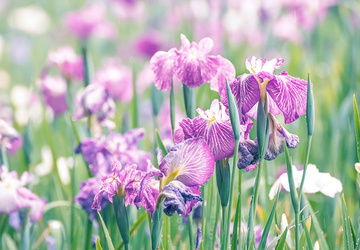
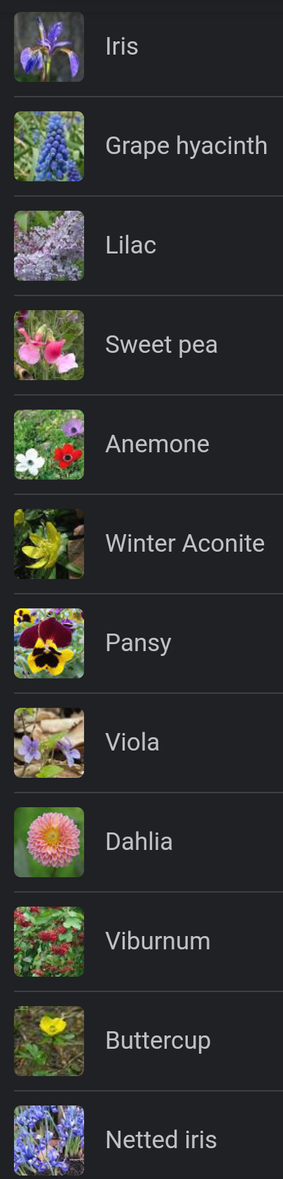
Iris
"The iris commonly means wisdom, hope, trust, and valor."
Photo & information from FTD Fresh (2016b).

"In the Christian faith it is seen as a symbol of wisdom, and tranquility [...] In the language of flowers the various colours have different meanings ranging from white for discreet love, to mauve for mourning."
Photo & information from National Records of Scotland Web Team (2013).
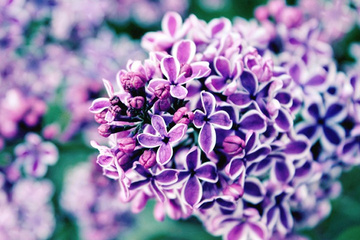
Photo & information from FTD Fresh (2016c).
Lilac
"Because lilacs have one of the earliest bloom times, they symboli[s]e spring and renewal. Lilacs also symboli[s]e confidence".
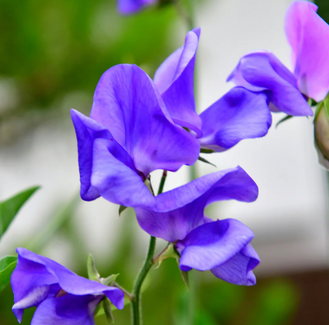

"In floriography, the language of flowers [...] the sweet pea flower meaning was blissful pleasure. Other meanings of the sweet pea flower include friendship, gratitude and goodbye."
Photo & information from McClenaghan (2022).
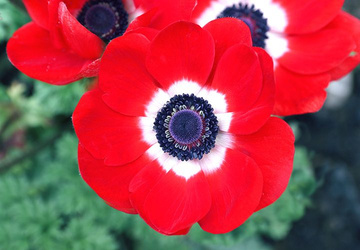
Photo & information from FTD Fresh (2016a).

"The flower specifically symboli[s]es relaxation and serves as a reminder to enjoy the moment [...] Anemone flowers also signify fragility."
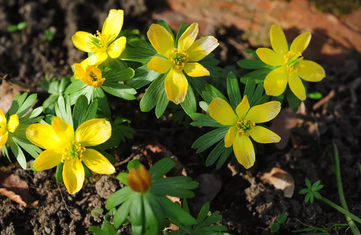
Winter Aconite
"Being one of the earliest Spring flowers, Winter Aconites symboli[s]e hope, rebirth, and new beginnings to some people."
Photo from Sears (2022). Information from Bos (n.d.).
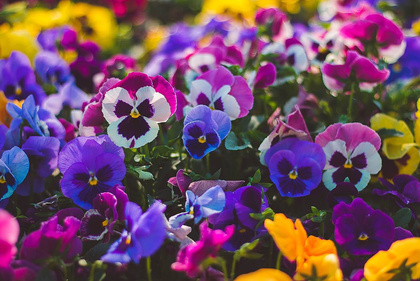
Photo & information from The Petal Republic Team (2022c).

"Pansies are associated with free thinking and thoughtfulness or consideration. Pansy flowers are also linked to feelings of remembrance and nostalgia."

Viola
"Violet flower symboli[s]es innocence, modesty and true, everlasting love.
It can also symboli[s]e faith, spirituality, mysticism and remembrance."
Photo & information from A to Z Flowers (n.d.).
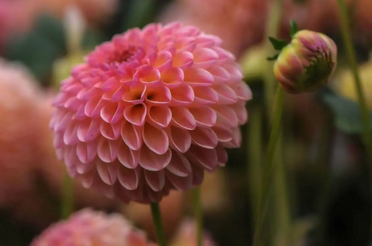

"[They] symboli[s]e elegance, inner strength, change, creativity, and dignity.
Though most of the symbolism is positive, dahlias still carry a few negative connotations, including betrayal, dishonesty, and instability."
Photo & information from The Petal Republic Team (2020).


"Although there are variations, quite often the flower is said to represent joy, youth, purity, happiness and friendship."
Photo & information from Canale (2017).
planning & production
practical skills
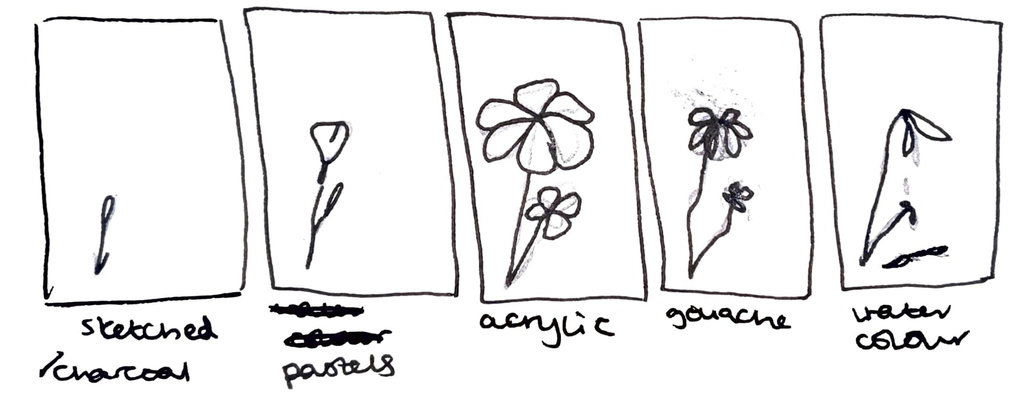
Testing Media - Experimental Studies & Maker's Morning:
problem solving

Testing different media to potentially use to create the flowers in my final outcome. Exploration of alternative ideas and processes.
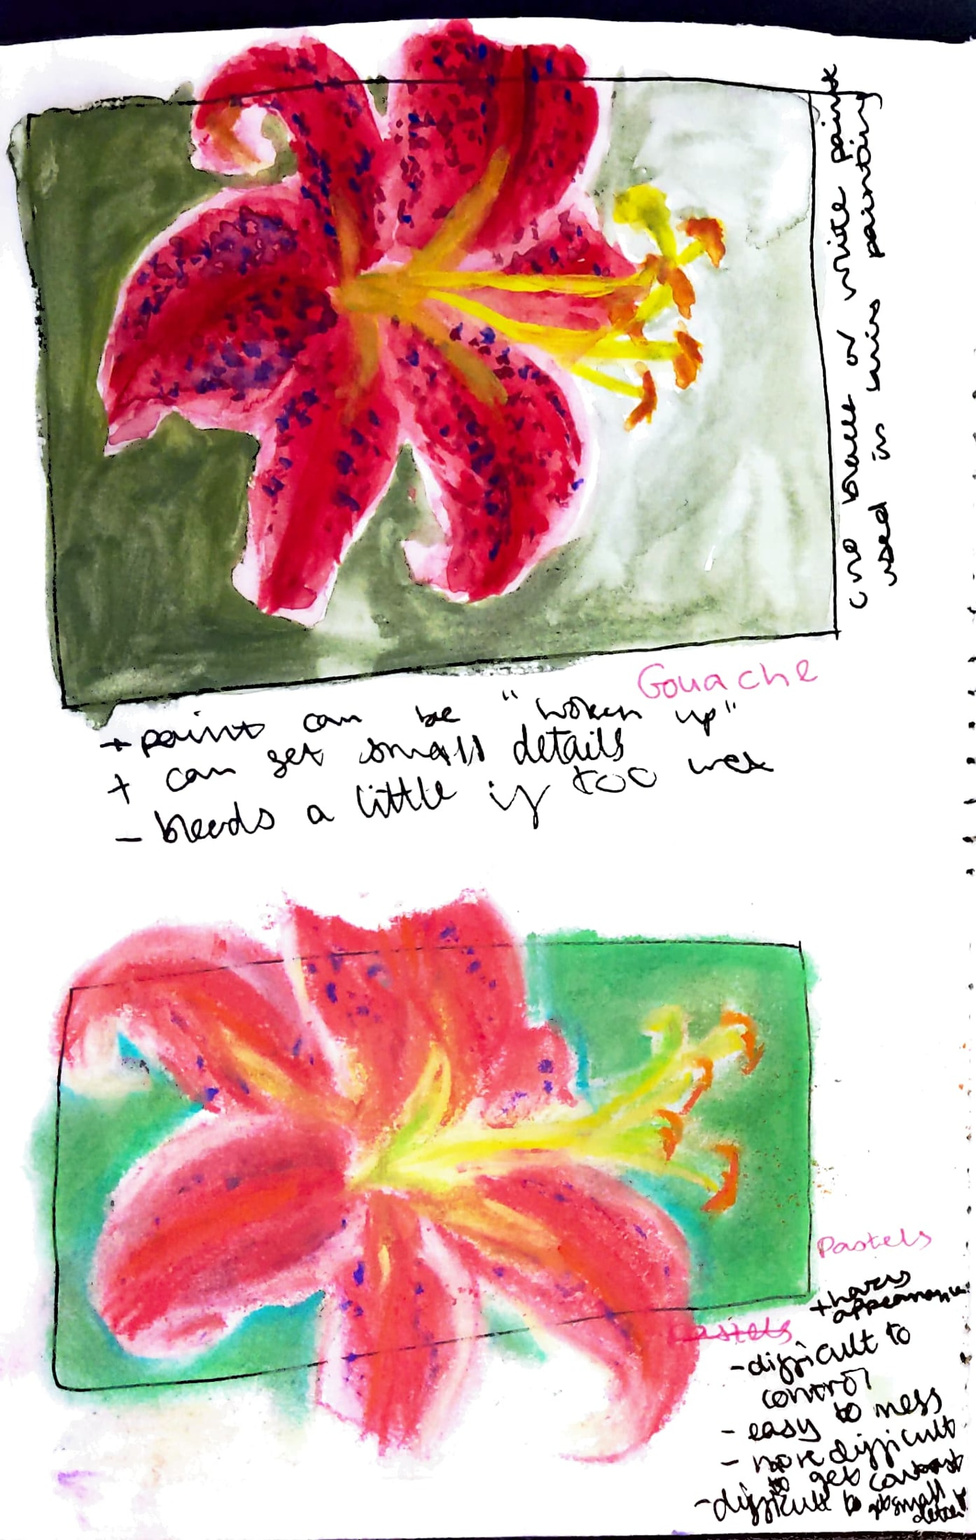
Quick Flower Studies:
In order to experiment with different media I did some quick studies of Freesias and Stargazer Lilies, the flowers I was originally going to use. While painting, I thought about how easy it was to use each media and the visual effects that came from each media's texture. Afterwards, I annotated the positives and negatives next to each study in my FMP project book. The media I tested included: acrylic paint, watercolours, gouache paints, and pastels.
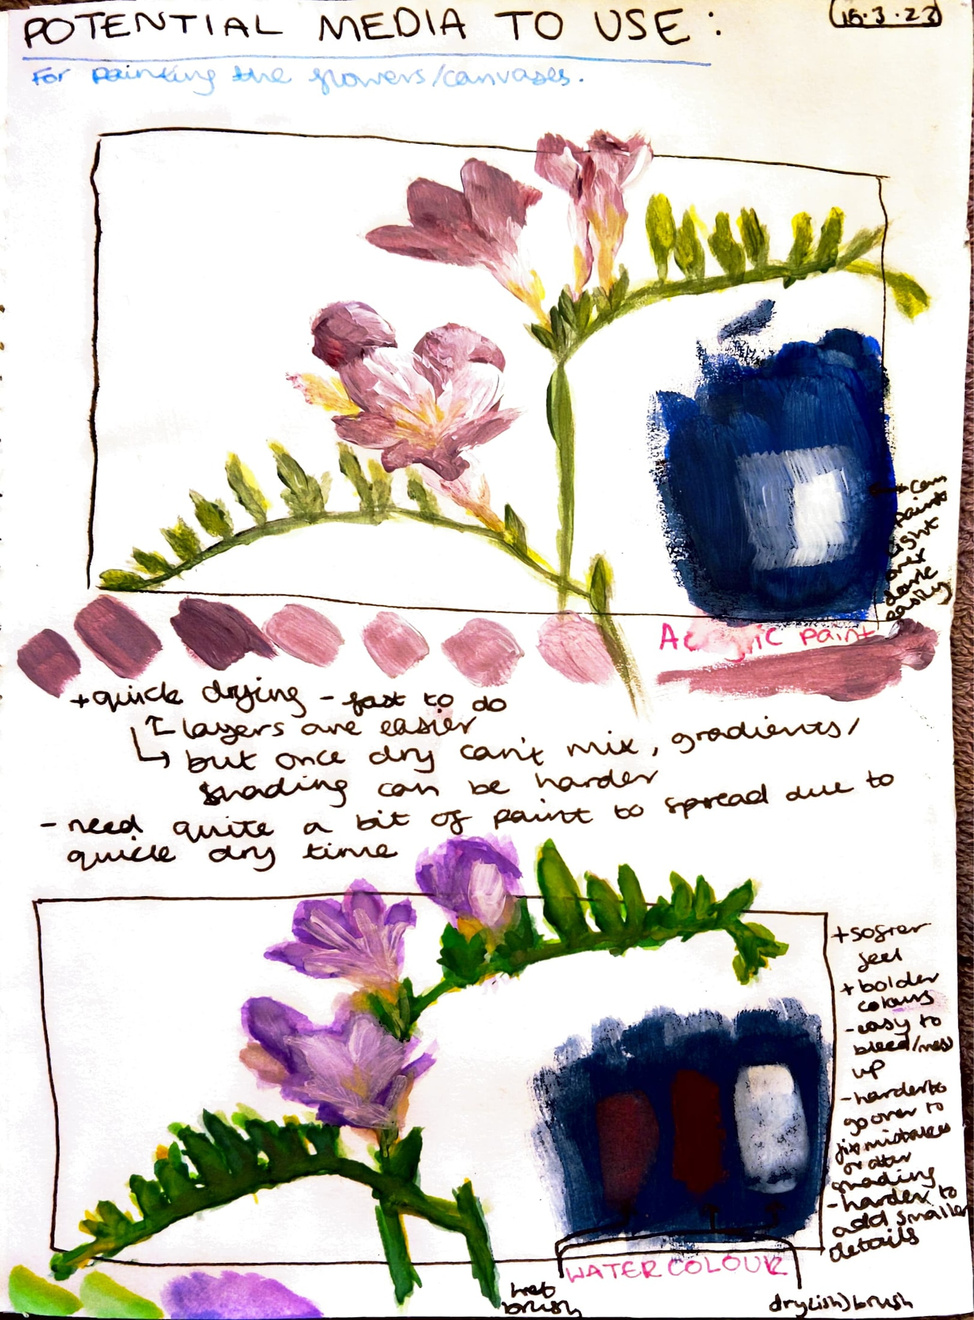

I have a fair amount of experience in acrylics so this may be a suitable media to work in. During my study I found that I could control the shading of the petals quite well, and the brush strokes in the acrylic create a nice, painterly texture which I like the effect of. I did notice that as usual, due to the quick dry time of the acrylic, it is very difficult to blend once the paint has started drying. A positive of this however, is that I can paint over previous layers and fix shading mistakes with ease. I did also find that small details were harder to paint, however this could most likely be fixed with a smaller brush size.

I have the most experience in water colours in monochrome tones, so it was interesting to use such a variety of colours to paint this study. While painting the stems and buds, I either didn't let the previous layers dry or used too much water when attempting the shading. I found the water colours harder to control than the acrylics, however on the other hand they created more vibrant colours and deeper contrasts in the shading.
Reference image from: (Funny How Flowers Do That, n.d.)
REFERENCES:
Reference image from: (Wisconsin Horticulture, n.d.)


I painted this during Maker's Morning and I unfortunately forgot to bring any white or black paint. I took this as a challenge to develop my practical skills and did my study with what I had available (red, yellow, and blue gouache). With that said, I am fairly pleased with how it turned out - the gouache paints are vibrant and have a good balance between being able to blend and being able to work over previous layers. Using black and white paint would have made the painting cleaner, as to get the paler tones I added more water to my brush, which allowed for a lot more bleeding. Gouache paints are a good balance between the quick drying consistency of acrylic and the vibrant blending of water colours.

I have the least experience with pastels, but I found them surprisingly easy to blend. This did mean, however, that they were also very easy to mess up. While the resulting colours are very bold and full of life, I found it difficult to creare the darker tones in the shading. To improve on this, I could try using blues and purples to shade into the reds, to try and create the dark tones I was looking for.
PRESENTATION: Idea Generation & Development:
My notes:
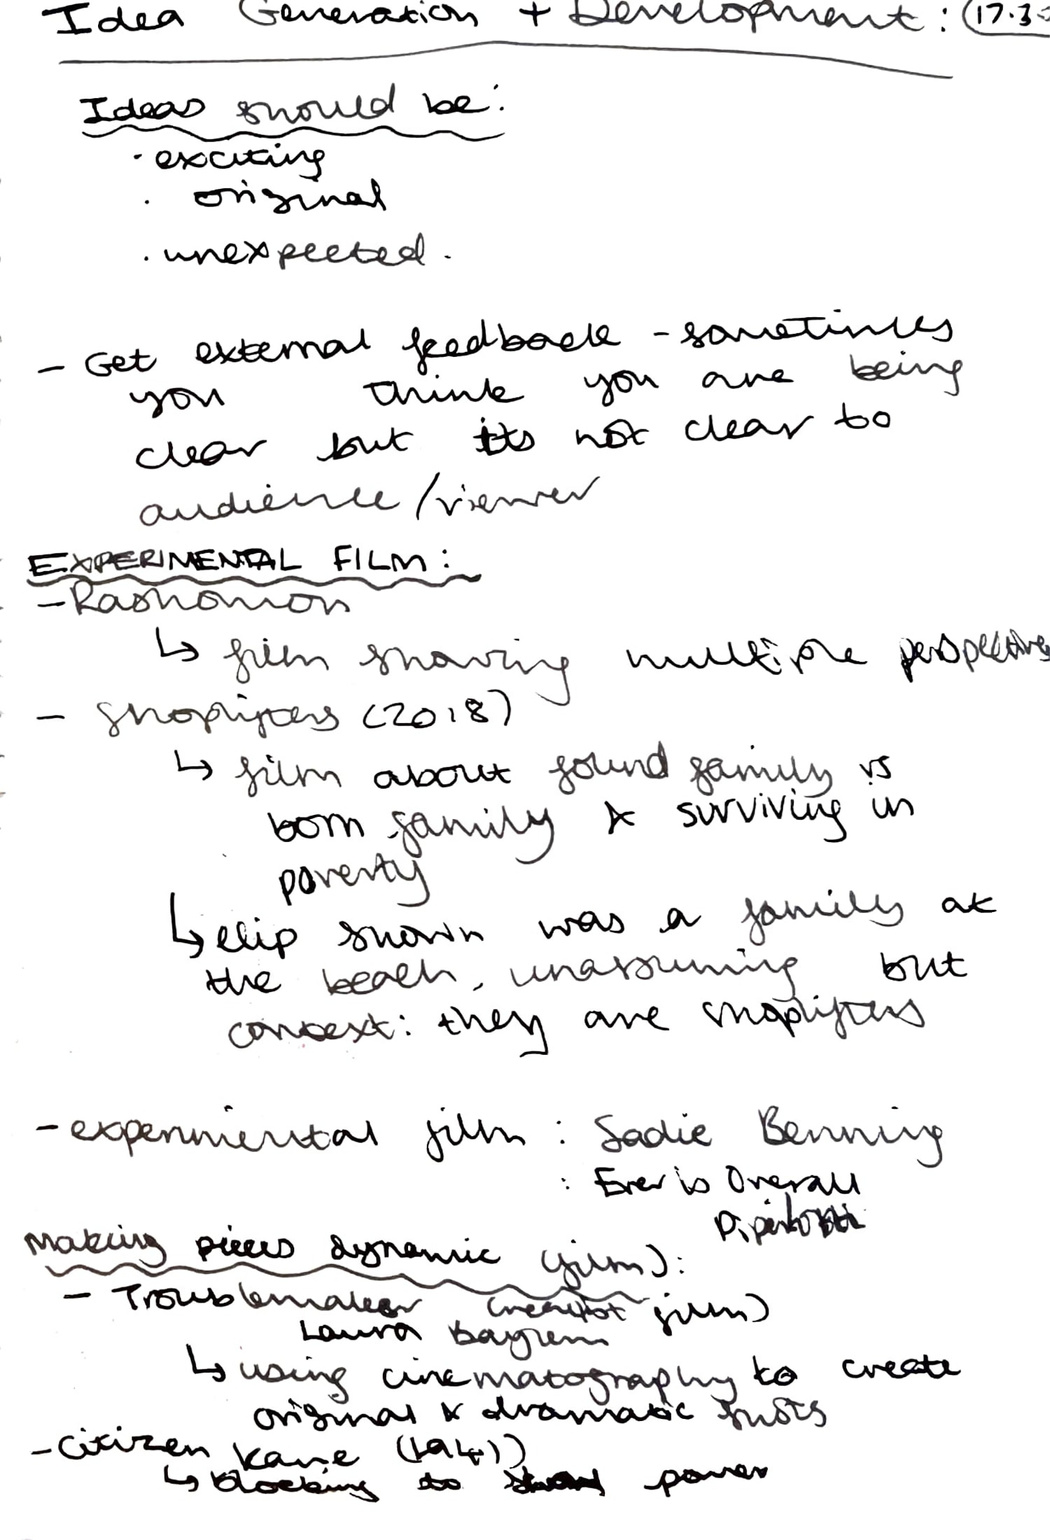
Development of Ideas:
building on my ideas to improve my piece and enhance its visual significance.
planning & production
1 - Portraying the narrative of life through Floriography:
To develop on my use of floriography as a communication of the fragility of time and the fleetingness of temporality, I could potentially use floriography to simultaneously portray the growth and development of a lifetime within the subject of decaying flowers. I think this will develop my piece as it links my exploration of temporality in an animatory space to the significance of the viewership's relationship with time in itself. By very subtly symbolising time passing by in relation to a person's life space, I will be creating a personal link between the objective flowers - that are my visual and metaphorical subject - and the audience.
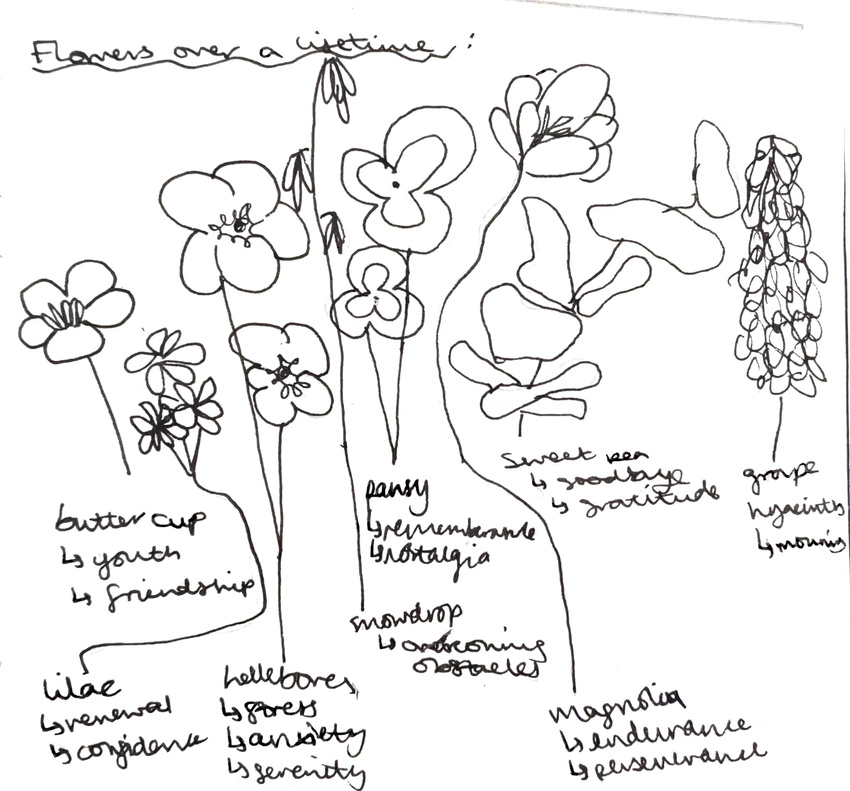
My sketch on which flowers could be used to portray events over a person's lifetime, according to the current blooming flowers and their meanings that I previously researched.
2 - Reflecting the development of time through the practical development of media:
Another development on my idea is to develop my practical media throughout the course of the animation, in order to visually support the communication of the project's investigation. By utilising the textures and colours of various tested media, I can enforce the message of the fleeting continuation of temporality through the continuation and physical development of changing media. To do this, I would use different types of paints and mark making tools to draw my floral subjects that flow from one to another, reflecting the physical state of the flower(s) through the texture and colour of that frame's mark making tools.
My sketch on the potential development of media in my animation.
Coloured impression left by my sketch on the other side of the page. Accidentally created by drawing on a page that was in contact with my pastel study. This could be an interesting way to incorporate pastels into my piece in a controlled manner.
research
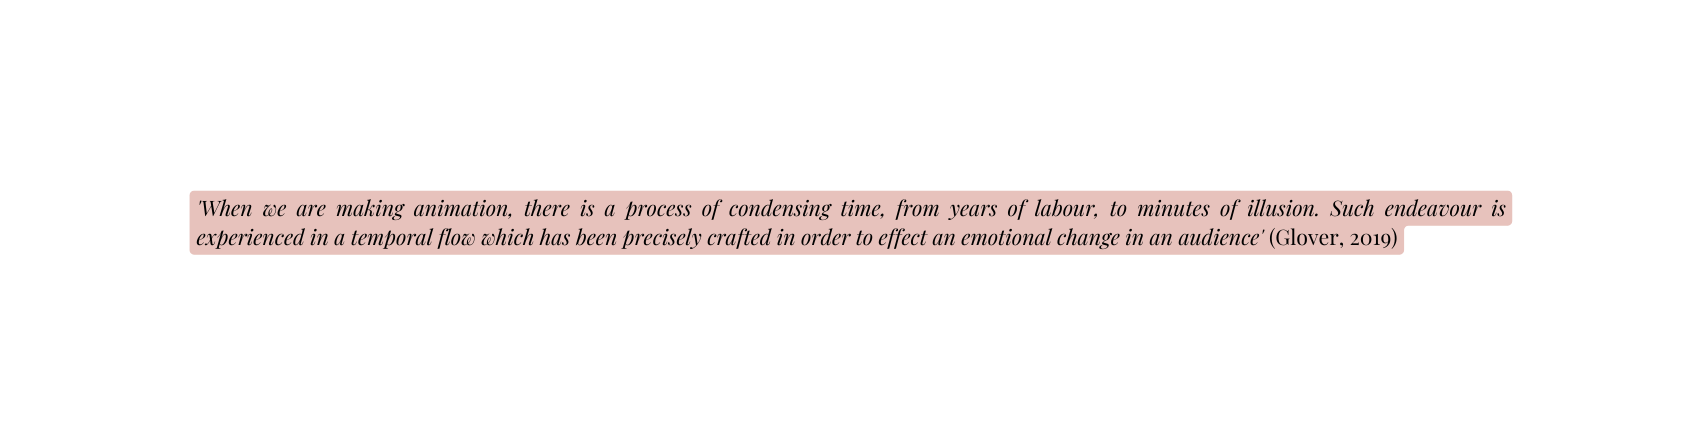
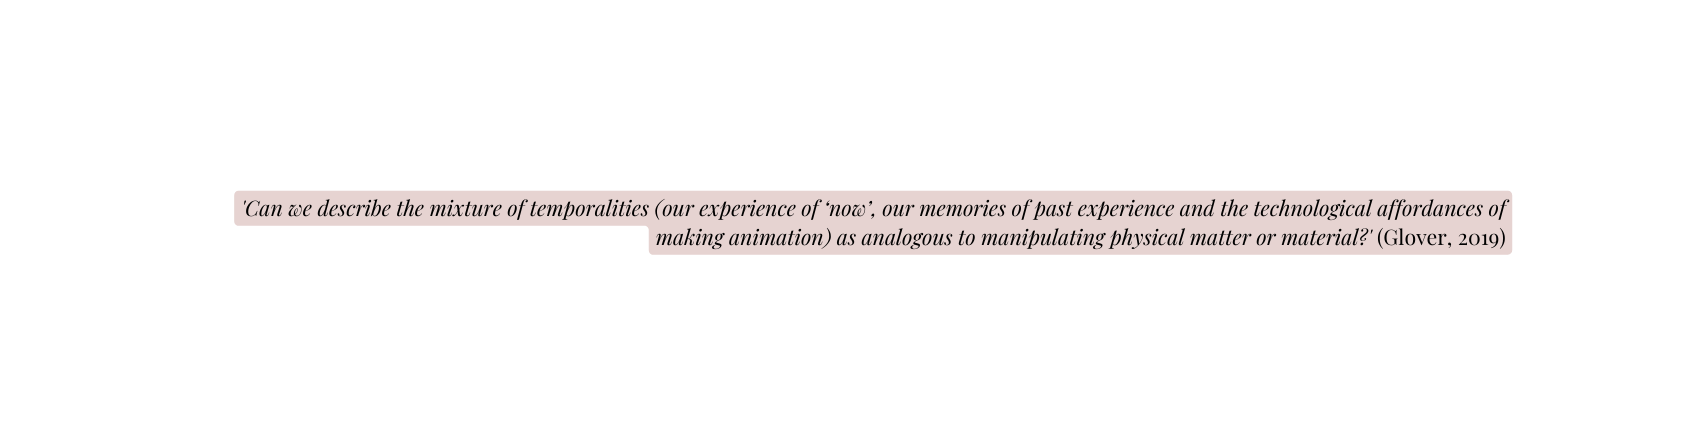
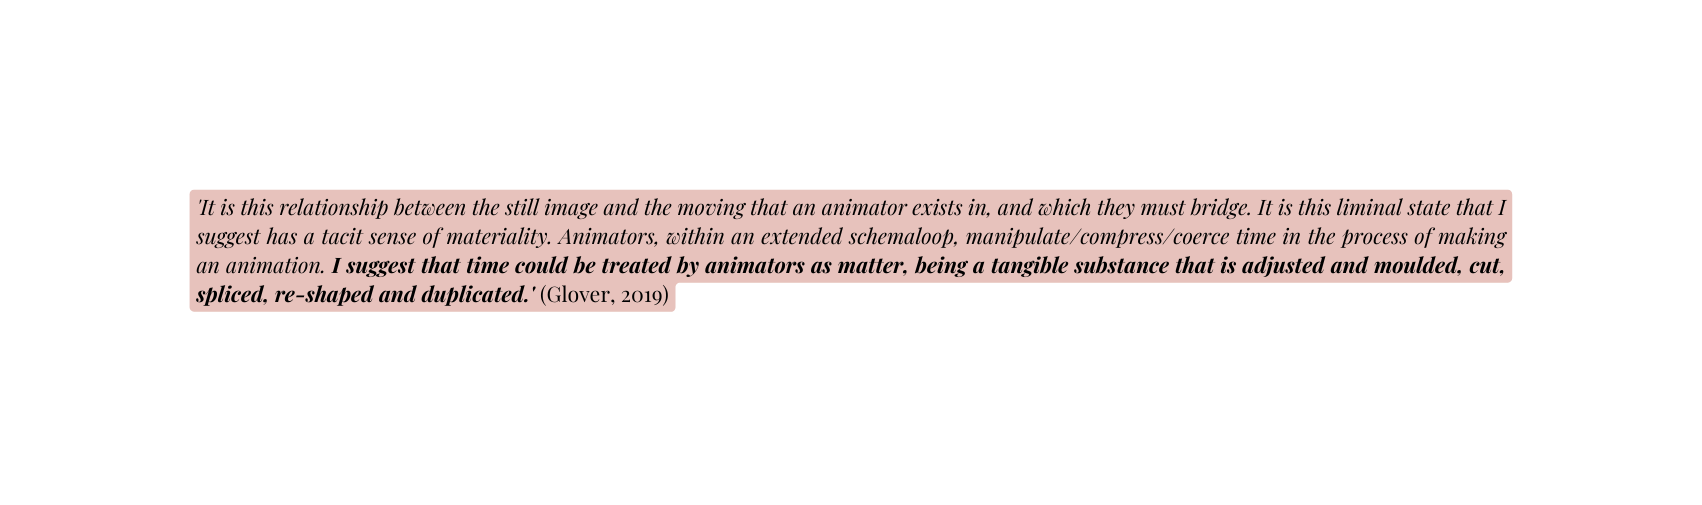
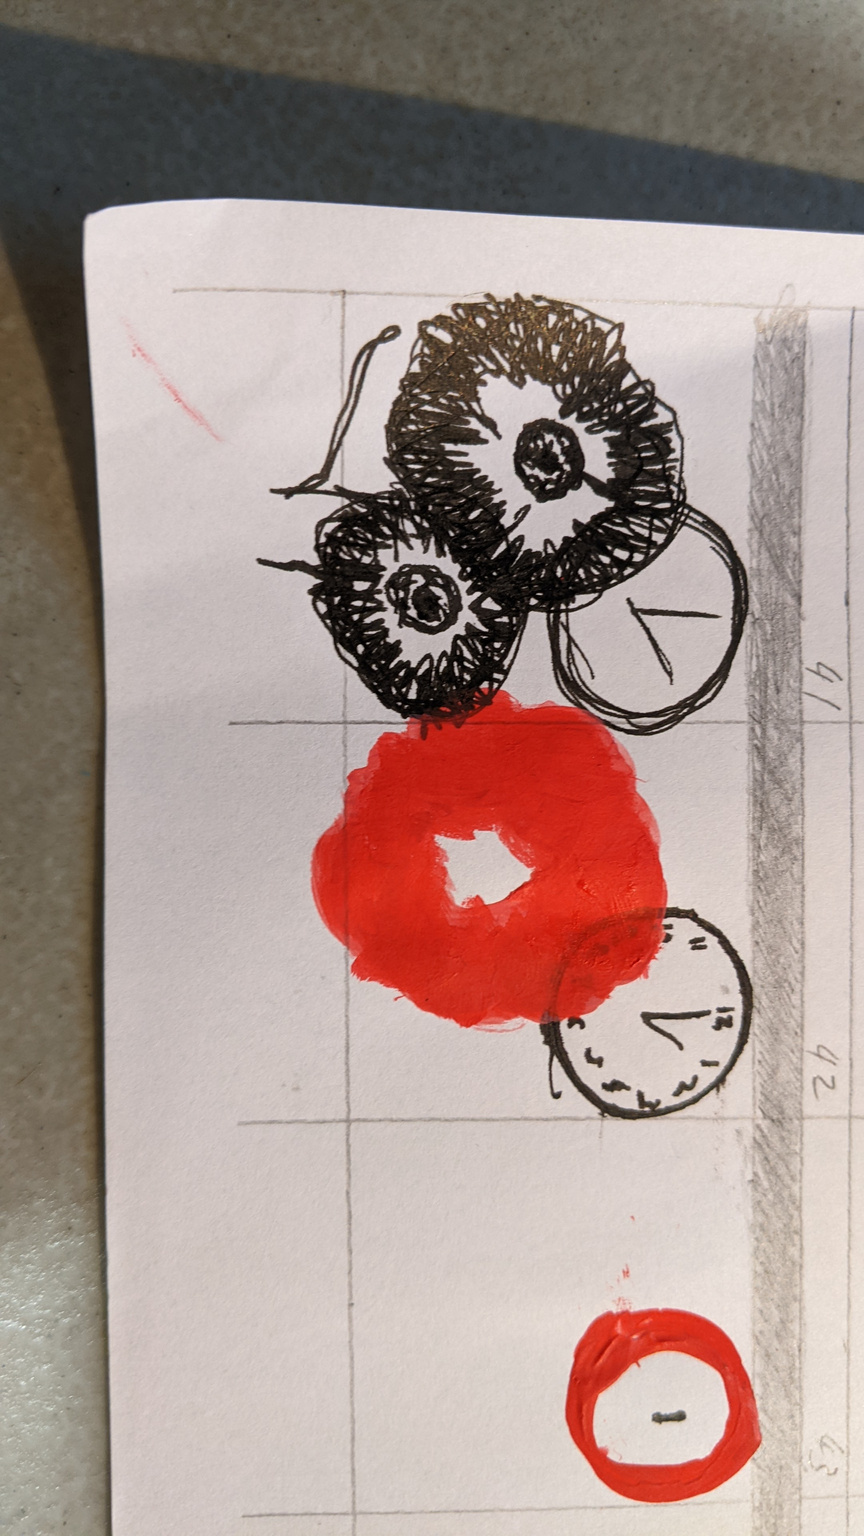
3 - Adding an element of mechanised temporality - exploring tacit knowledge as a visual symbol
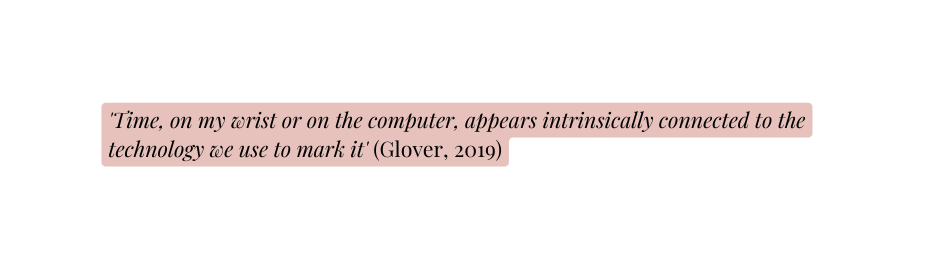
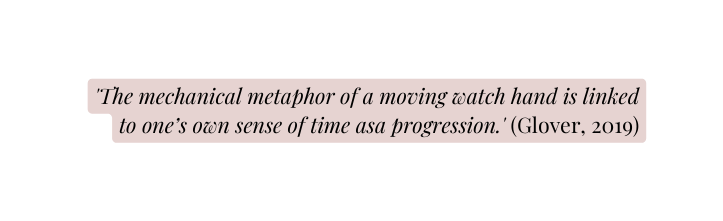
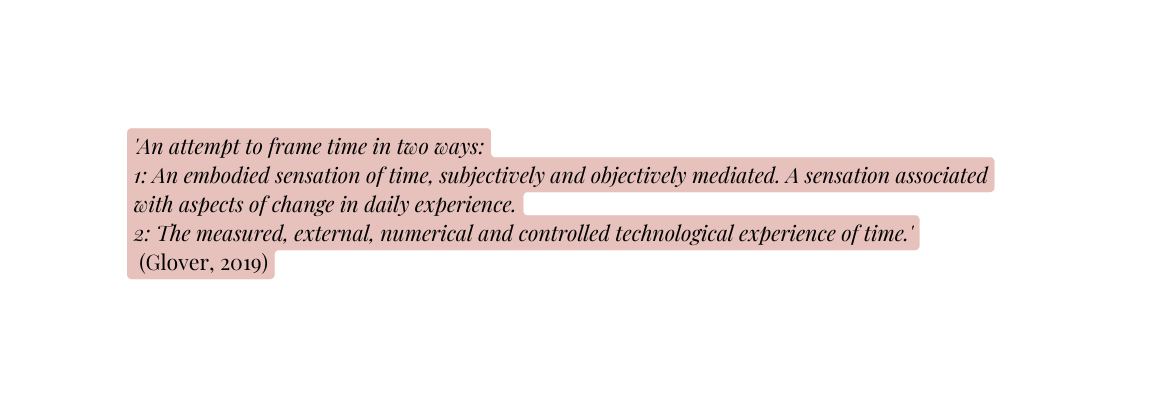
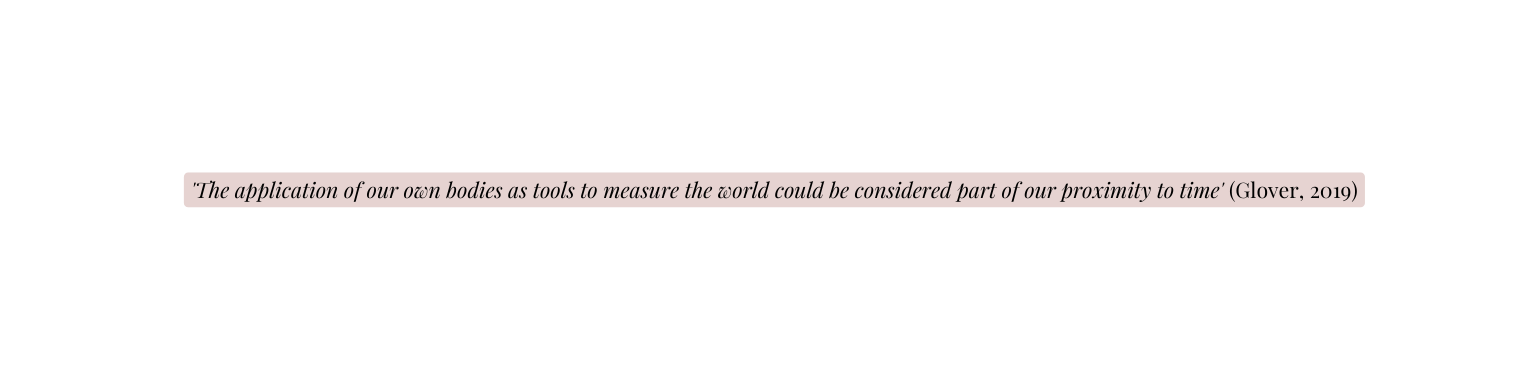
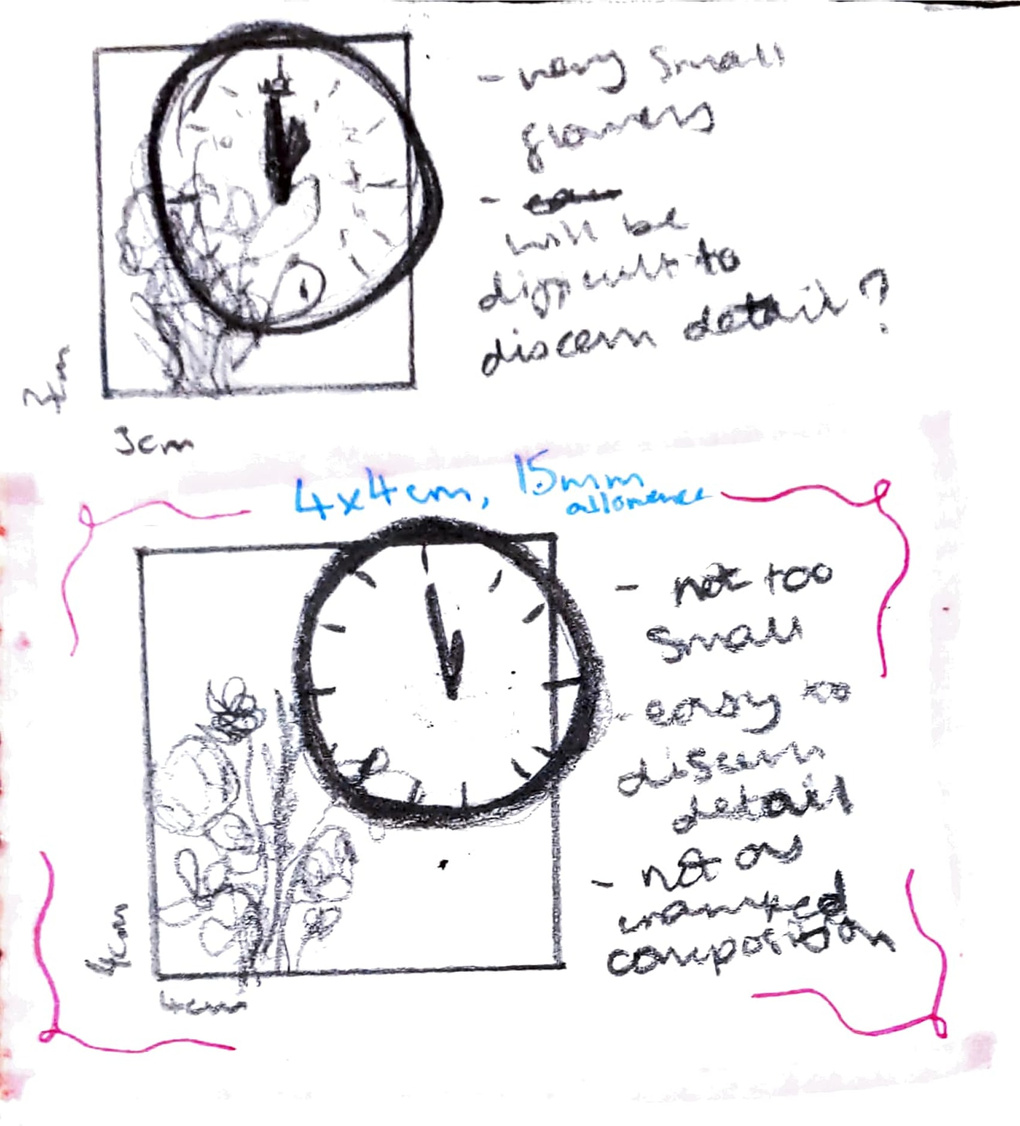
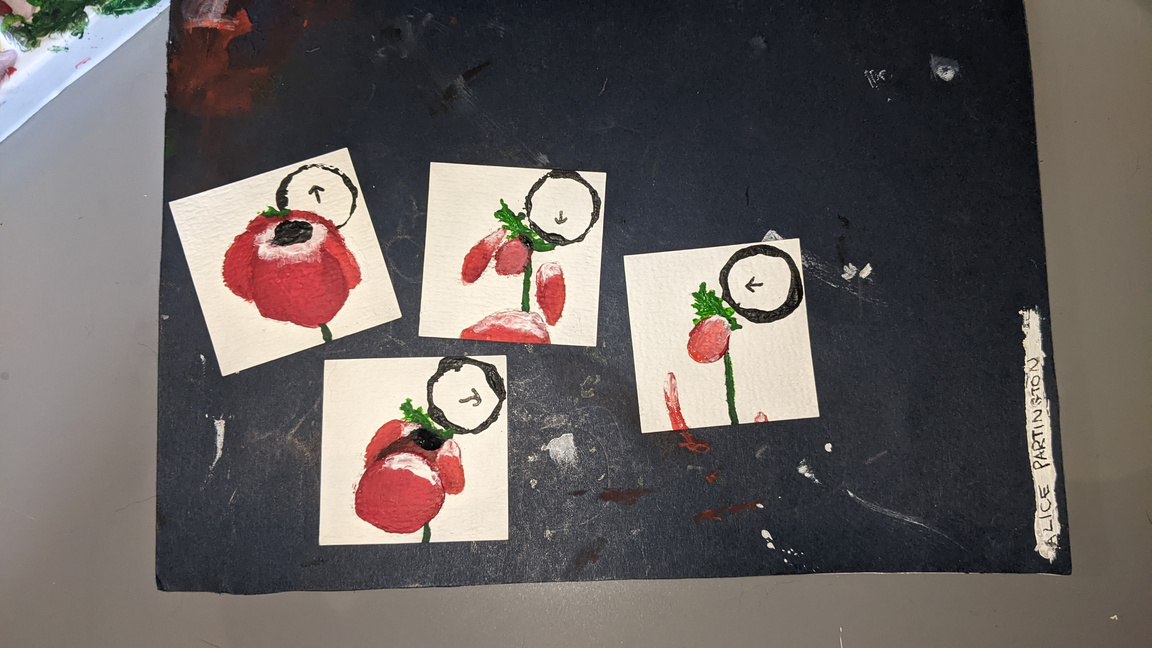
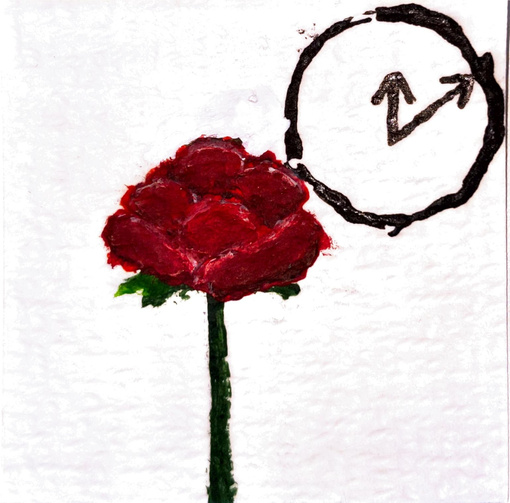
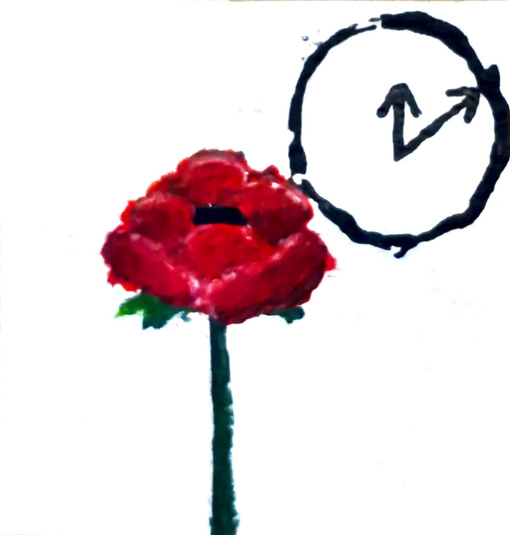
A development I may implement is the addition of a clock in the background of my subject. This composition change would create the dynamic of a foreground and background, as well as give the viewer another method of considering their relationship with temporality. After reading parts of Hugo Glover's thesis on Animatory Thinking, I am interesting in technology as a way of understanding and sensing our place within time. Below are some quotes from Glover's thesis, which I am intrigued by and which summarise tacit knowledge of temporality through the mechanics of temporal technology, and the role of animators as manipulators of the viewer's experience of time.
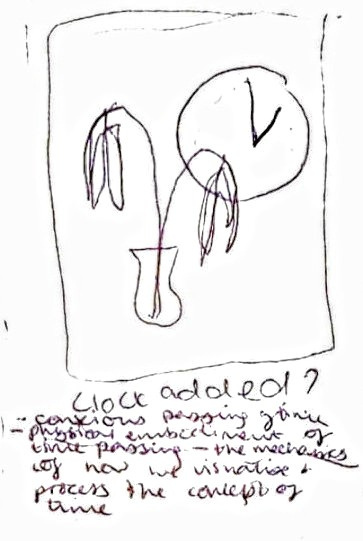
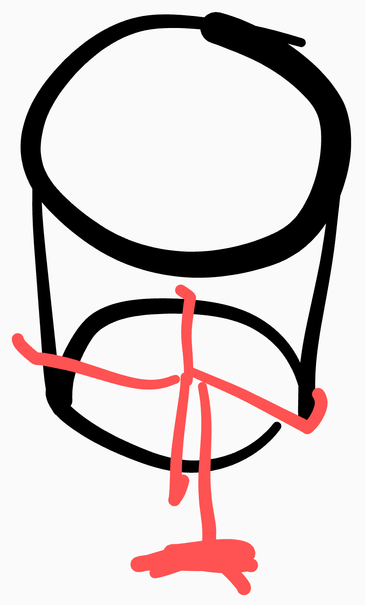
My sketch of how I would implement a clock into the composition of my piece.

Week 3
Problem solving
evaluation
Problem solving
planning & production
problem solving
Evaluation
Reflecting on Week 2
What problems I have overcome, what problems I will need to overcome:
Problem Solving: New Metaphors Tool Kit
Creating new metaphors from randomised words.
problem solving
Food Trucks as a Metaphor for Kindness:
With this tool kit, you have to create a new metaphor using the words provided. My word was "kindness" and my object was "food trucks". I think that food trucks work well as a symbol for kindness as they are a mobile source of comfort and can be found anywhere. Due to their commercial functionality, they provide nourishment for strangers in need and connect people through a love for tasty and inexpensive food.
This has been a helpful task for considering alternate ways of perceiving objects in a different metaphorical light.
APPLYING THIS TASK TO MY FMP: Leaking as a metaphor for the continuity of temporality:
The card I chose to use as a metaphor for my FMP was this card on the left, titled "What's Leaking?". I believe this could be seen as a good metaphorical communication for the endless continuity of temporality that I am exploring in my investigation. The question of "what's leaking?" implies a curiosity fuelled by a lack of knowledge and a lack of control; we can also see this when exploring the animatory relationship between the viewer and time. When viewing an animation, the frames are processed so fast that the brain merges the images to see one continuous motion. When we stop and look at the frames individually, however, we can see each small detail that creates this illusion of movement captured in each millisecond. The constant dripping of water links to the continuous flow of time; the lack of knowledge of the source of the "leaks" can symbolises our insignificance and lack of certain understanding of time and our place within it.
problem solving
Problem Solving: Exploring Sensory Experiences:
Applying tactile experiences to my project: TEXTURE & SMELL:
Fort his task we explored the physical sensory experiences of textures and smells. The texture our table experienced was a small patch of denim that had been sewn up, ripped, and painted on to harden and roughen the fabric. The smell we experienced intrigued me more in terms of relating to my FMP: we were lent a tiny jam jar with a hint of liquid Jasmine. I found this scent a little bit grass-like and super strong. To me, it smelt really oily and like soap. We also got to smell frankincense, which I disliked the smell of. It smelt a little bit like how I would imagine gone-off soap would smell like, and was also really strong.
Jam jar of jasmine.
Jam jar of frankincense.


Evaluation
Evaluation:
Reflecting on my alternate ideas through new metaphors and sensory experiences.

functionality of my piece
Planning:
What I need to do for my piece to be possible.
problem solving
planning & production

The order of what I need to do to make my piece function:
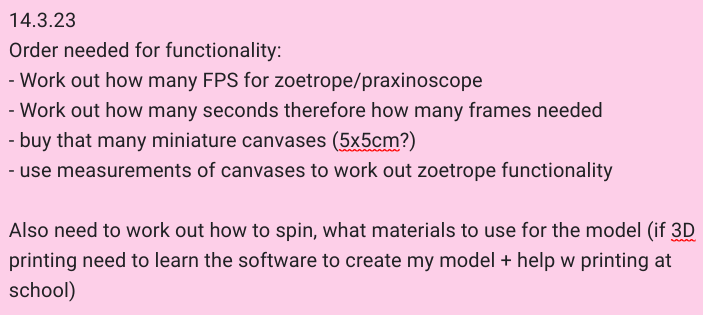
Obstacles to overcome:
I planned the order of what I needed to do in order to make a functioning zoetrope (or praxinoscope). I want the canvases to be small to keep the project on a miniature scale, and I also need to work out how many canvases I can use with it still functioning as a zoetrope. The measurements of the physical zoetrope will rely on the measurements of the canvases. The measurements of the canvases will impact the amount of frames I can fit in, so the first thing I need to sort is how many frames I will need and will this work in a zoetrope.

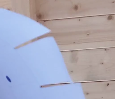
WORKING OUT FPS: Digital Testing
planning & production
problem solving
Experimenting with digital animation to gain an understanding of the effect of FPS on a zoetrope.
practical skill


evaluation
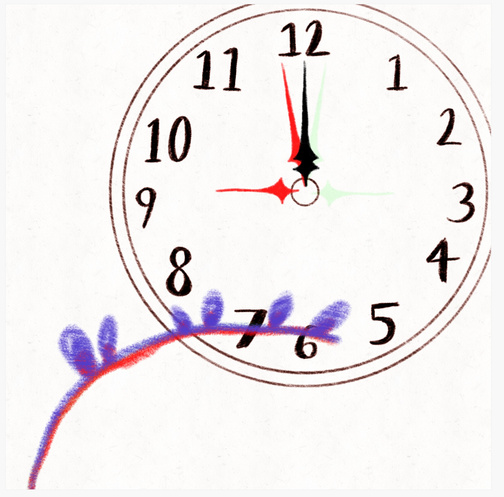
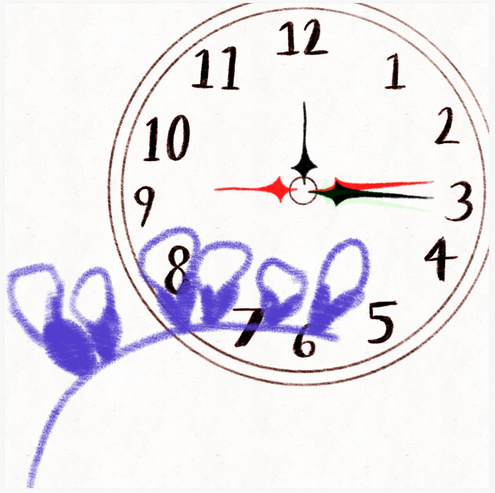
Digital animation tests: Experimenting with FPS and practicing with my planned composition:
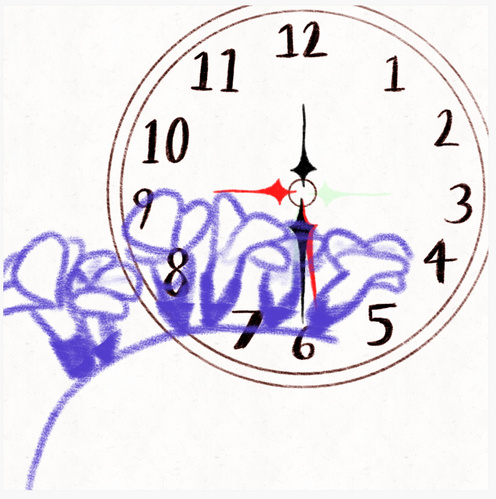
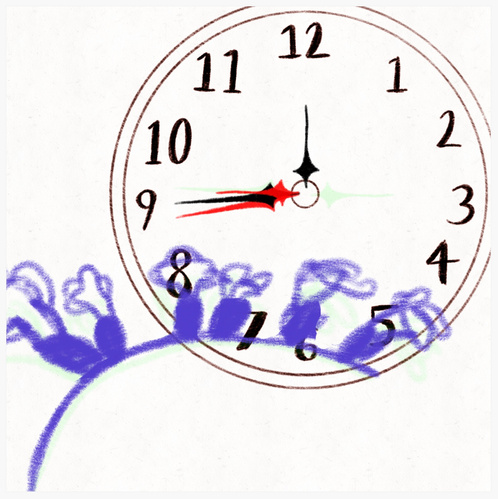
I used the app Flipaclip in order to create this digital animation test. I animated the clock in order to gauge the amount of frames needed for a full temporal rotation, which would allow my zoetrope to repeat and loop nicely (which is important thematically in order to highlight the ubiquitous and ceaseless continuity of temporality).
Clock animation test: 6FPS
Clock animation test: 12FPS
evaluation
This is the same animation played at 6FPS and 12FPS respectively. It was originally animated in 6FPS, then quickened to 12FPS. In my mind, the zoetrope animation would only be a few seconds - like the 12FPS version - due to my understanding of how they work. The interesting thing with this animation is that you can physically see the time going by through the smooth motion of the clock arrows, and implements the tacit understanding of temporality through technological mechanics as previously researched. When I animated this I initially only drew half the amount of frames for the arrows in order to keep the amount of frames low, but it did not look smooth and the short hand just seemed to flicker up and down rather than appearing as though it was completing a full rotation. I think the completed loop in 12FPS appears the best both in smoothness of motion and in physical rotation of the clock. The fast looping of time going past is a strong communication of the significance of my thematic exploration in this project. However, I would need to test if this amount of frames works both with the time needed for the flowers (the main subject) to grow and decay, and with the practical functionality of a physical zoetrope or praxinoscope.
DIGITAL ANIMATION TESTS: Animating Freesias
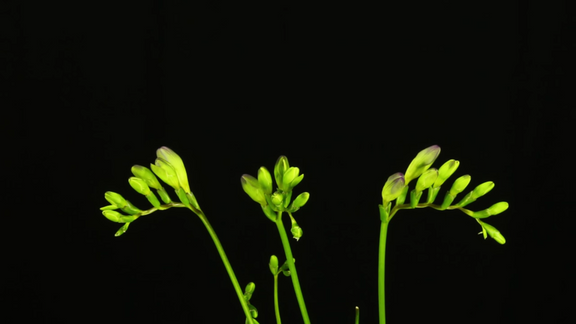
I animated the growth and decay of Freesias on a separate layer of the top of the clock. I drew these from memory with my understanding of the physicality of Freesia growth from the research into timelapses and the experimenting with key frames that I did during Week 1.
Looping GIF
I converted my test into a looping GIF in order to check that it works going from decay to growth immediately after. While the timeline of the flower's life is not accurate to the real-time lifespan of an actual flower, I think that the rushed growth enunciates the message of the fleetingness of temporality well as a visual metaphor for existence.
Original video from Kindow1 (2018)
My digital animation. 12FPS with a total of 48 frames.
My digital animation as a GIF.
Key Frames
These are the keyframes I drew as the milestones in the freesia's life at each quarter of the clock's rotation, in order for the flower growth and decay to loop in sync with the clock's rotation.
WORKING OUT FPS: Analogue Testing
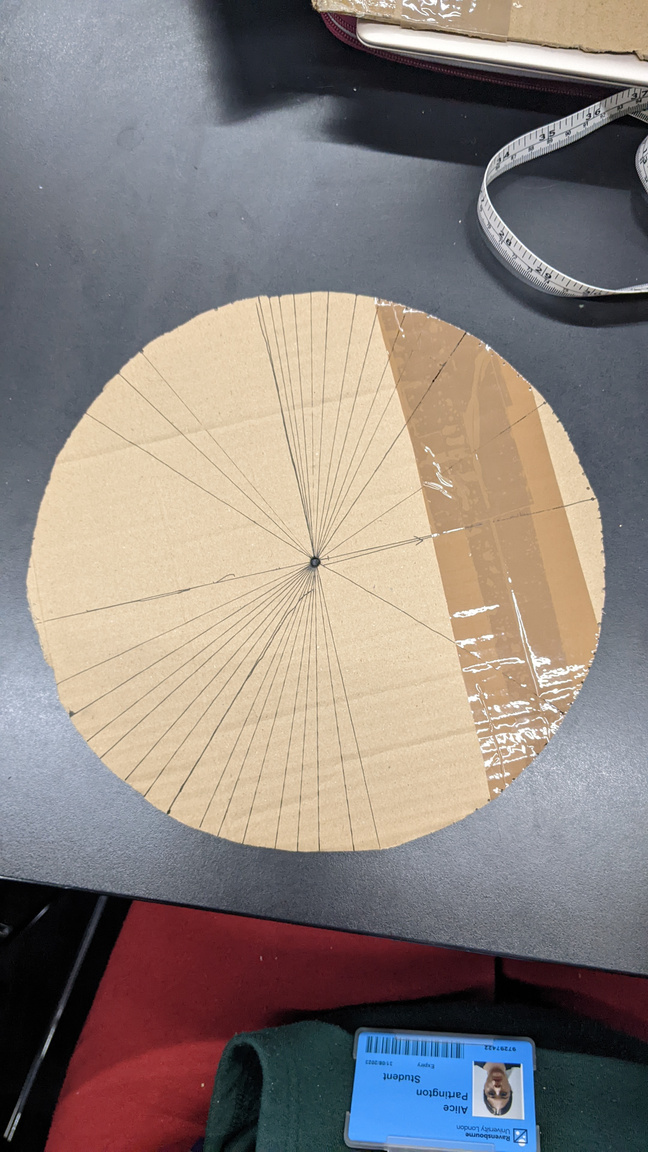
Making a paper zoetrope to work out how to implement my animation practically.
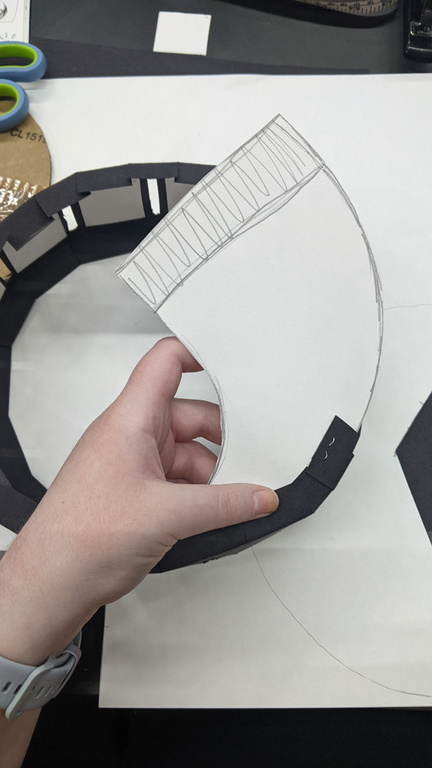
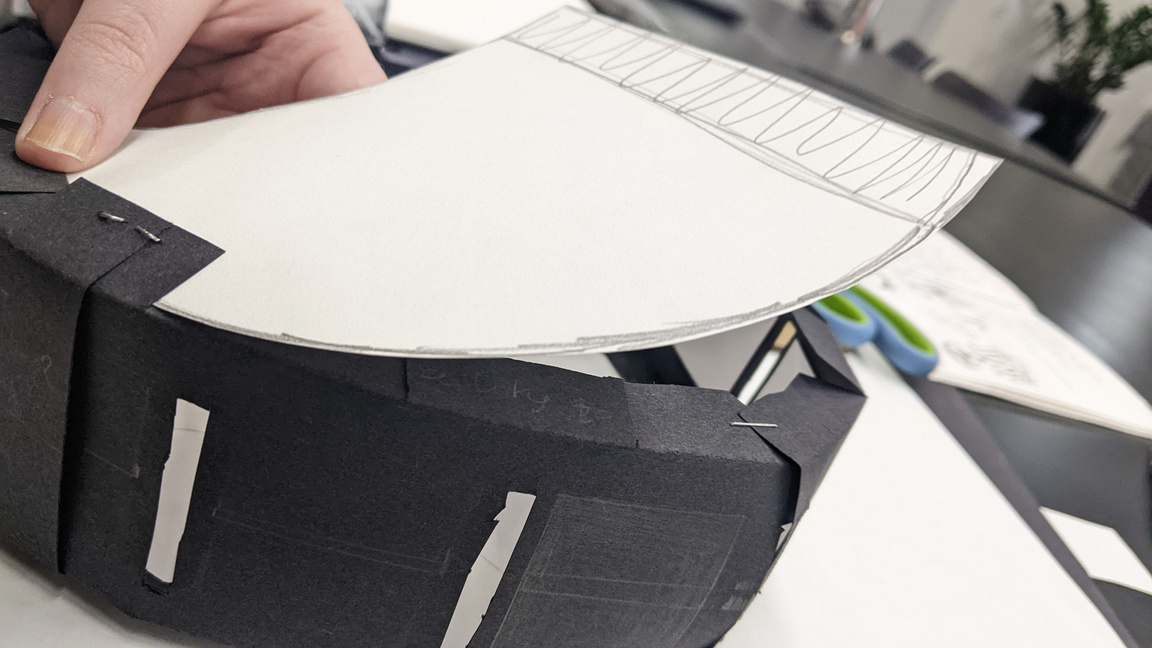
Paper Zoetrope
I planned to make a paper zoetrope using my digital animation, but I decided to first make one that functions in order to gain a full understanding of how to make a zoetrope function practically.
Reference
I took inspiration and learnt how to make a zoetrope from this video (RimstarOrg, 2018).
evaluation
problem solving
planning & production
practical skill

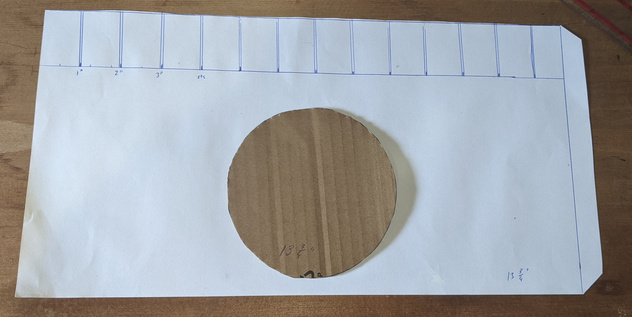
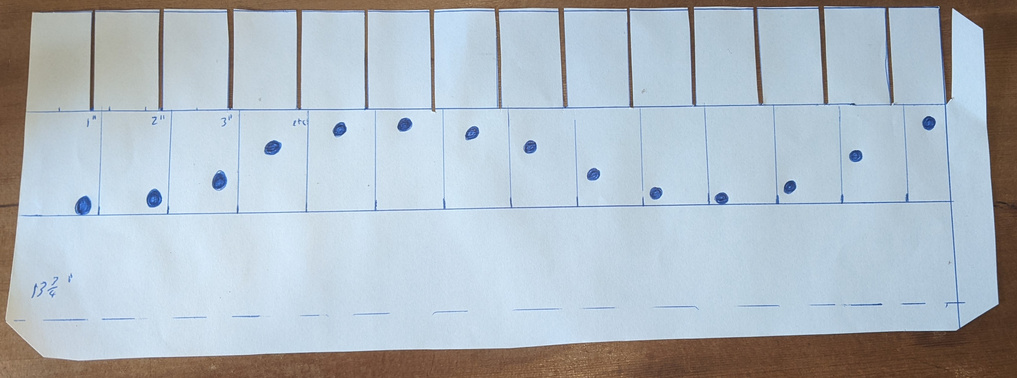
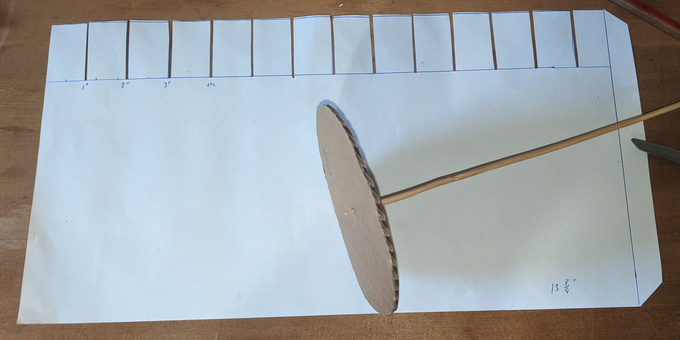
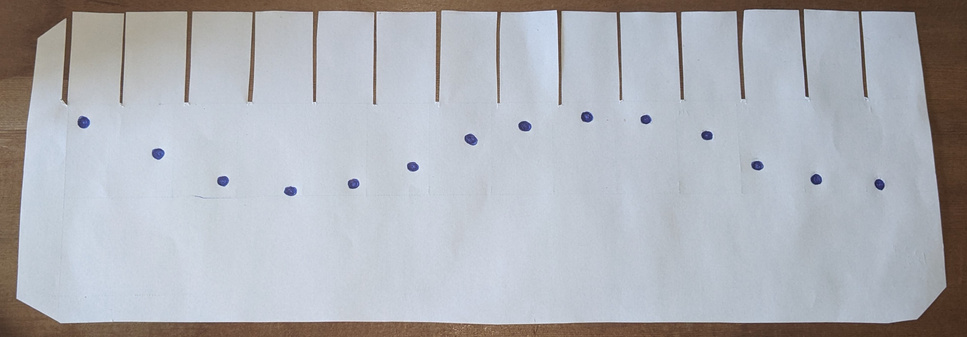
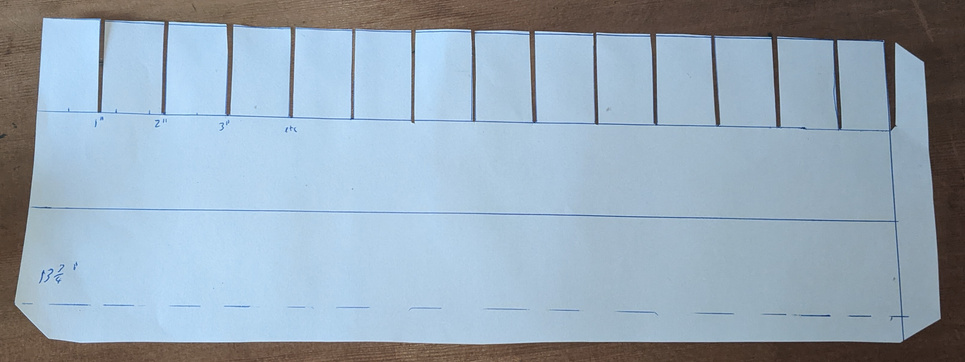
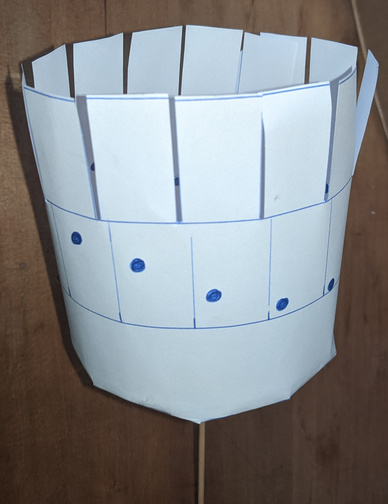
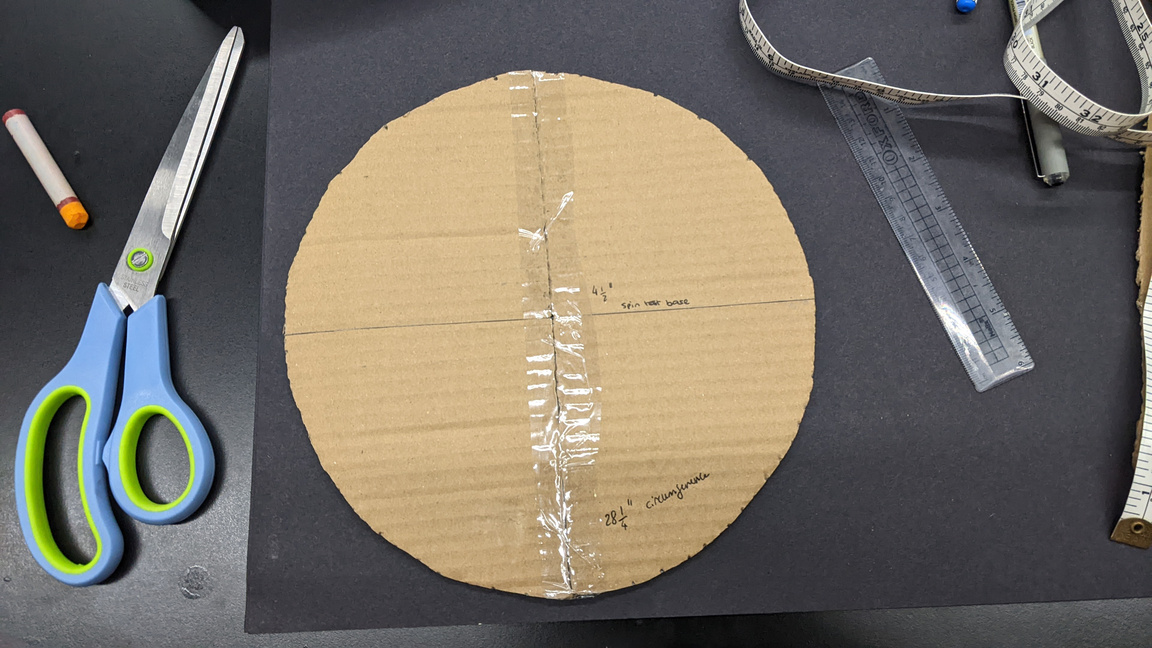
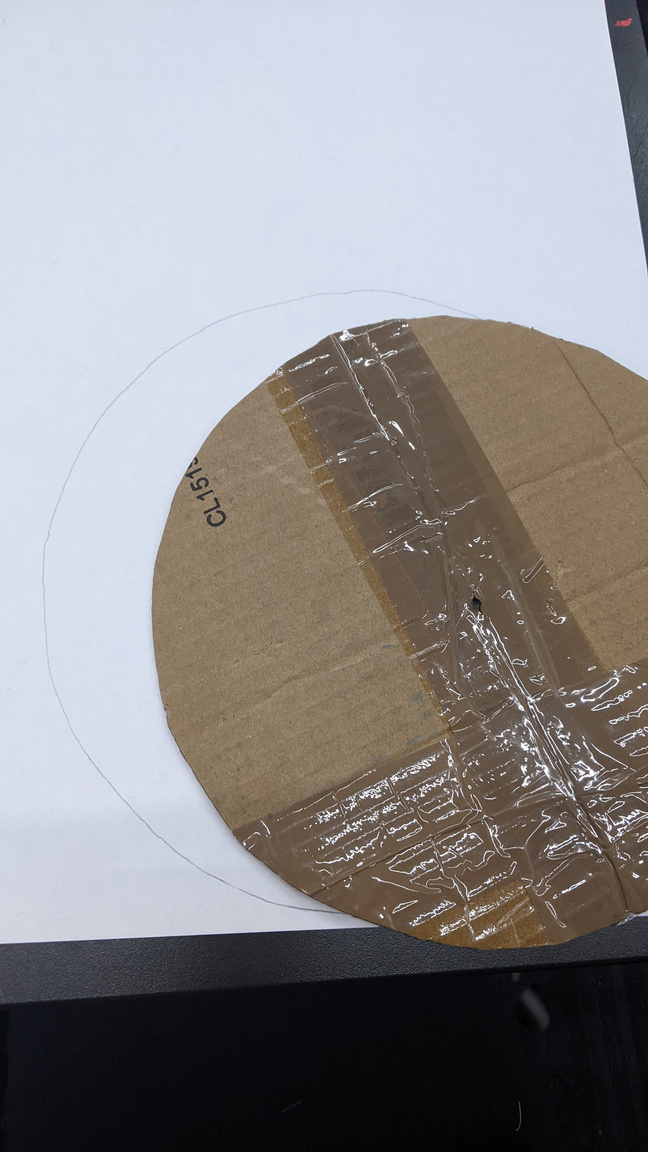
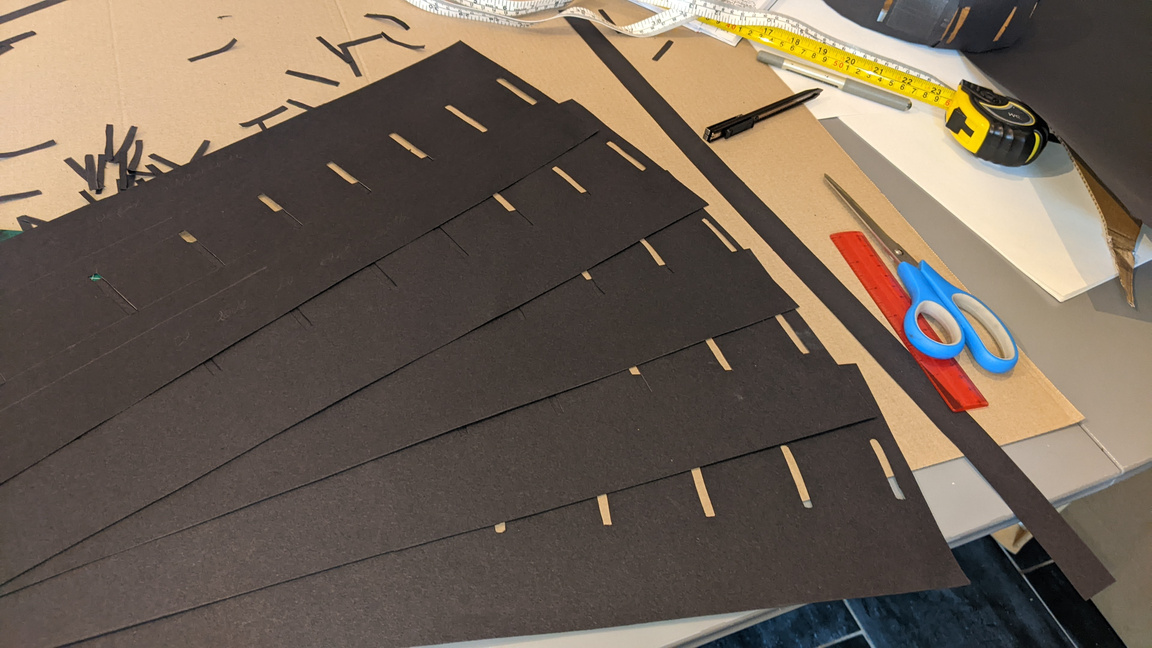
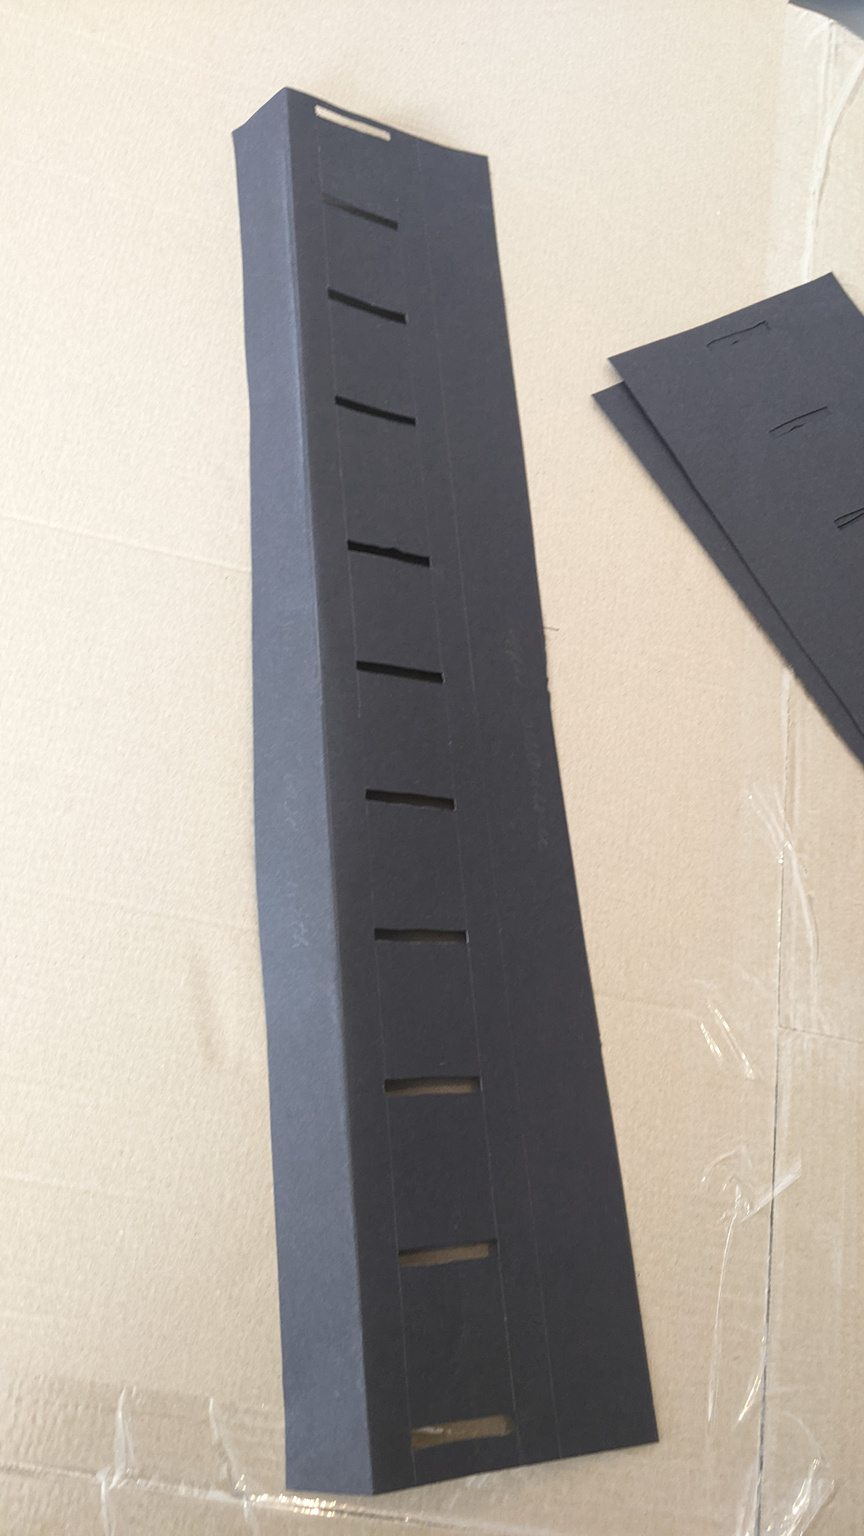
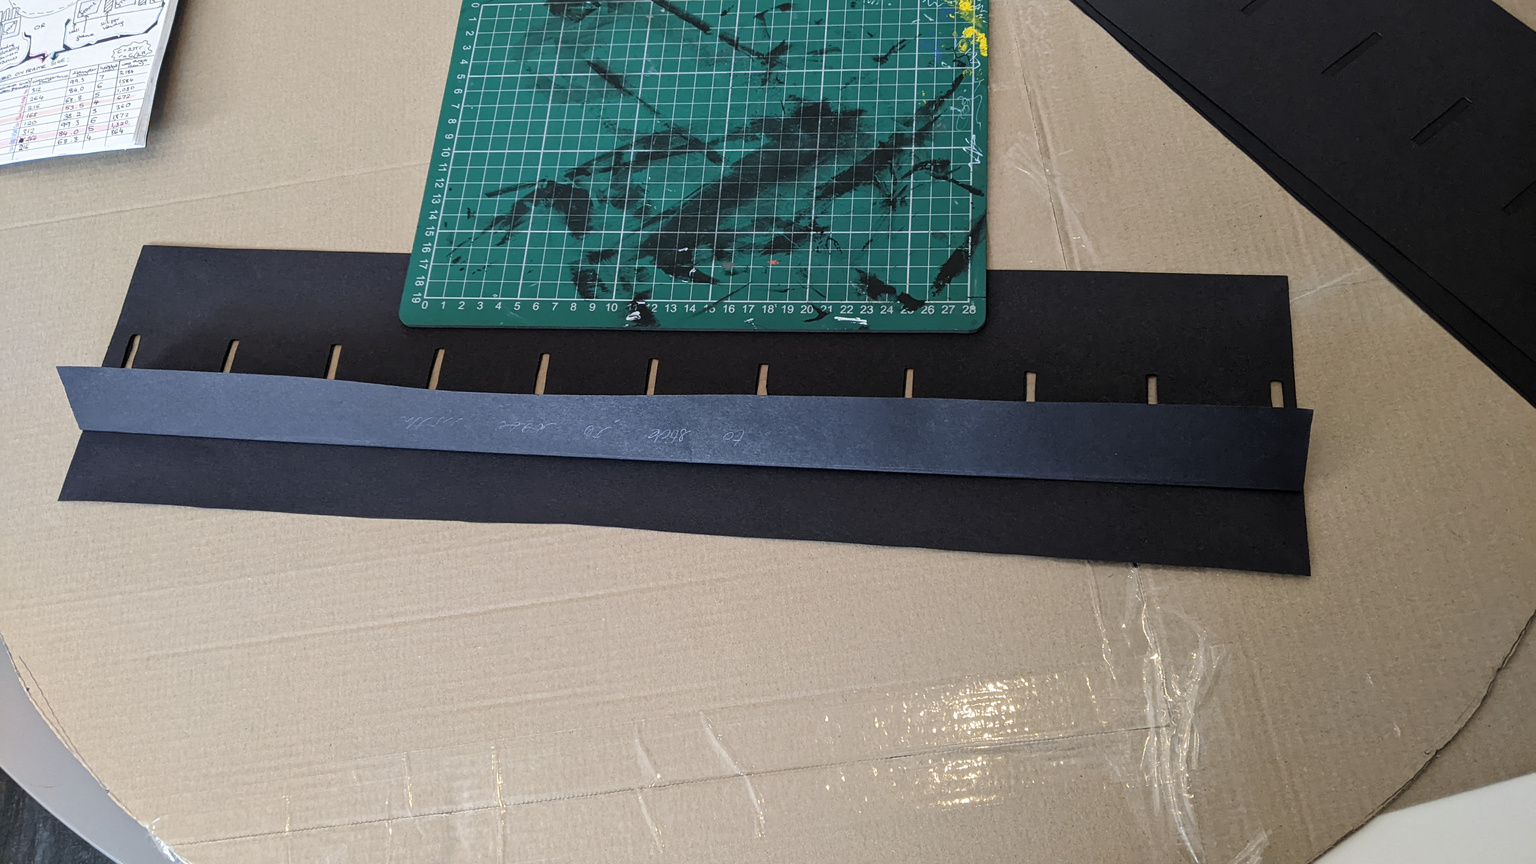
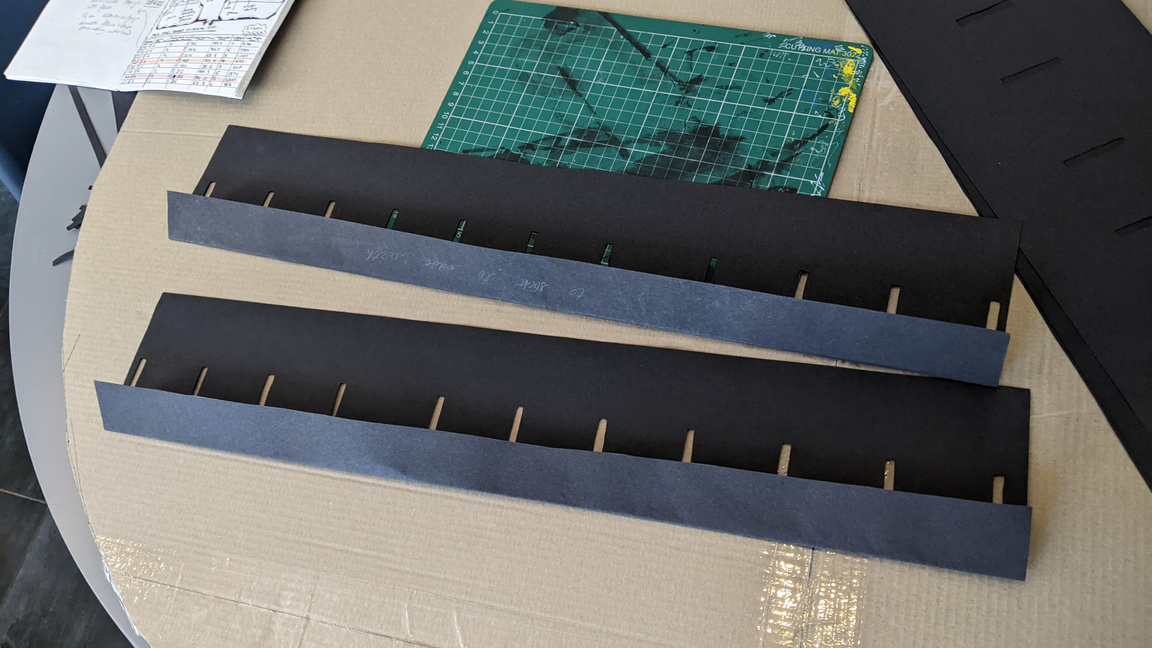
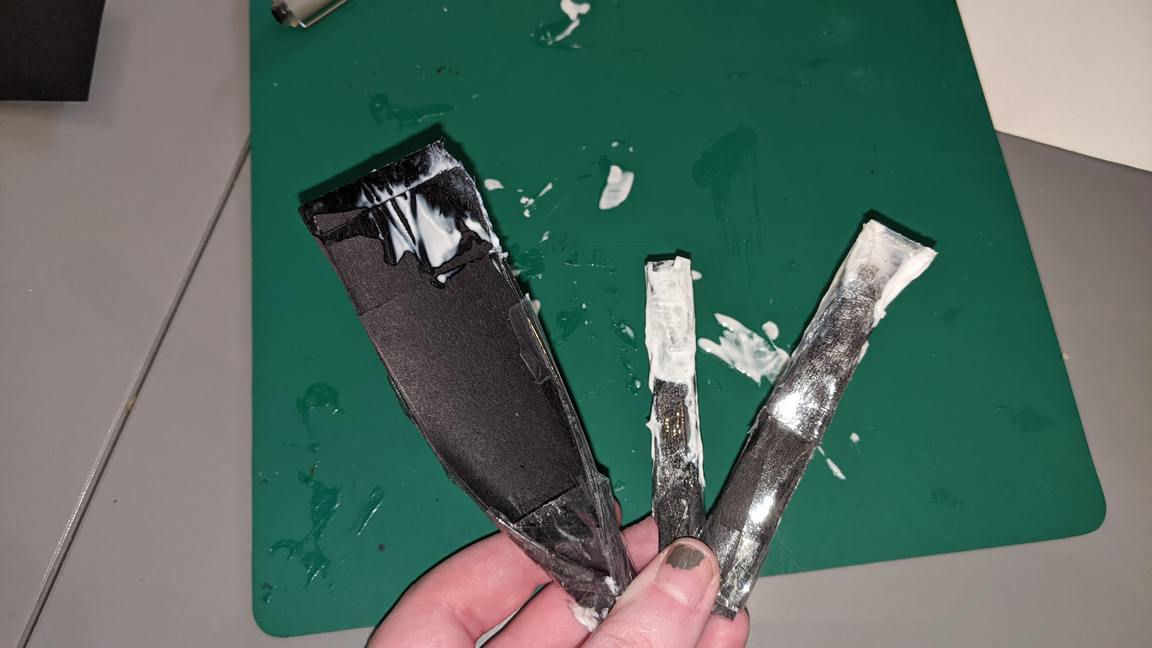
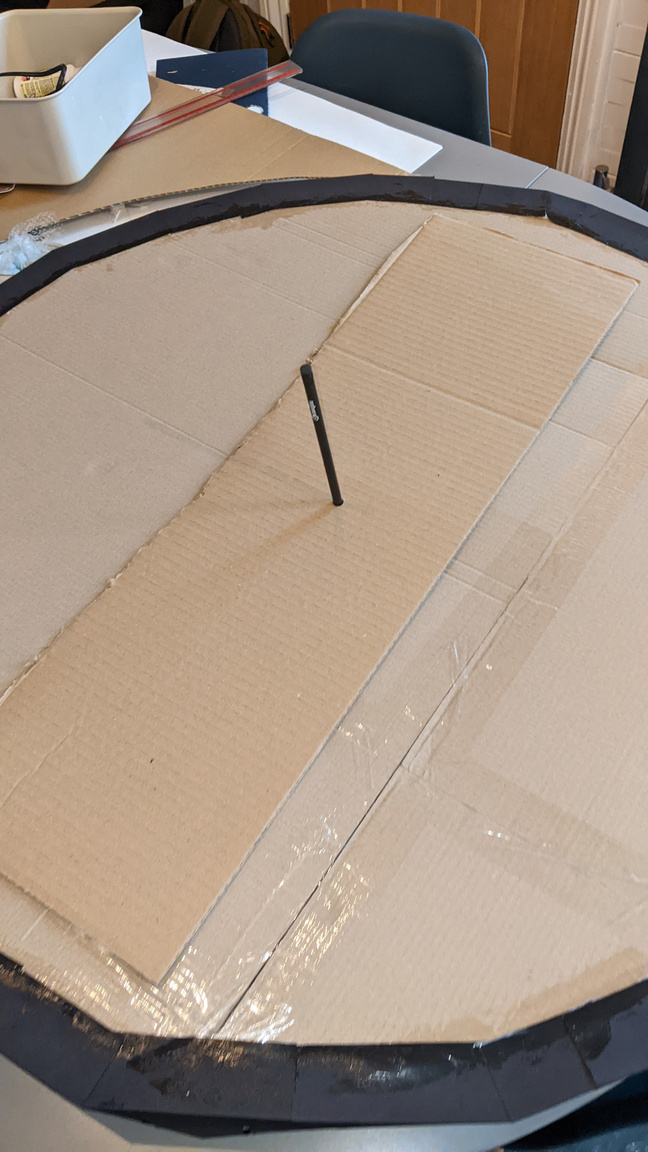
I first cut out a circle of cardboard for the base of the zoetrope. I then measured the perimeter and used this to cut out a rectangle for the sides. I cut slits in the top every 1 inch for viewing though, and then drew out frames for a ball bouncing to test the amount of frames I could use in this space. I taped the sides on to finish.
PROCESS:
This is the first version outcome, with smaller slits. It is difficult to see the animation.
Smaller slits - size: approx 1-2mm
outcome:
problem solving
This is the second outcome, where I made the slits bigger. It is easier to see the animation.

Largerslits - size: approx 5mm
WORKING OUT FPS: Evaluation
evaluation
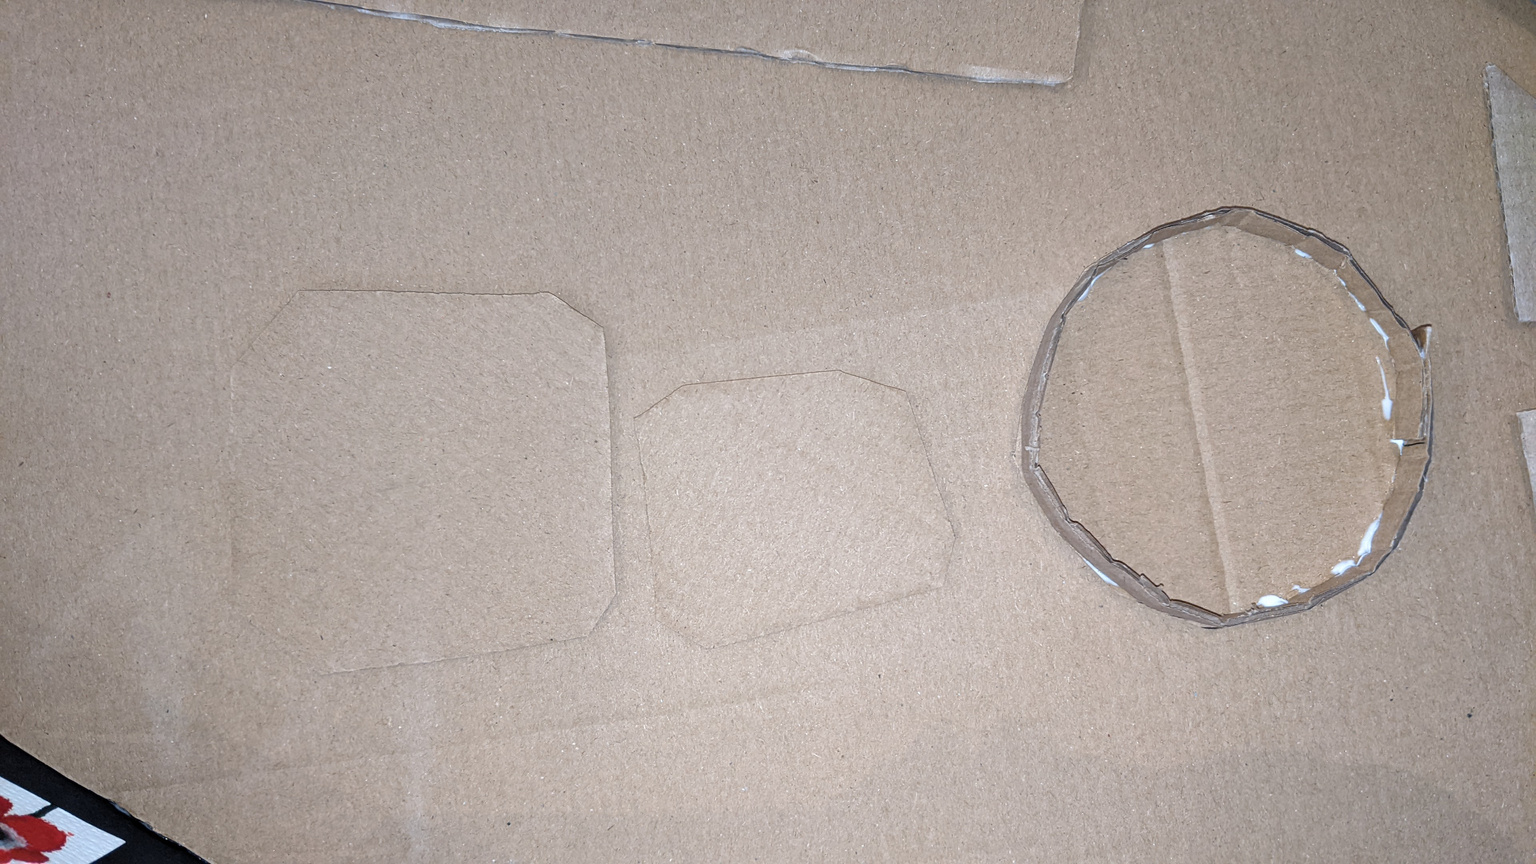
Working out Canvas Size:
Experimenting with analogue practices to simulate a zoetrope full of canvases, and gain an understanding of the effect of canvas size on the viewing of a zoetrope.
planning & production
practical skill
problem solving
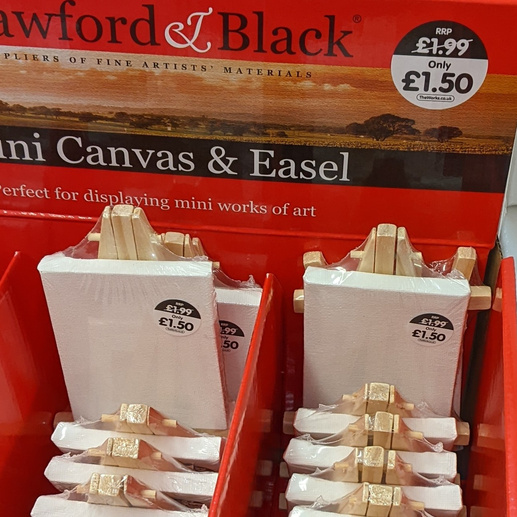
Smallest available canvas sizes:
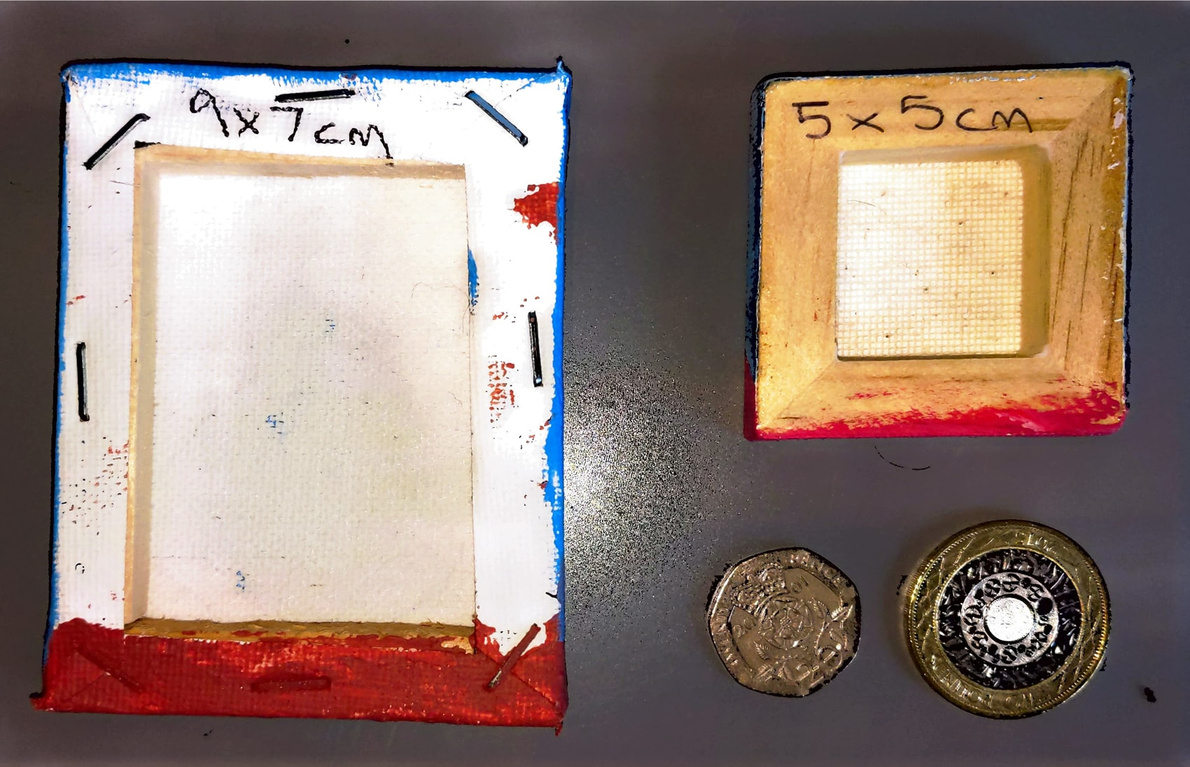
These are the smallest canvases I own (9x7cm and 5x5cm) and that I know where to get more from. On the left you can see their sizes in comparison to coins. As well as exploring the effect of the different sizes on the viewing of a zoetrope, I will also need to consider and experiment with whether a rectangular or square canvas will work better both practically and in terms of composition.
I started working out the measurements if I were to use these canvases dimensions. With the smallest canvas, the diameter of my zoetrope would be 76cm, which is fairly large but may work. I will need to test other dimensions to see if there are better ones that are a reasonable size to paint and function correctly.

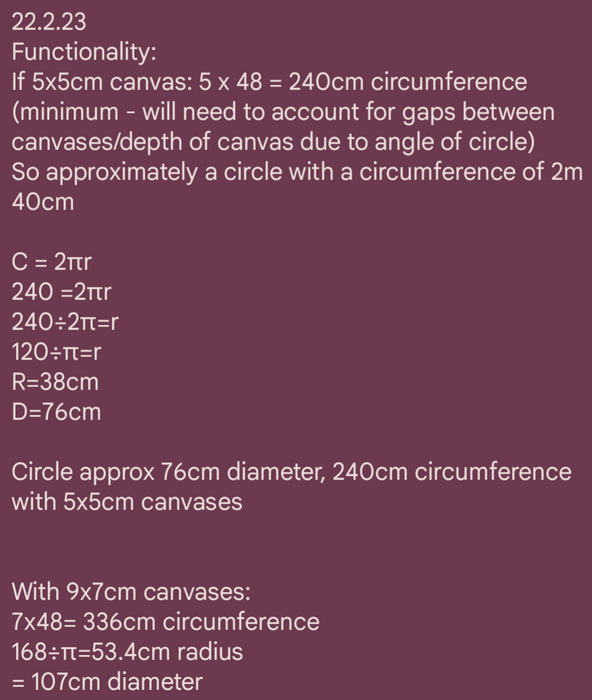
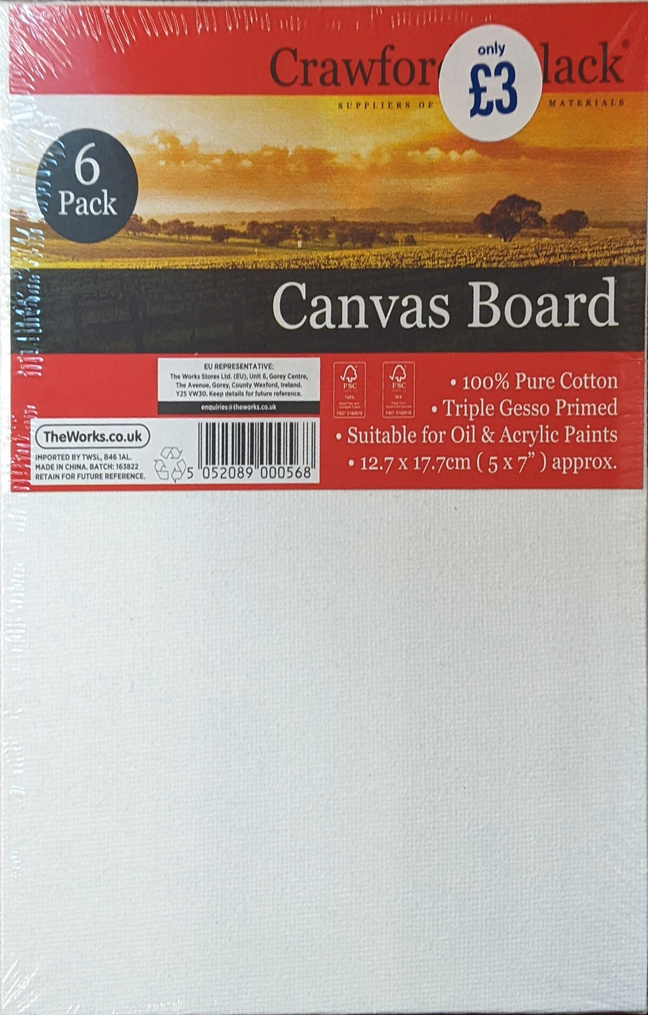
Canvas prices:
I went to The Works to look at the prices for the tiny canvases, and they only had the 9x7cm canvases in store. After realising I may need 48 frames, I looked at the other options to be more cost effective and also take up less space, as the canvases are quite thick. I found packs of 6 canvas boards for £3, which I considered using and cutting up, but I think that it would end up being too much work for not a great outcome. The boards are relatively thick and sturdy so cutting them would require a strong tool and could easily create unwanted rough edges. As a solution to be cost effective and create a neat outcome, I have decided to use regular card and paper (likely watercolour paper, or a similar thicker type) to create my tiny canvas frames.

problem solving
Working out what size is small enough for the model but works to paint in that scale:
Testing different canvas sizes through flower studies and theoretical calculations.
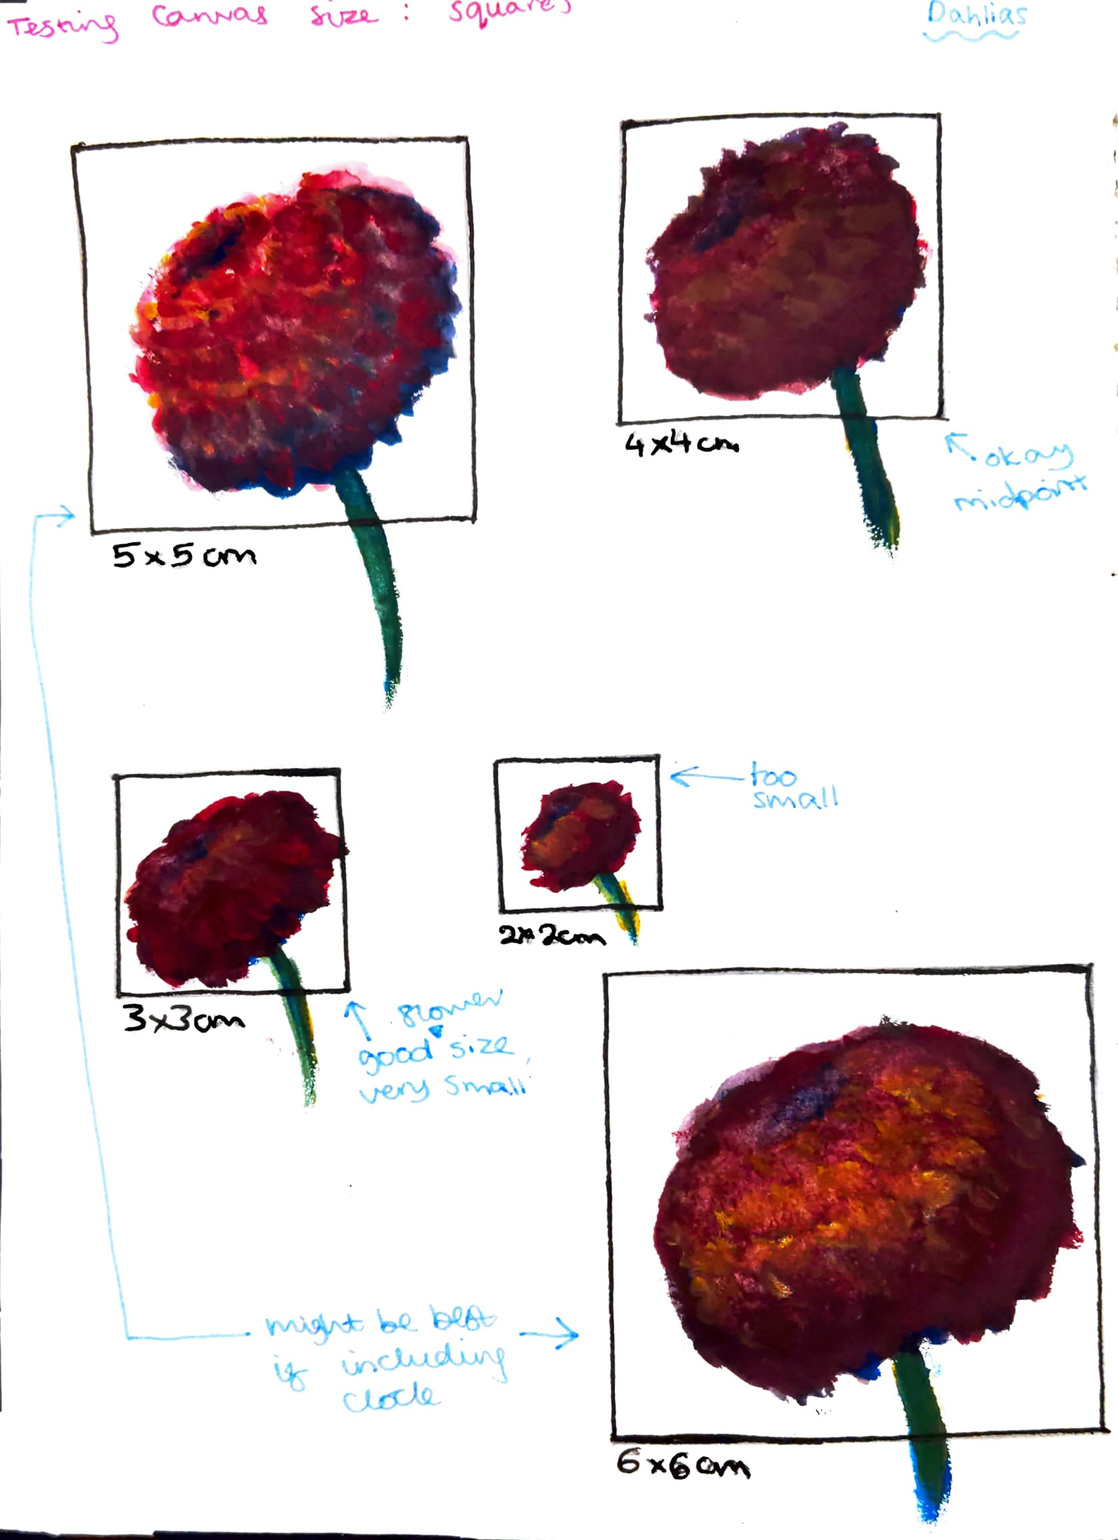
Testing different canvas sises with rough Dahlia studies
I did some quick gouache studies of dahlias in my sketchbook within different sized squares, in order to test which sizes were better as canvases. I also changed my painting technique as I went through the different sizes. I did these quick paintings during class, where I only had access to red, blue and yellow gouache paint (I did not know I would test canvas sizes this way, so I did not have access to black and white paint once again).
Evaluating my studies
Considering the fact that I did not have access to black or white gouache paint, I am pleased with the 5x5 and 6x6 paintings. I feel none of the paintings exactly resemble a Dahlia, and I felt these would be improved if I did have access to black and white paint so I could more readily control the shading.
Test Conclusion
From these tests I found that 2x2 is too small, and 6x6 could be too big. Depending on how big it would make the final model, a canvas between 3-5cm would work well for saving space while also allowing for adequate painted detail.
Calculating measurements based on different canvas sizes
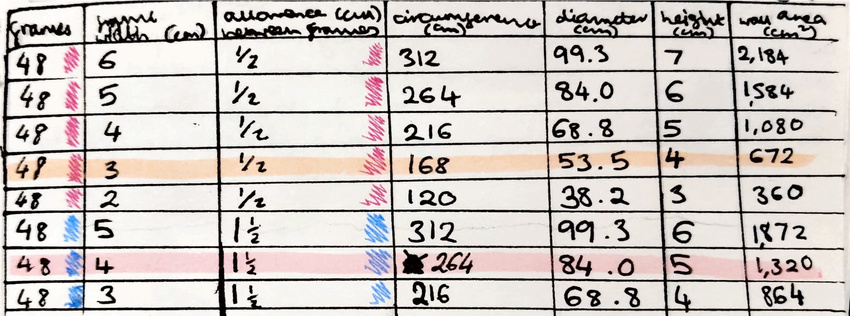
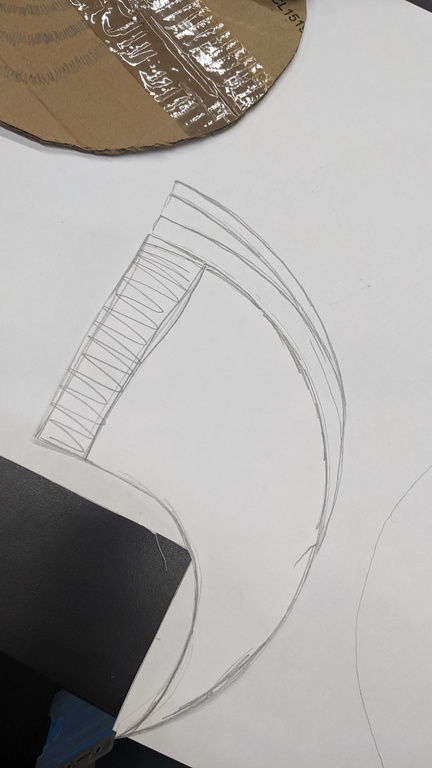
After the painting tests, I drew out a template for the measurements of the model. I sketched out two different versions for the placement of the viewing slits in the zoetrope walls: one based on the paper model I made (pink side) and one based on how I originally planned for it to work. I then created a table with the different variables that will impact the dimensions of my outcome. I then calculated the circumference and diameter the zoetrope would be based on the width of the frames and the gaps between the frames. As the animation test I did worked well with 48 frames, I am sticking to this number as an estimate and plan for the final number of frames.
Conclusion
It has been really informative to see the range of scale results from the variety of frame width.
Working out Canvas Size:
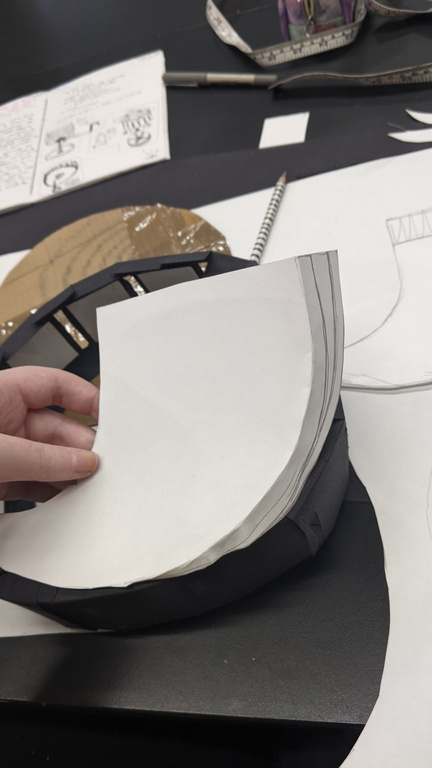
measuring out 3x3cm
planning & production
Experimenting with analogue practices to simulate a zoetrope full of canvases, and gain an understanding of the effect of canvas size on the viewing of a zoetrope.
Cutting out a cardboard base:
I measured and cut out the size a base would be if I used 3x3cm
width for my frames. This test was helpful to visually understand the physical scale of my project. I did not have a compass, so I used a measuring tape and a ruler to measure out the size.
CONCLUSION
Using 3x3cm turned out to be smaller than I thought, however I did use a 5mm allowance instead of a 15mm allowance, which would work better functionally. It is good to know that the project will have a decent scale that is achievable physically.
Pre Production presentation notes:
My notes:
research
Problem Solving presentation notes:
My notes:
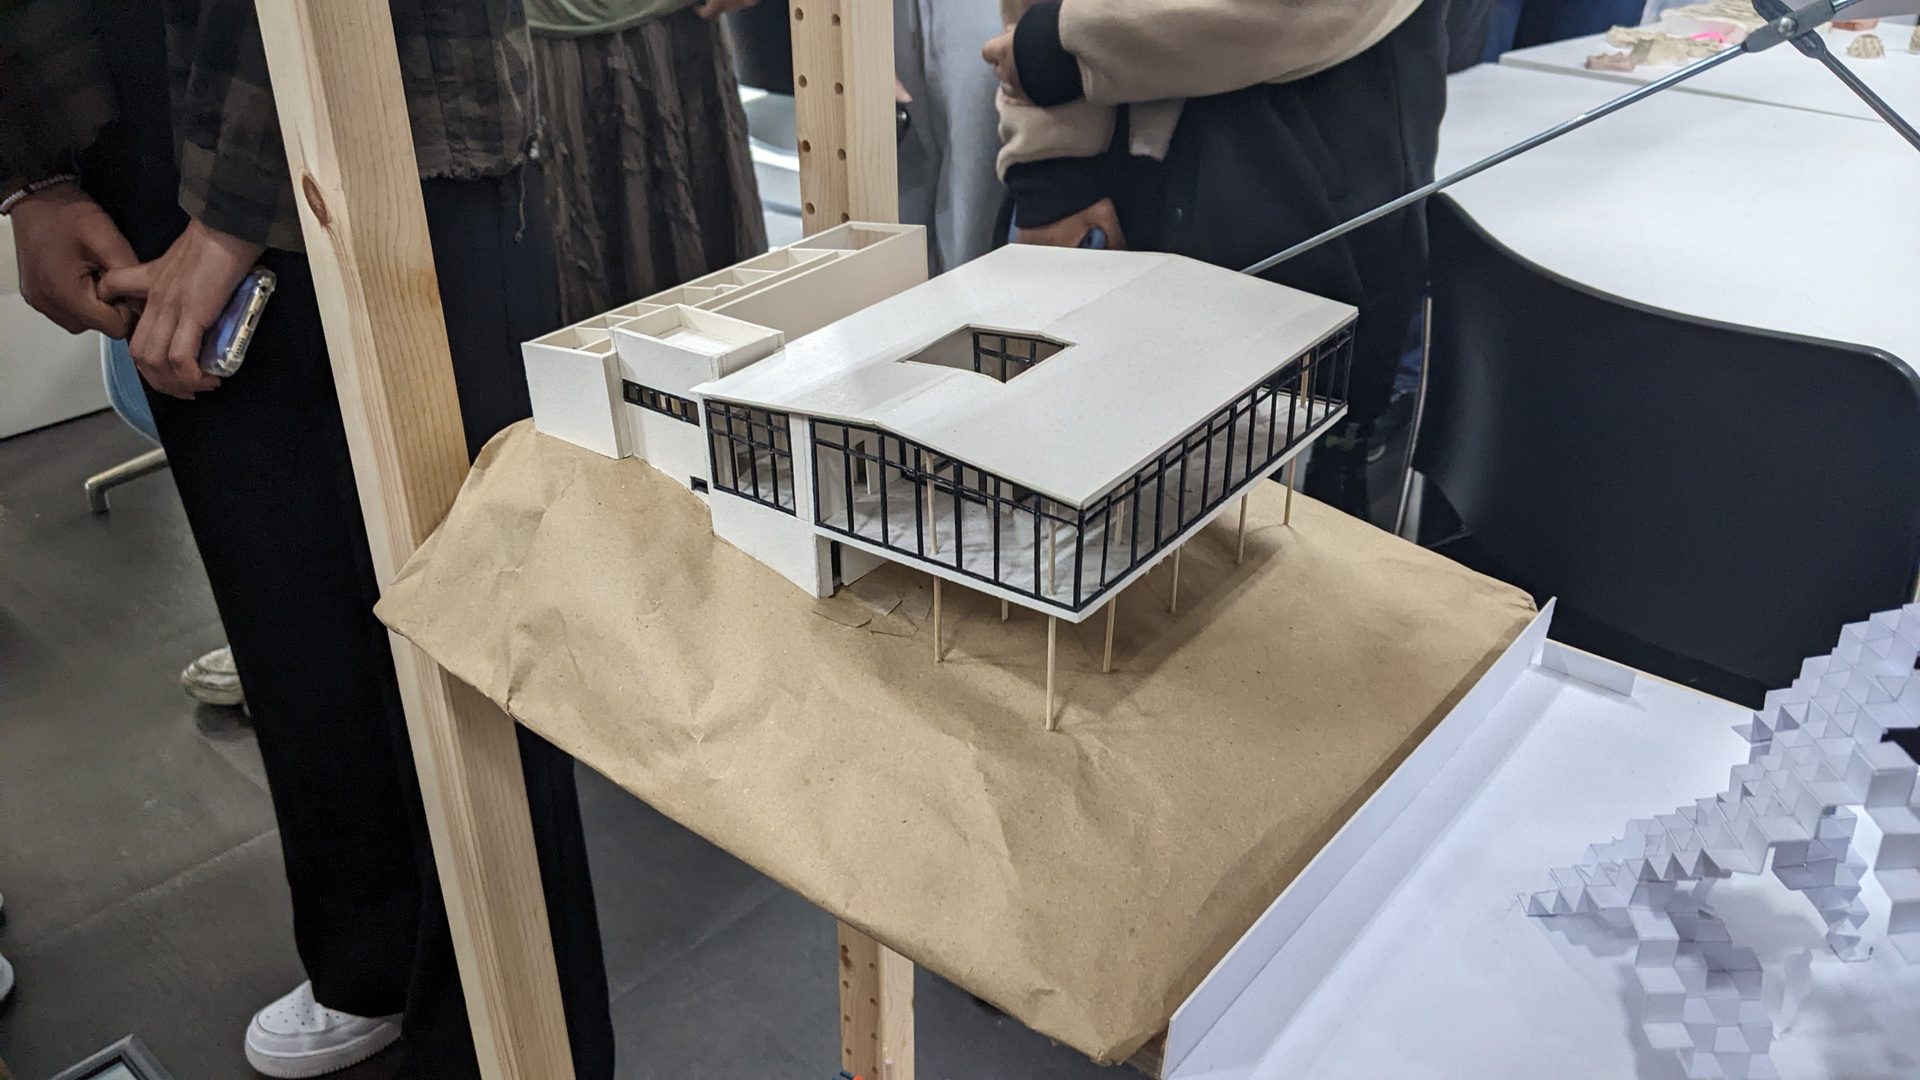
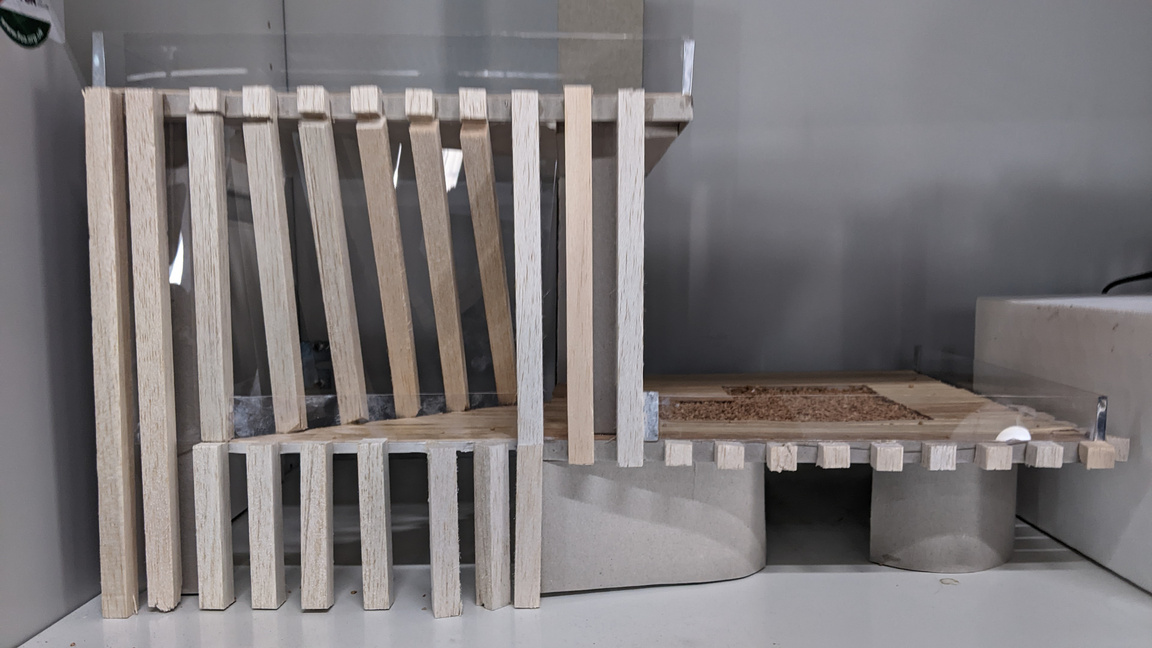
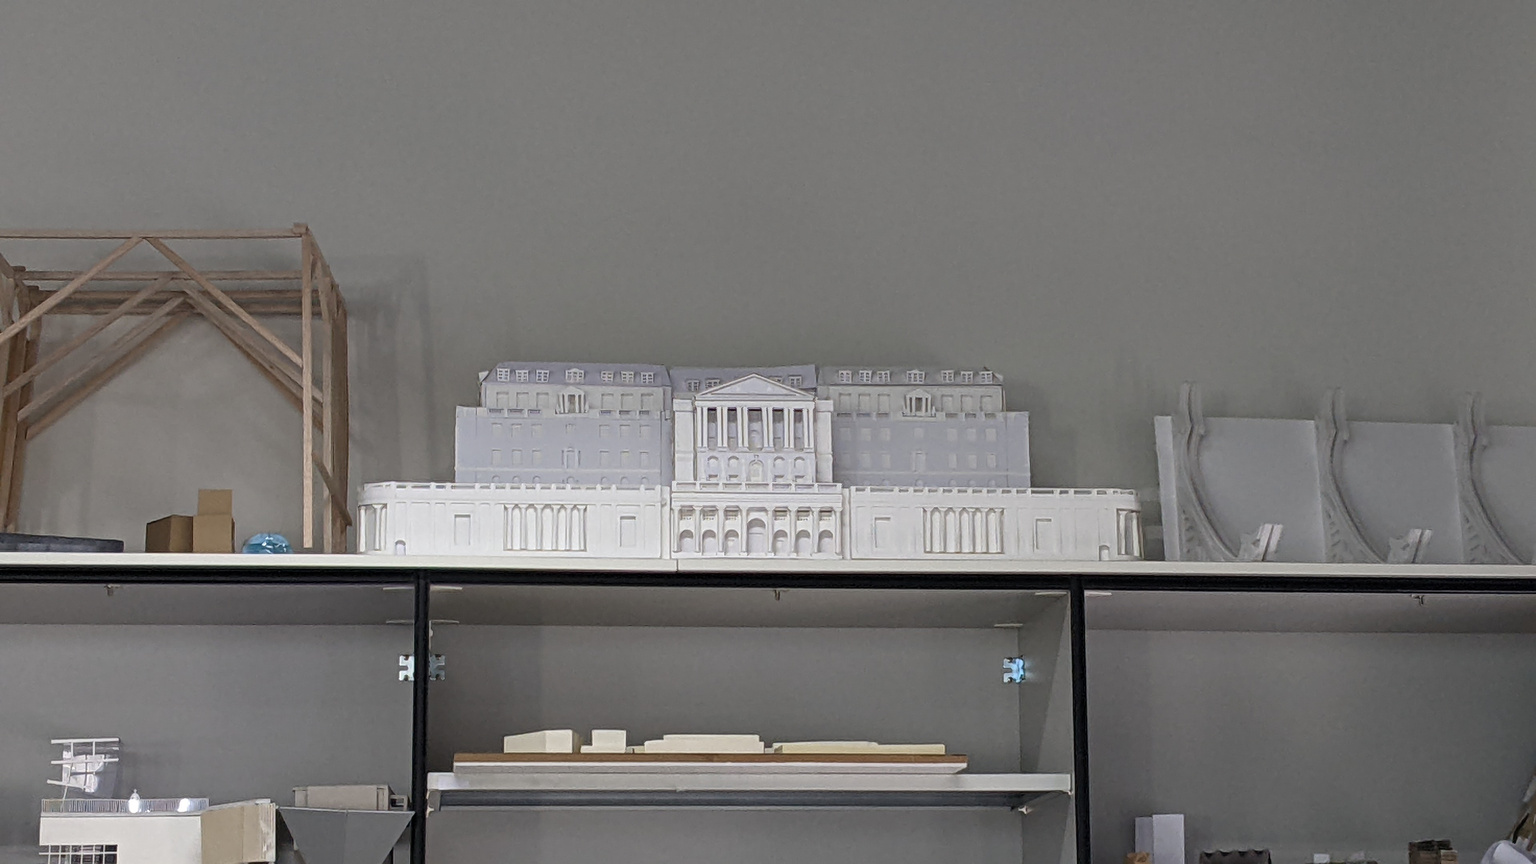
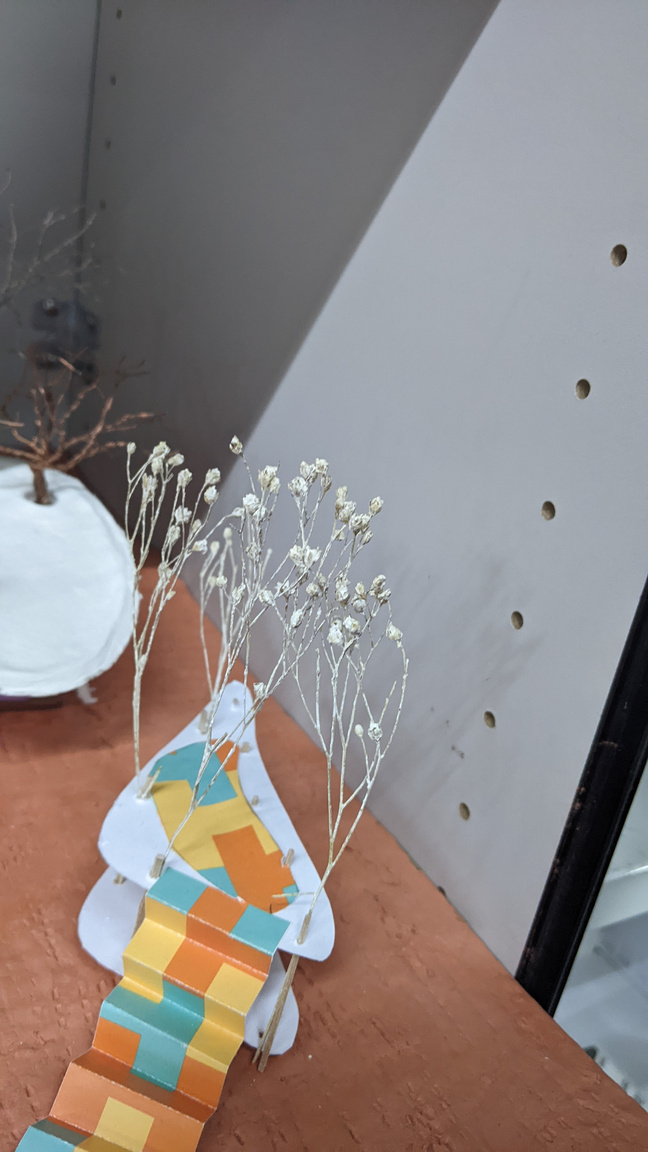
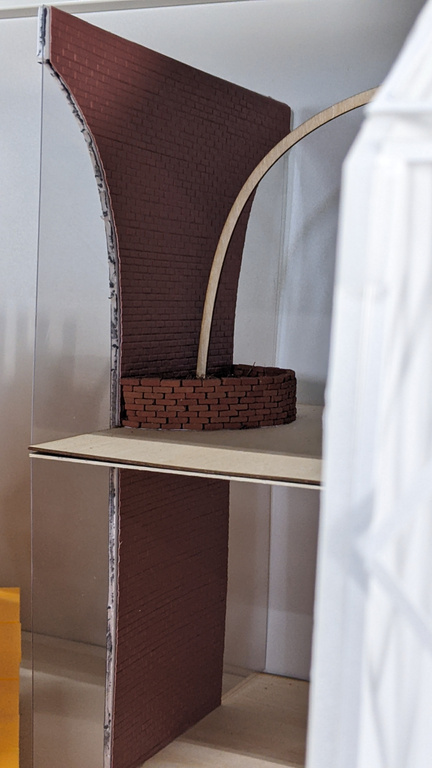
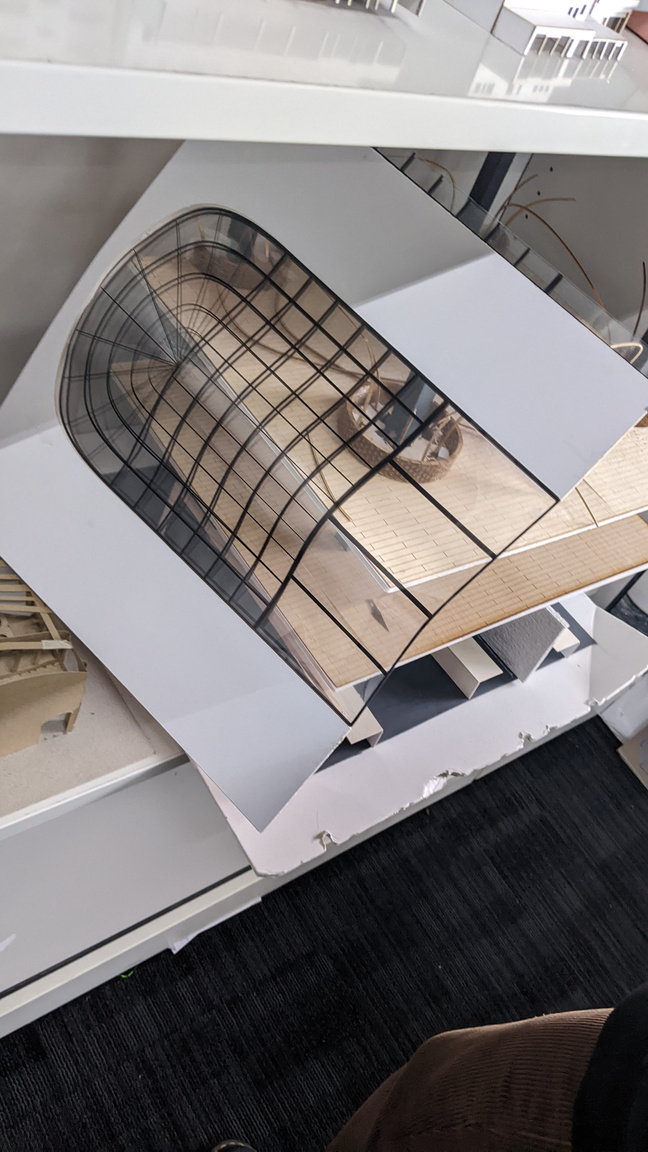
Exploring architectural miniature practices:
Looking at architecture students' previous works to learn about materials and glues to use in miniatures, and the best techniques to fix boards together.
My notes:
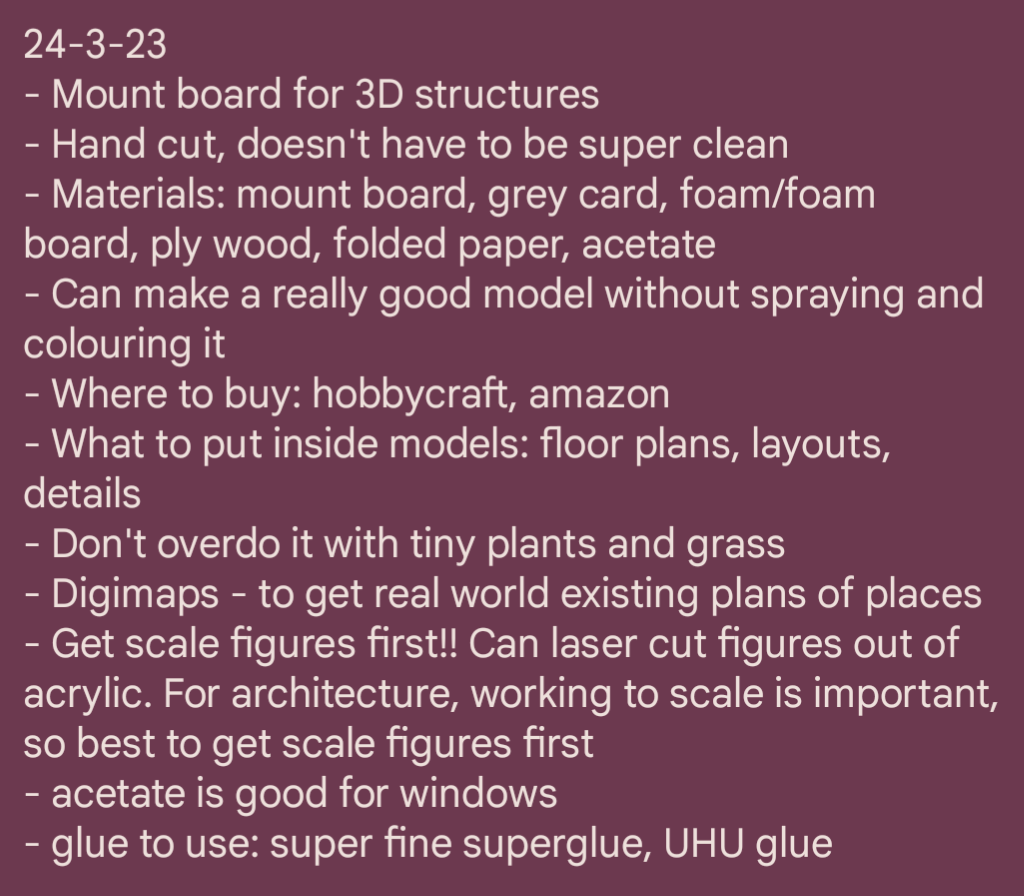
research
planning & production
Informative and relevent miniature models:
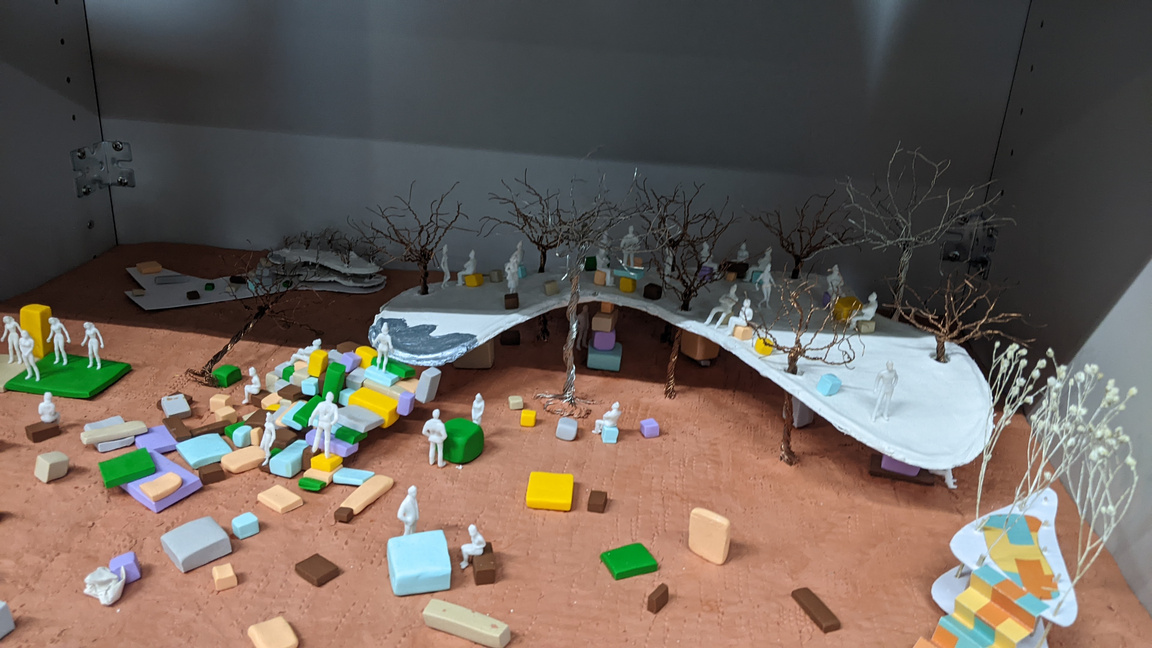
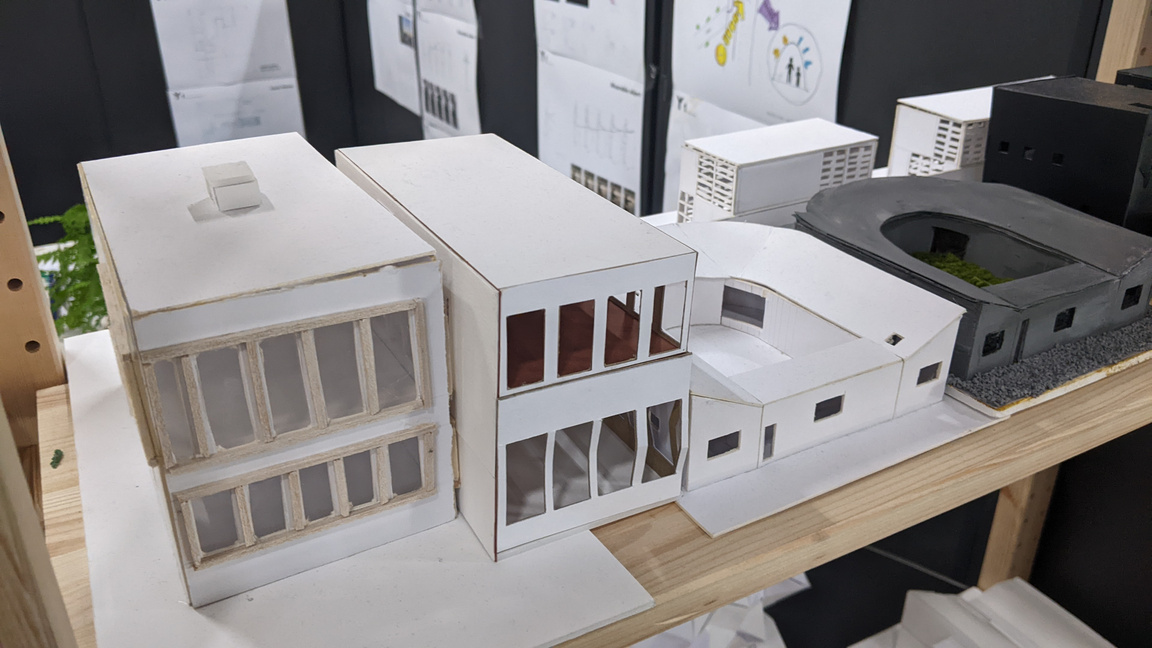

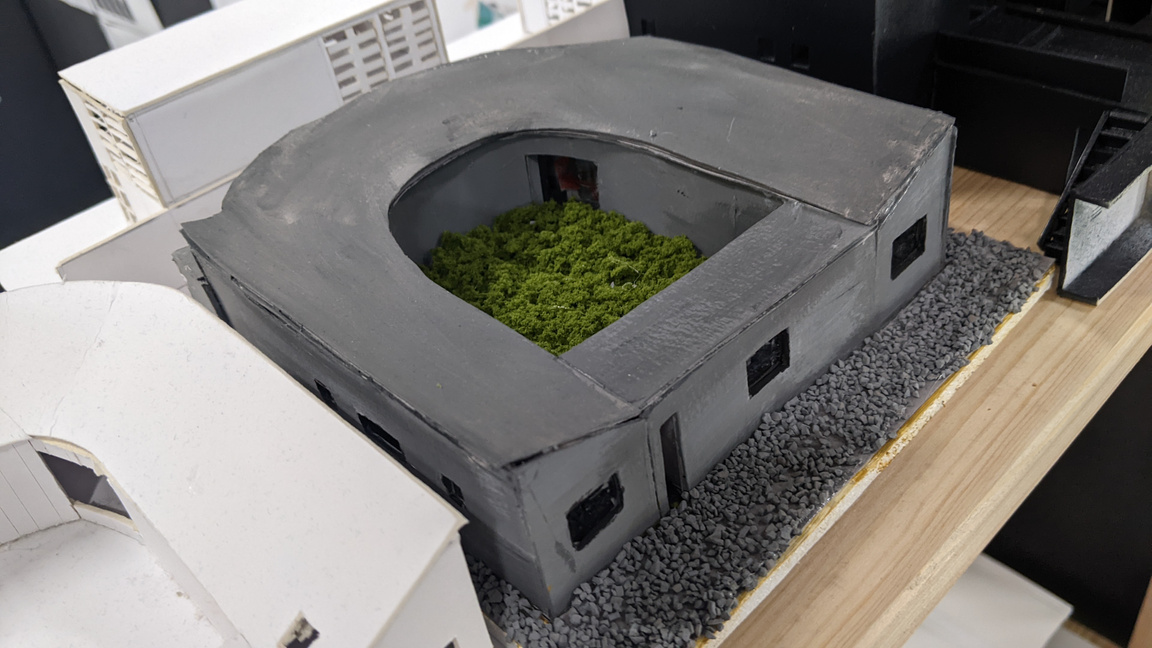
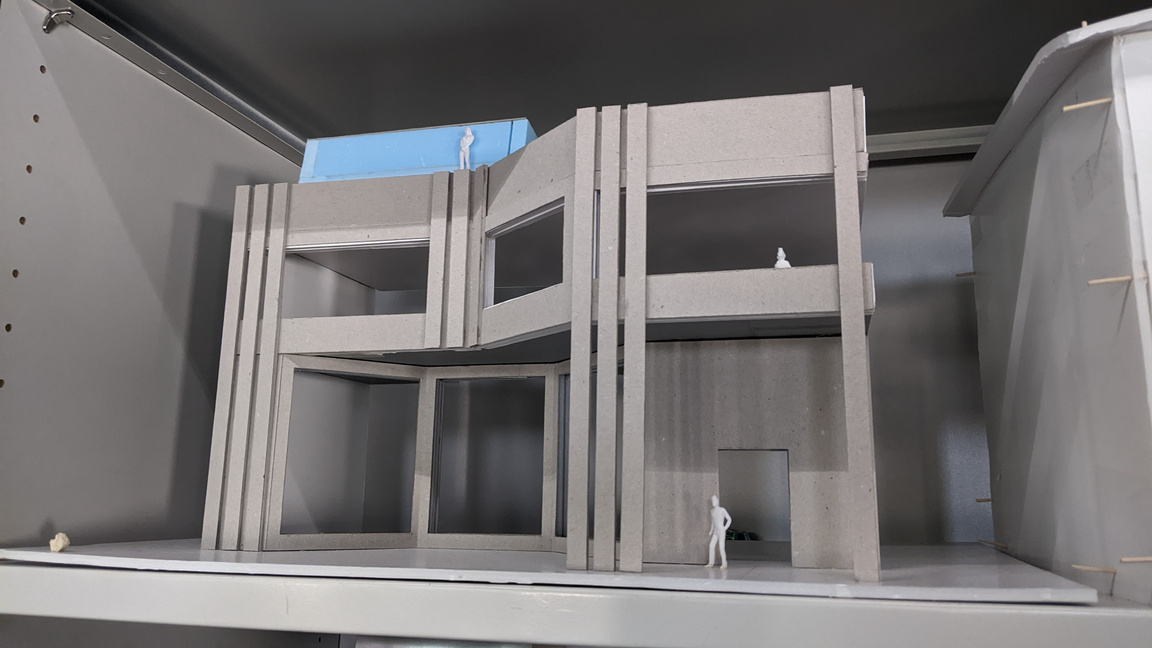
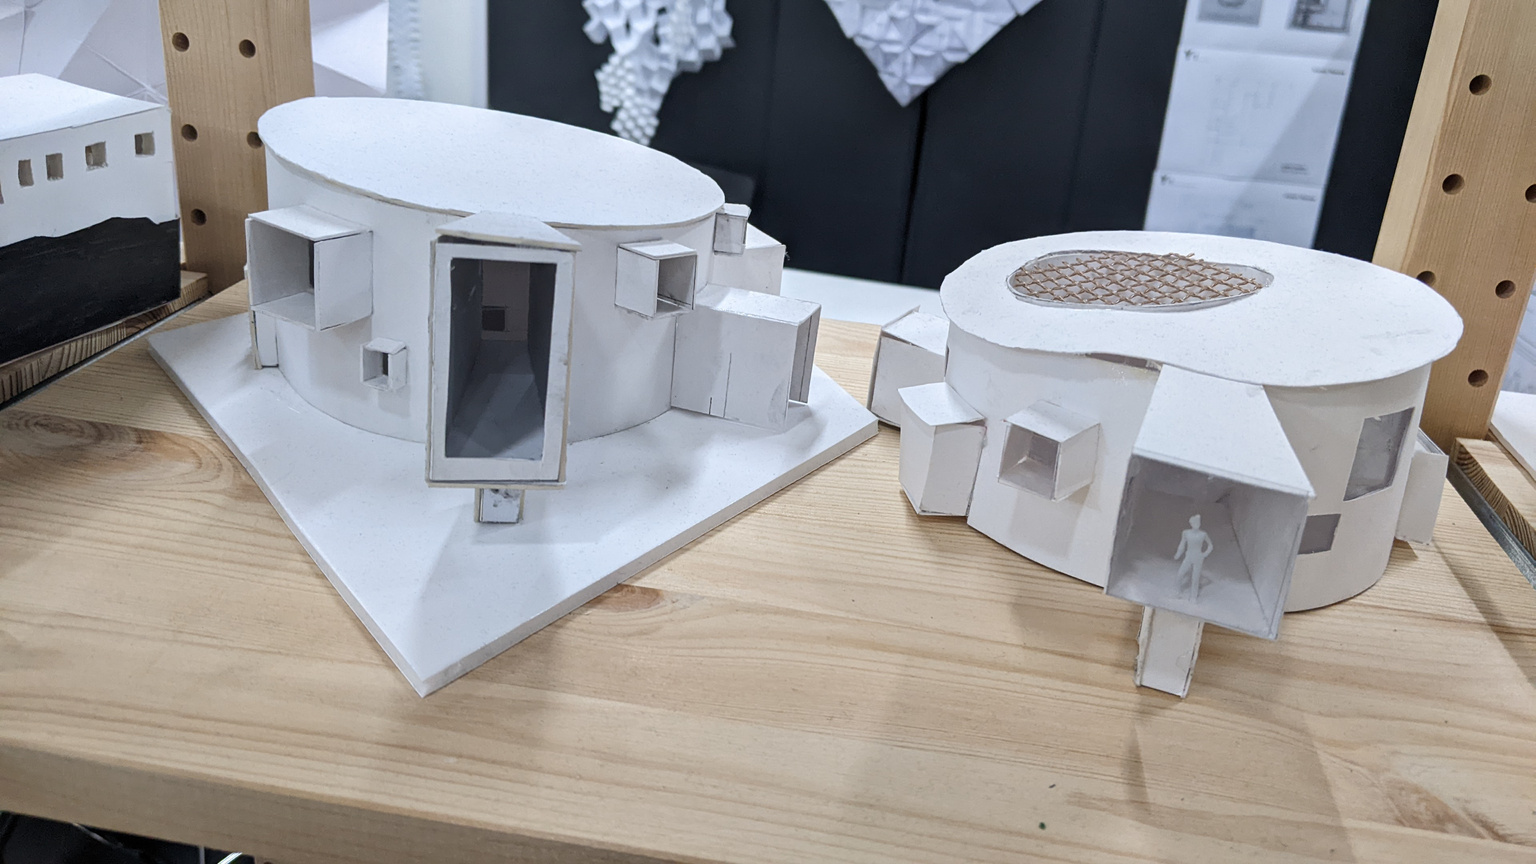

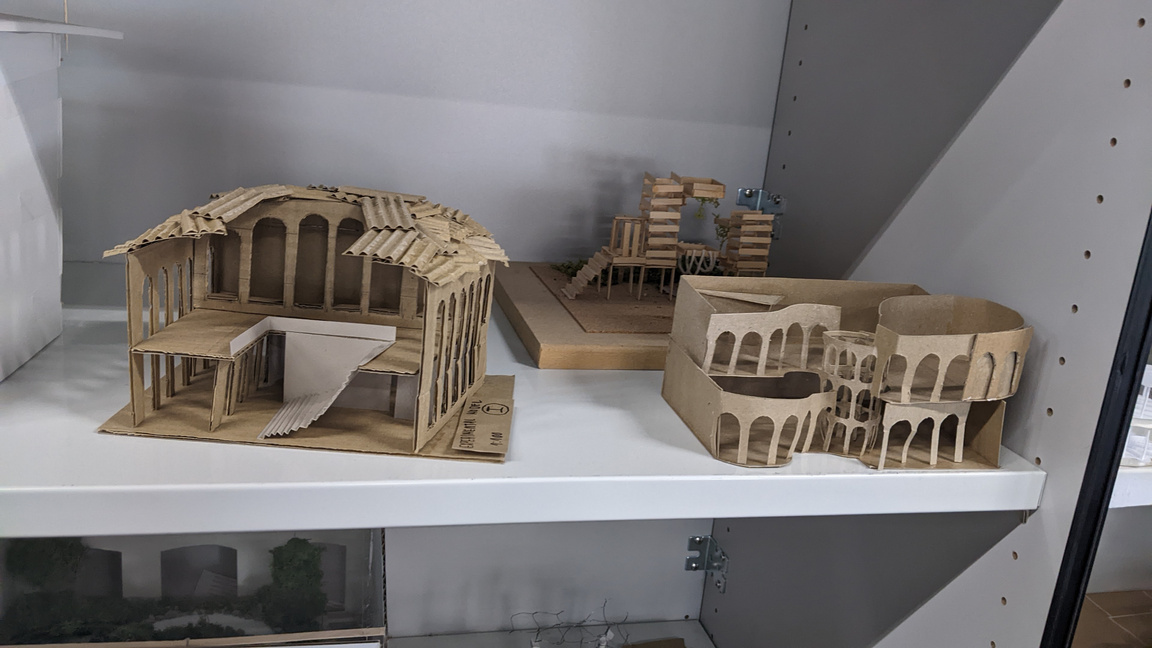
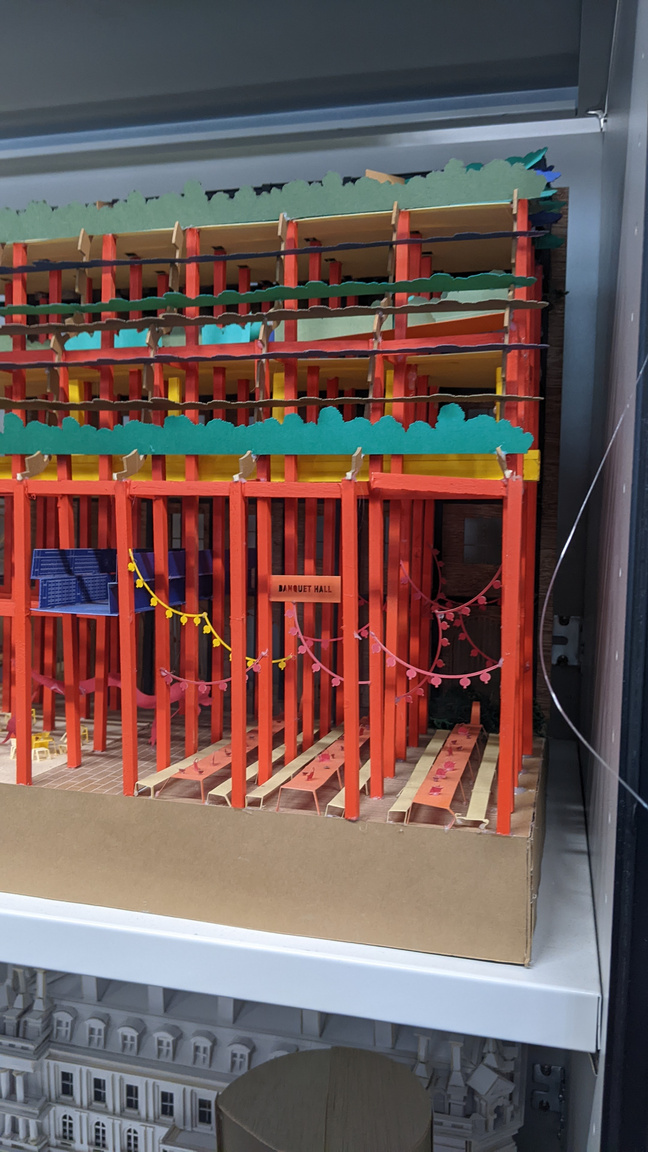


Other interesting models:


Week 4
Mid Point
Problem solving
PLANNING & production
Practical skill
Reflecting on Week 3:
evaluation
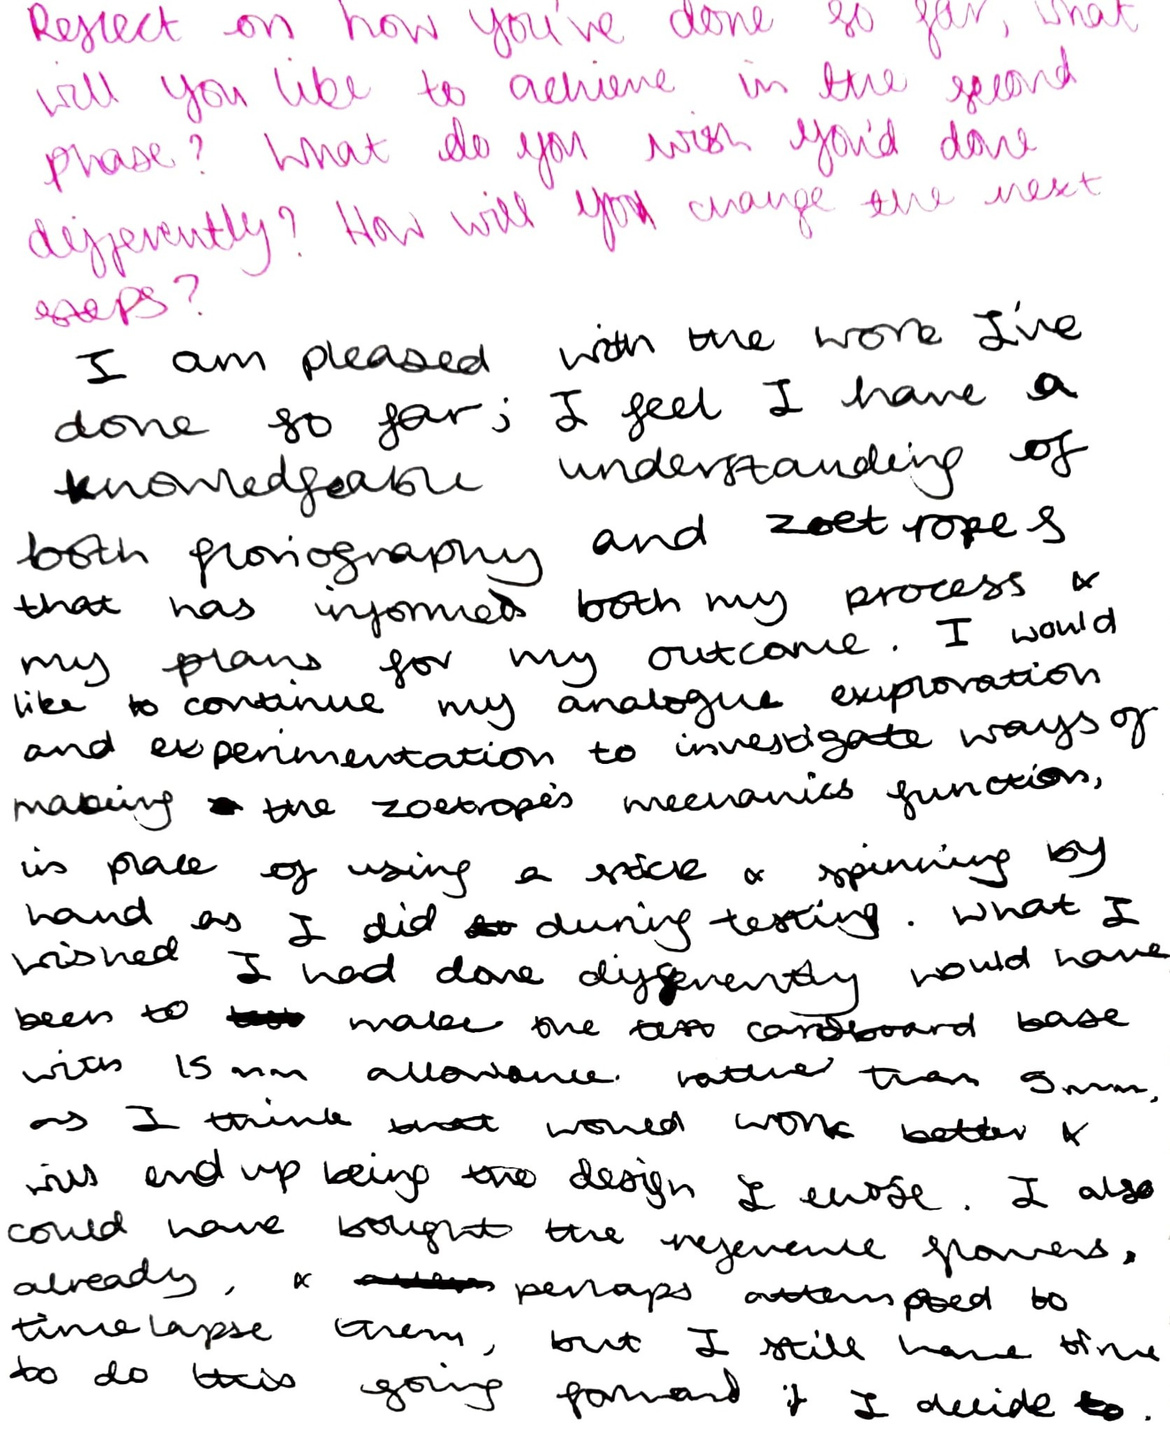

Reflect on how you've done so far, what will you like to achieve in the second phase? What do you wish you'd done differently? How will you change the next steps?
Confirming Canvas Size: to-scale composition sketches
More sketches to confirm cavas size, testing my composition in accurate scale squares.
problem solving
planning & production
The highlighted dimensions for the chosen frame: 4x4cm. After looking over the dimensions again, I think the height should be 6cm, not 5.
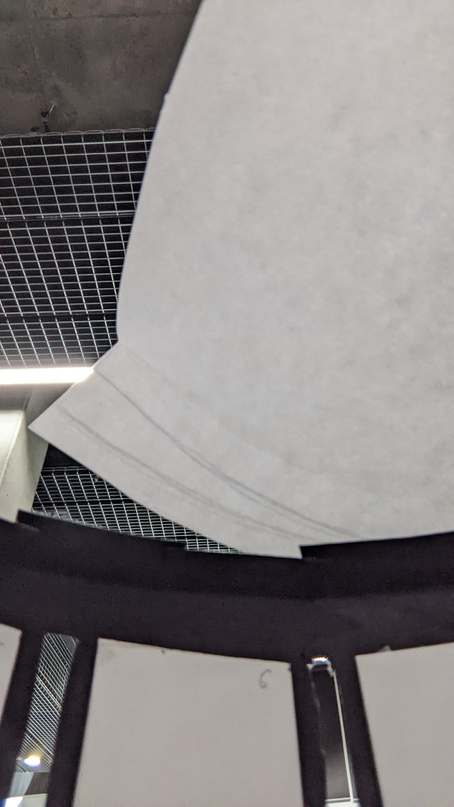
Scale sketches to test composition clarity
I sketched out my current idea for composition as a 3x3cm frame and a 4x4cm frame, in order to confirm which size would be best. From my earlier testing 3x3cm was smaller than I thought it would be, and the frames would be fairly small. I realised that if I want to include multiple flowers along with a clock, I would probably have to make my frame scale bigger in order to view it properly. These test sketches showed me that making my frame 4x4cm gives me the space to create a more clear composition, which is necessary due to the fast-paced vieweing of a zoetrope.
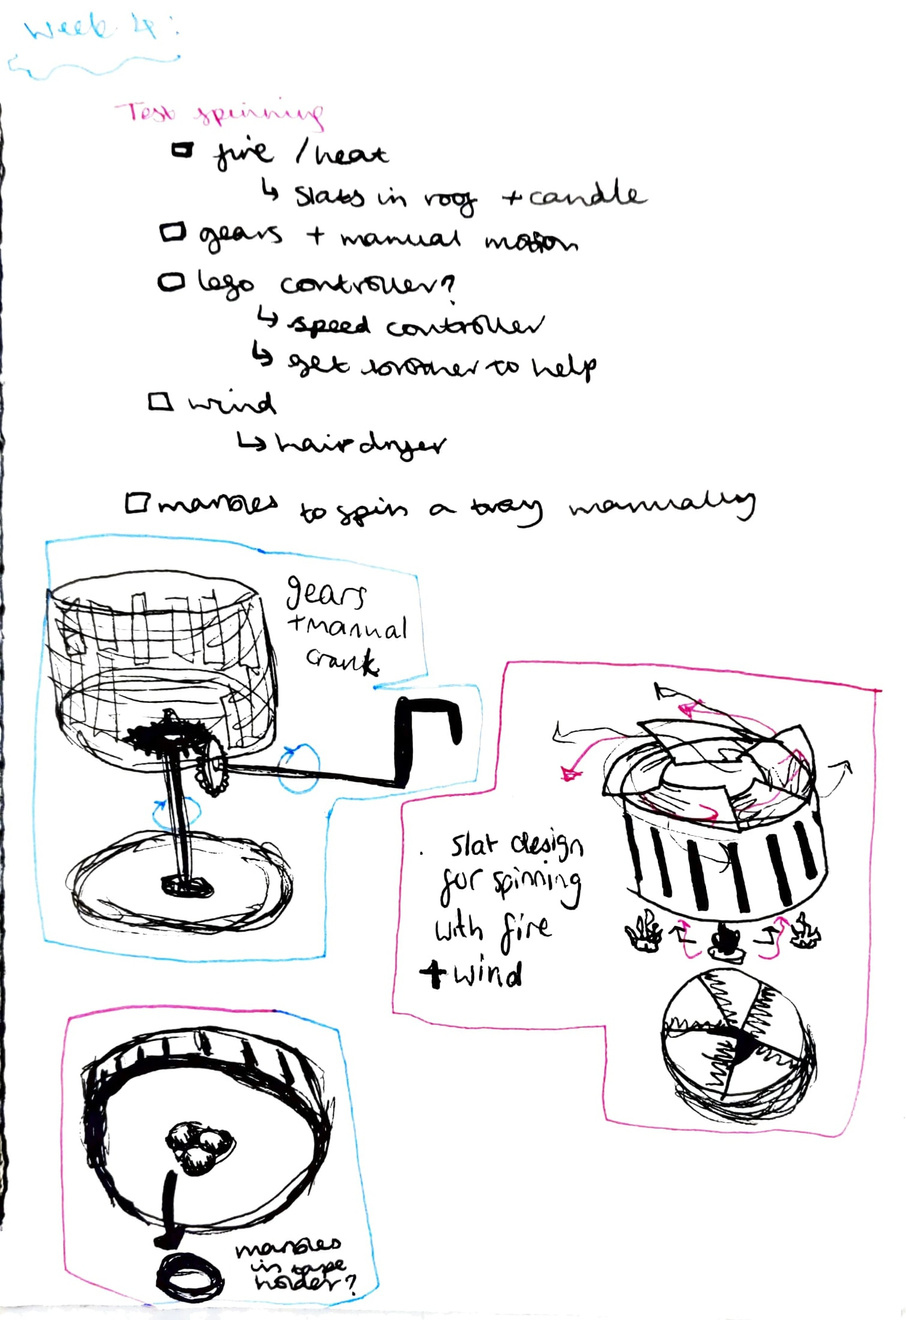
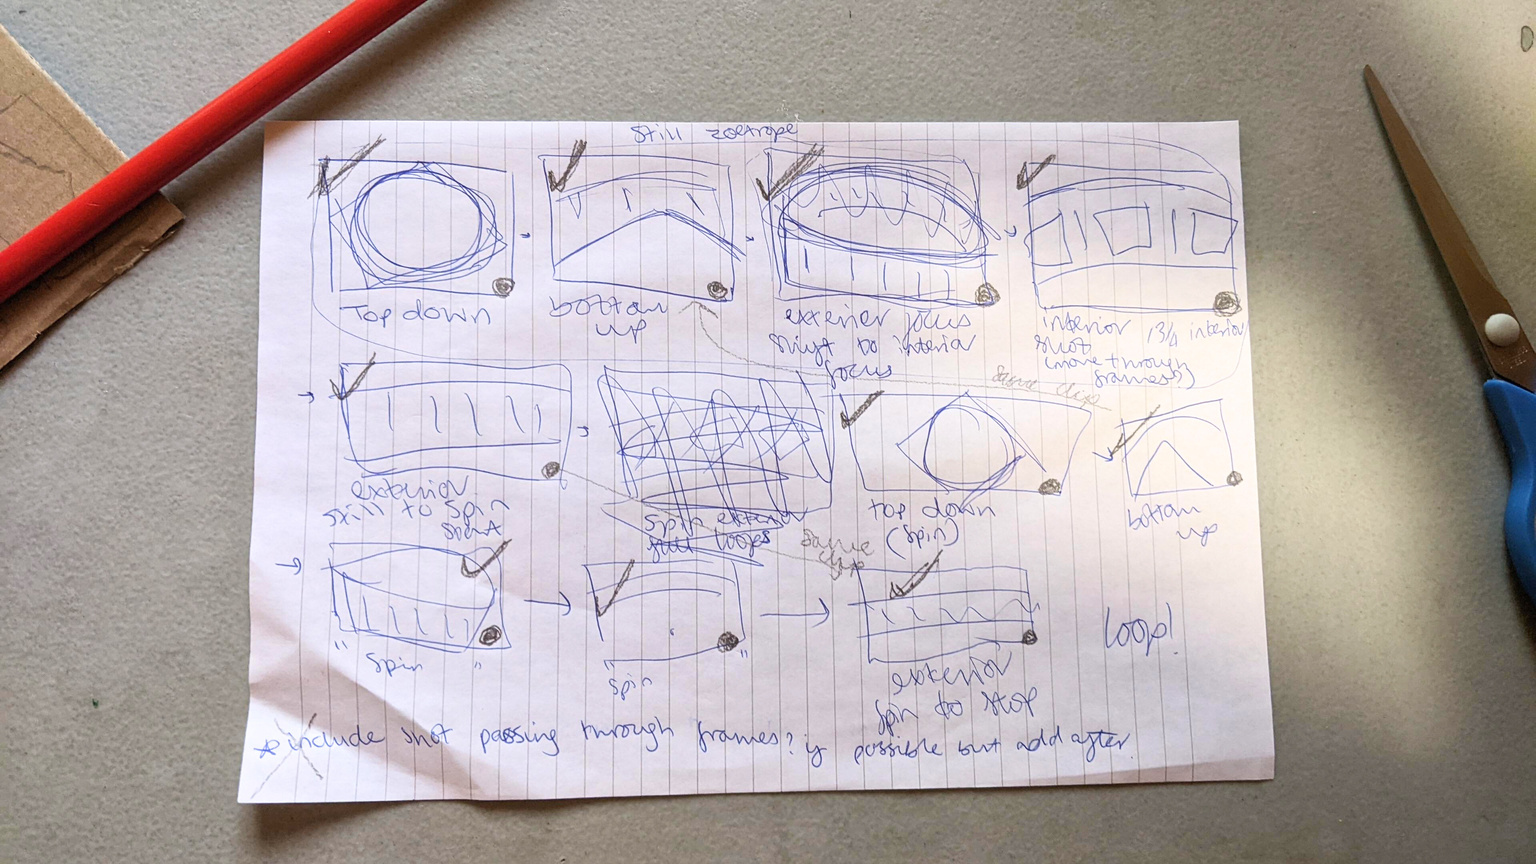
Spinning Tests: PLANNING
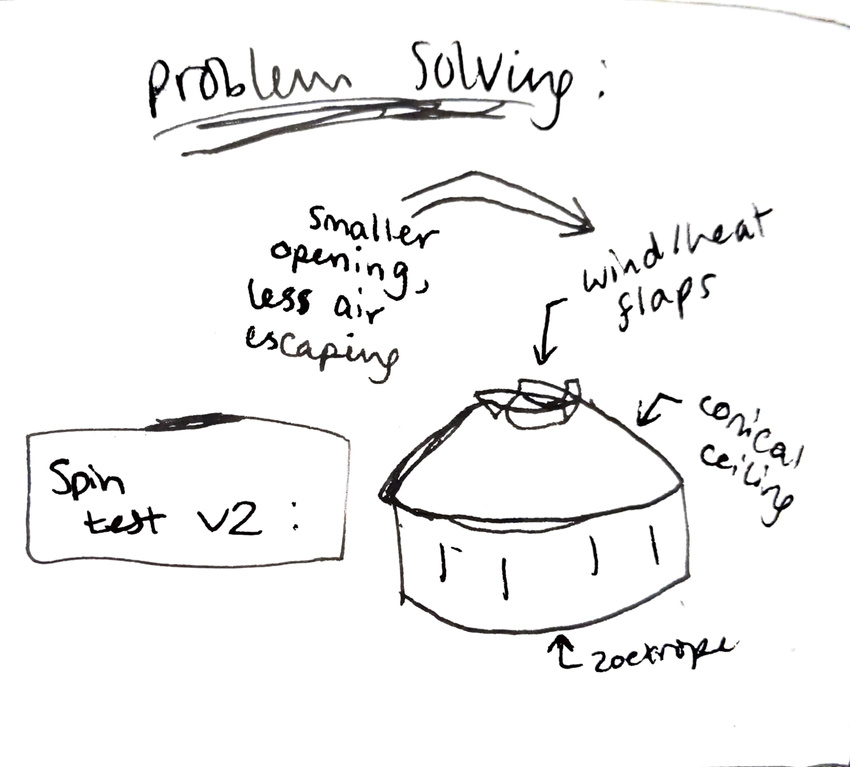
Lists and diagrams planning for what methods of zoetrope spinning I will experiment with to propel my study and improve my work physically.
Sketching methods of creating motion:
I drew some sketches of the different methods of spinning I can experiment with as listed above. I think spinning with wind could be an interesting way to create motion, apart from the difficulty in keeping a floor to the zoetrope (in keeping with the original plan to create a miniature gallery space).
Planning analogue tests:
I created a list of different mechanisms I am considering to make my zoetrope spin. Testing will be a good way to gain an understanding of these mechanics, as well as to develop my practical skills.
problem solving
planning & production
practical skill
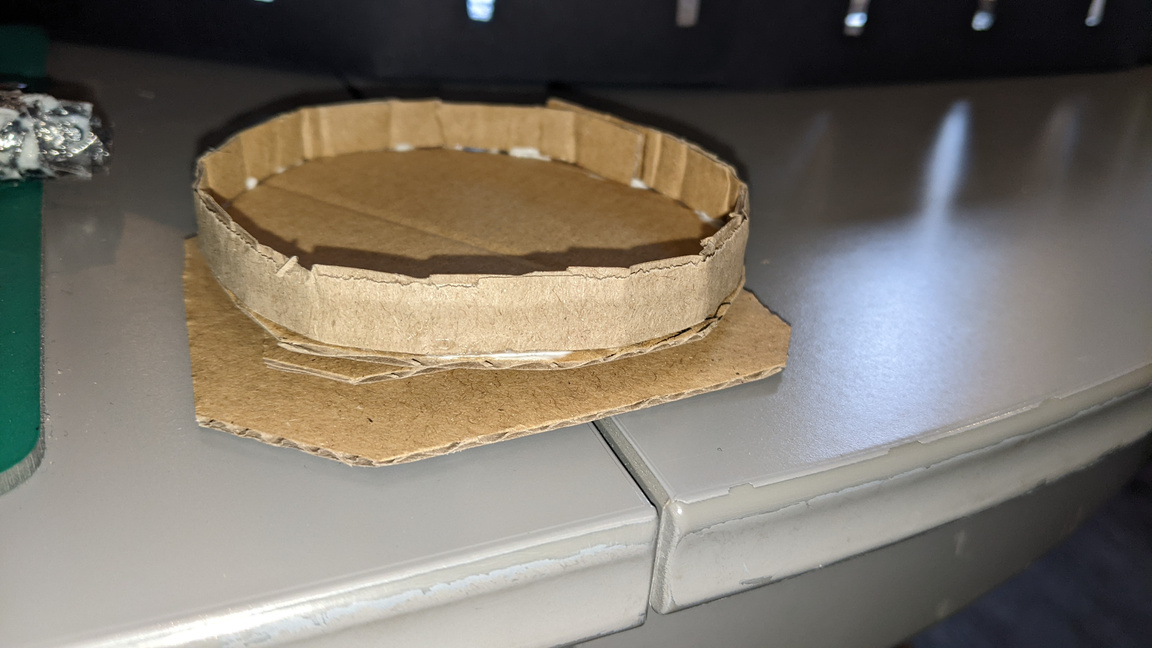
Spinning Tests: MAKING
Making a miniature zoetrope to test my dimensions and my spinning functionality plans to gain a full understanding of the physicality of my piece.
problem solving
planning & production
practical skill
Making a
TEST ZOETROPE
Making a small zoetrope to perform my spin tests on.
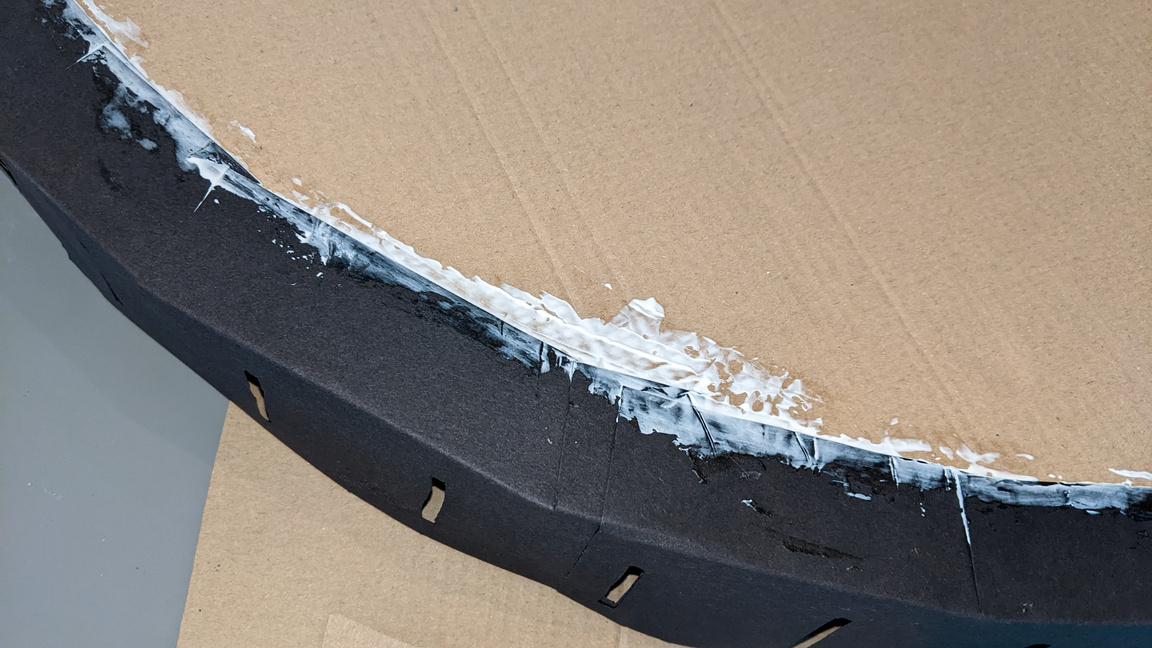
Making Process:
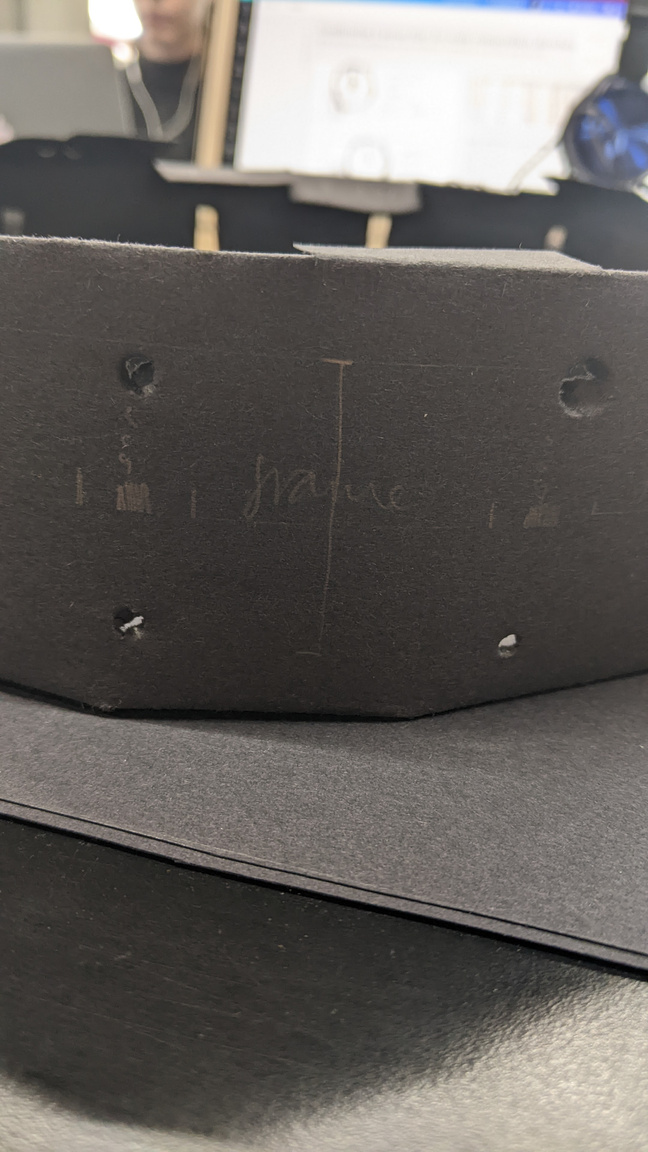
I started by creating a base from two sheets of cardboard taped together. To overcome the problem of not having a compass that would work, I used a measuring tape and a pen in order to make dots along the circumference of the base.
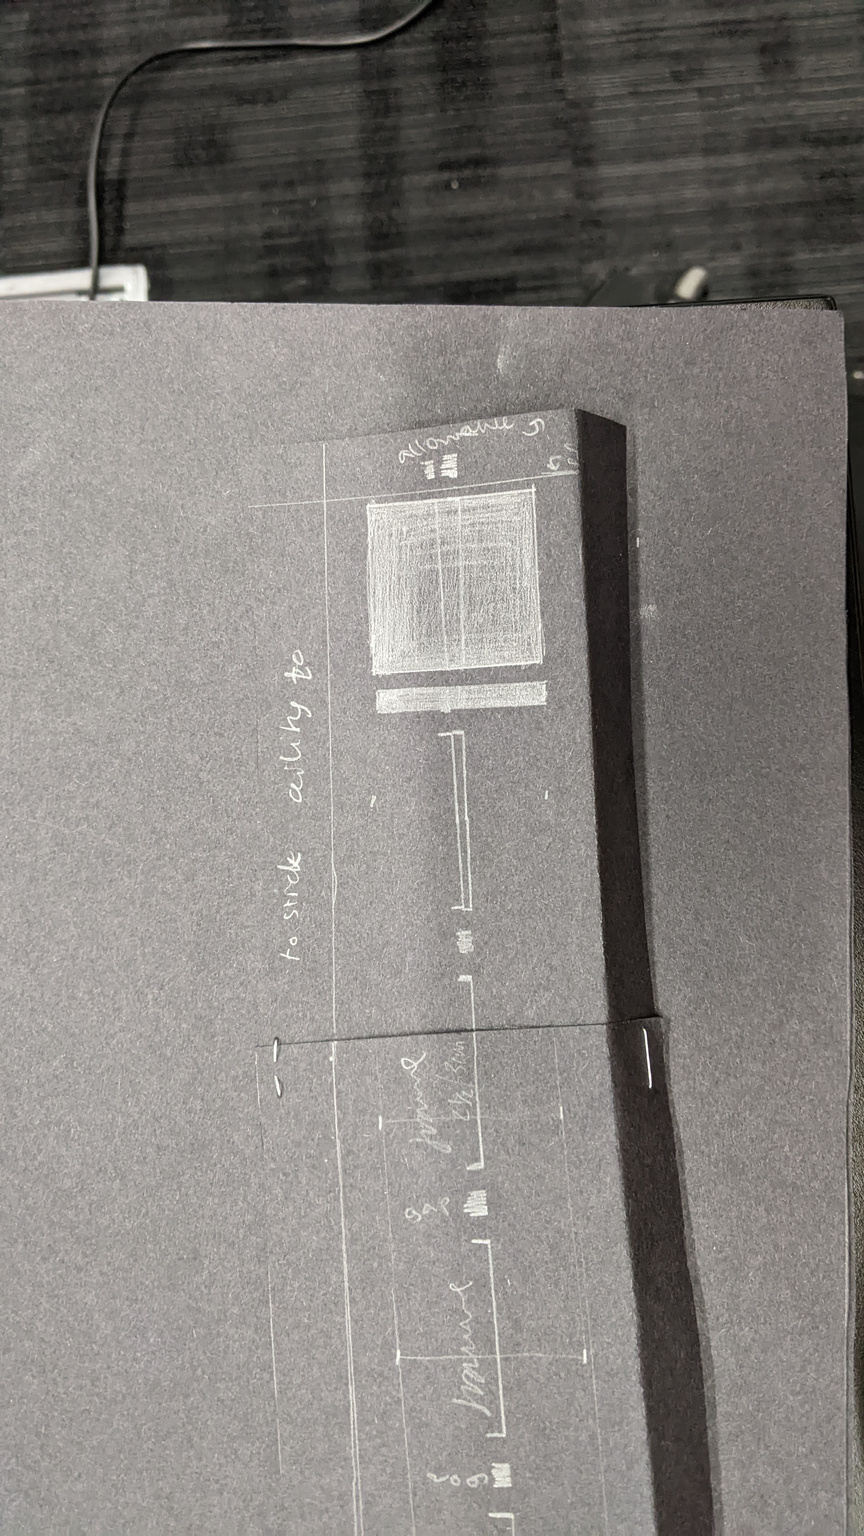
I used the dimensions I previously calculated to measure out the walls of the zoetrope. I added an allowance on the top and bottom of the walls to provide material to stick the base and ceiling to.

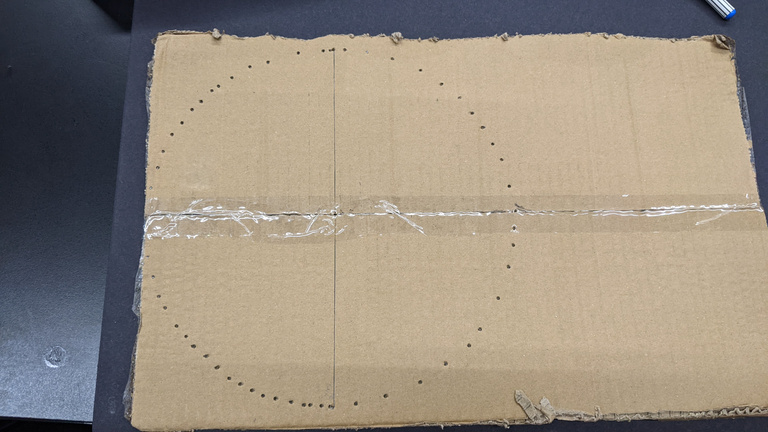
Cutting out the base based on pre-calculated measurements.

The measured out dimensions for the zoetrope wall.
Making Process:
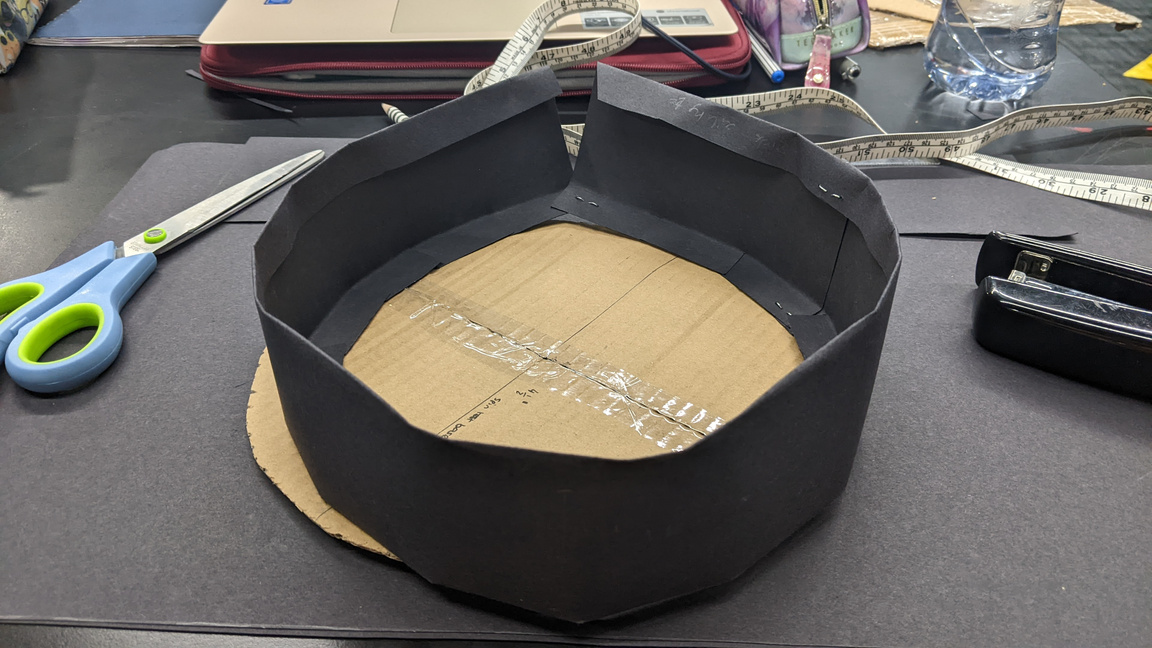
I curved the walls around the base to ensure they would fit (I had to extend the wall a little using a second piece of card-paper, which can be seen on the right of the zoetrope wall in the picture). In order for the walls to stay upright, I cut slits into the lower allowance for the paper to overlap. I later did this on the upper allowance as well. I stuck the edges together with a stapler.
I then cut out the slits. I only had a pair of scissors at my disposal in class so I had to make do by poking holes through the card-paper with a pencil before cutting out the rectangles, which worked surprisingly well. Using the pencil and scissors technique made the slits very messy though, so I will definitely be using a craft knife for the final outcome.
This is the size of the frame compared to the size of the viewing slit.
Curving the walls round and securing the edges with a stapler.
Cutting out the slits.
Poking holes to cut the slits with.
Slits in the card-paper allowing it to curve without folding.
Making Process:
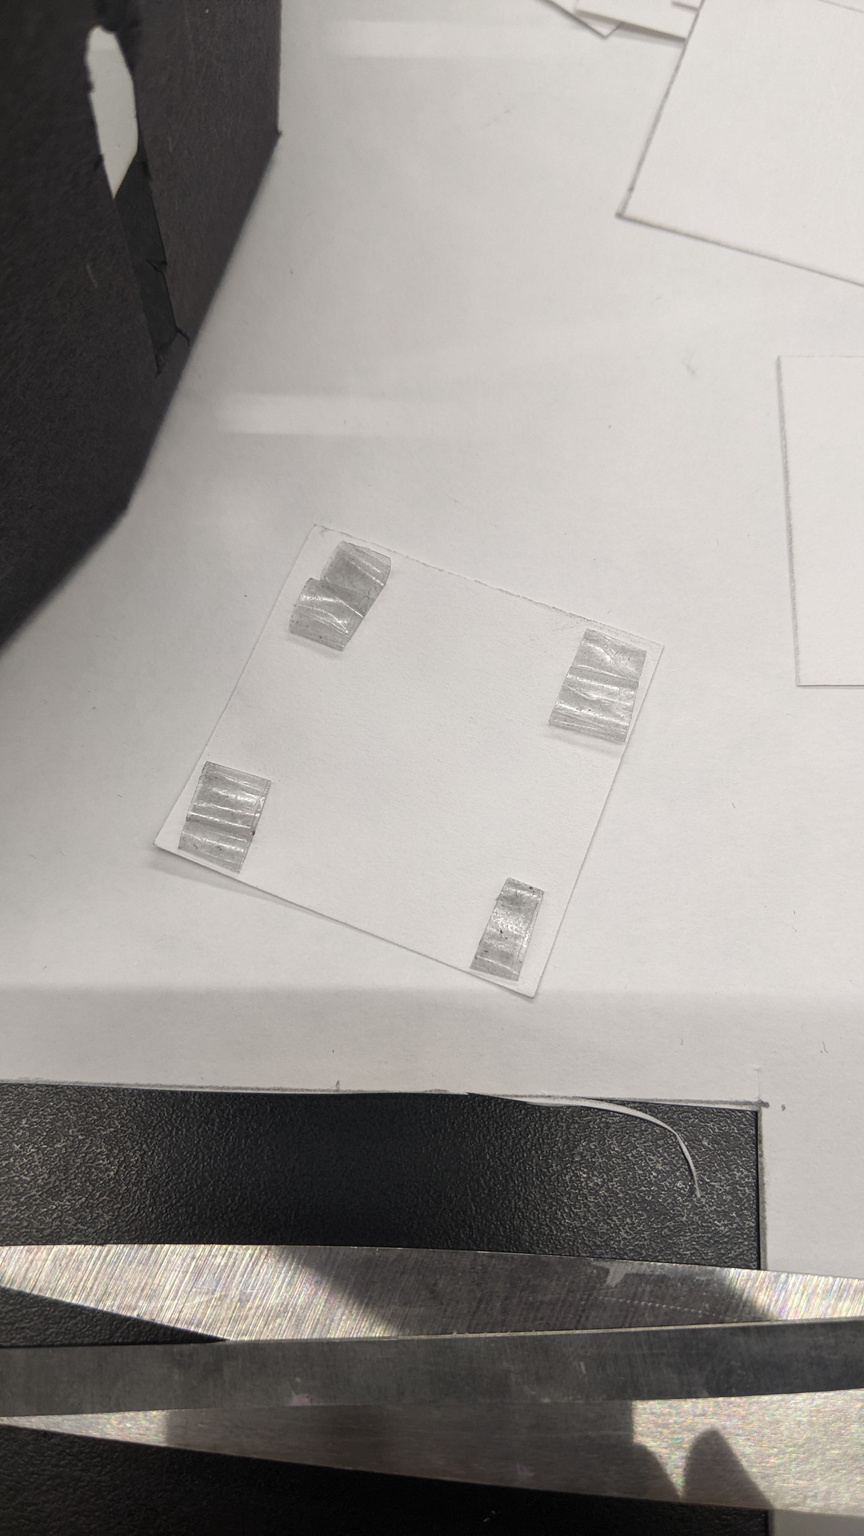
I cut out each frame 4x4cm and folded over tape to make double-sided tape and added it to the corners of each piece of paper. After making sure they all fit by sticking them on, I drew out a simple animation to test the zoetrope.
The final zoetrope test frame.
Cutting out the frames.
Makeshift double sided tape.
The test frames in place.
The test frames in place.
Frames drawn in pencil.
Frames drawn in pencil.
Temporary functionality:
I loosely stuck the base on a pencil in order to spin it.
Test Frames:
I drew a simple flower animation to test the zoetrope. I drew them in pencil before outlining in black pen for clarity.
Frames drawn in pen.
Frames drawn in pen.
Temporary spinning test mechanism.
Individual test frames 1-13, and a GIF of the outcome.

Spinning Tests: TESTING
Performing an analogue test in order to gain an understanding of the physical functioning of spinning mechanisms; by doing so I will be able to determine the best method to implement into my own zoetrope practices for the outcome of this project.
evaluation
problem solving
planning & production
practical skill
heat/wind test
Attempting to make my frame able to spin above heat or wind; this test failed before it began.
Prepping for the test - Failed attempt:
With this test I wanted to try and create a wind/heat tunnel that would direct the wind/heat energy to propel the zoetrope. My first attempt was to make panel flaps like in my sketch plan: I traced the base to copy the circumference and cut out a similar looking flap shape. After consulting with my tutor I discovered that this method will m not work due to the weakness of the paper and the much too open design of the flaps. Below are photos of my process with this first failed attempt.

Process photo for the failed test attempt.
2nd Attempt Plan:
I planned how to fix the problems of my first attempt for this test.This test ended up being left unfinished due to impracticality and time constraints, however it would be an interesting method to explore if this project was expanded upon.
Test Conclusion
I will not be using wind or heat powered spinning for my zoetrope due to the precision needed to create a working wind tunnel. I will perform other tests on other methods as the project continues.
Animation Workshop: Acting for Reference:
practical skill
Sketching from References:
Improving my drawing through 30 second/1 minute sketches from reference. I found thise workshop very helpfuil and can see clear improvement throughout, particularly with some of the animal sketches.

Easter Break
Easter Break
practical skill
presentation
planning & production
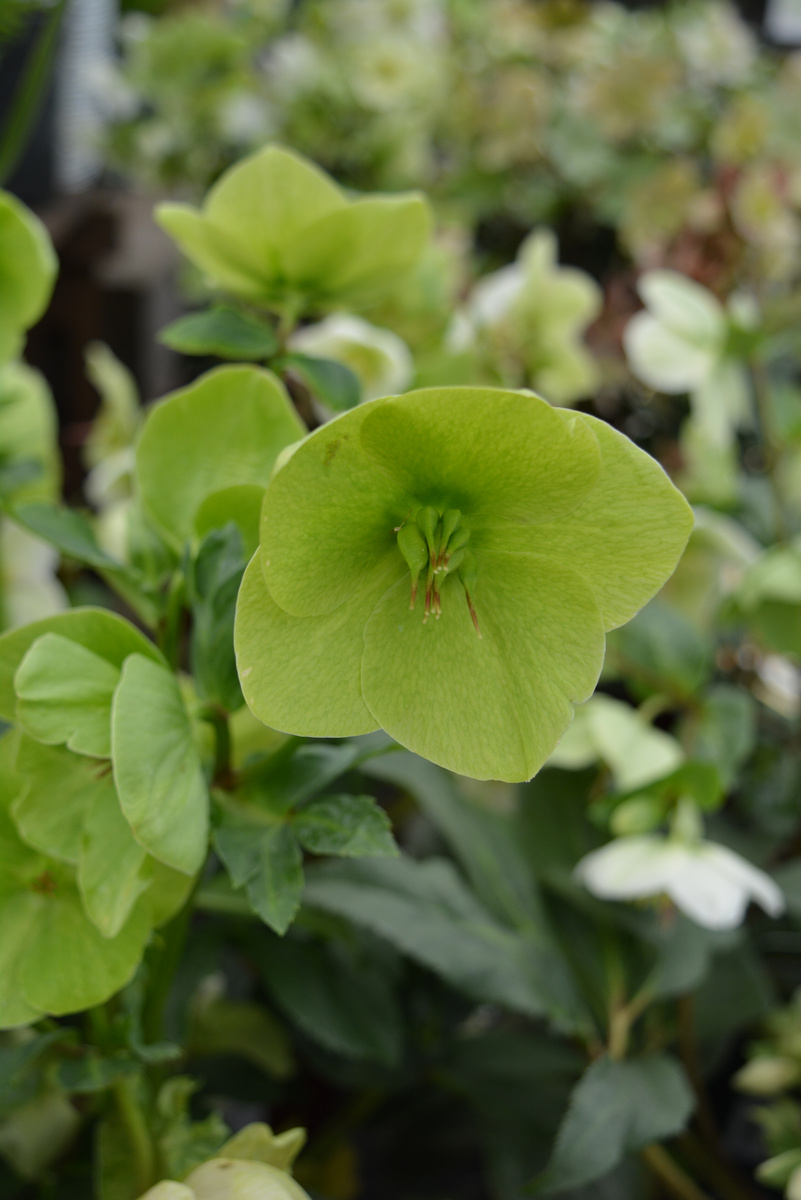
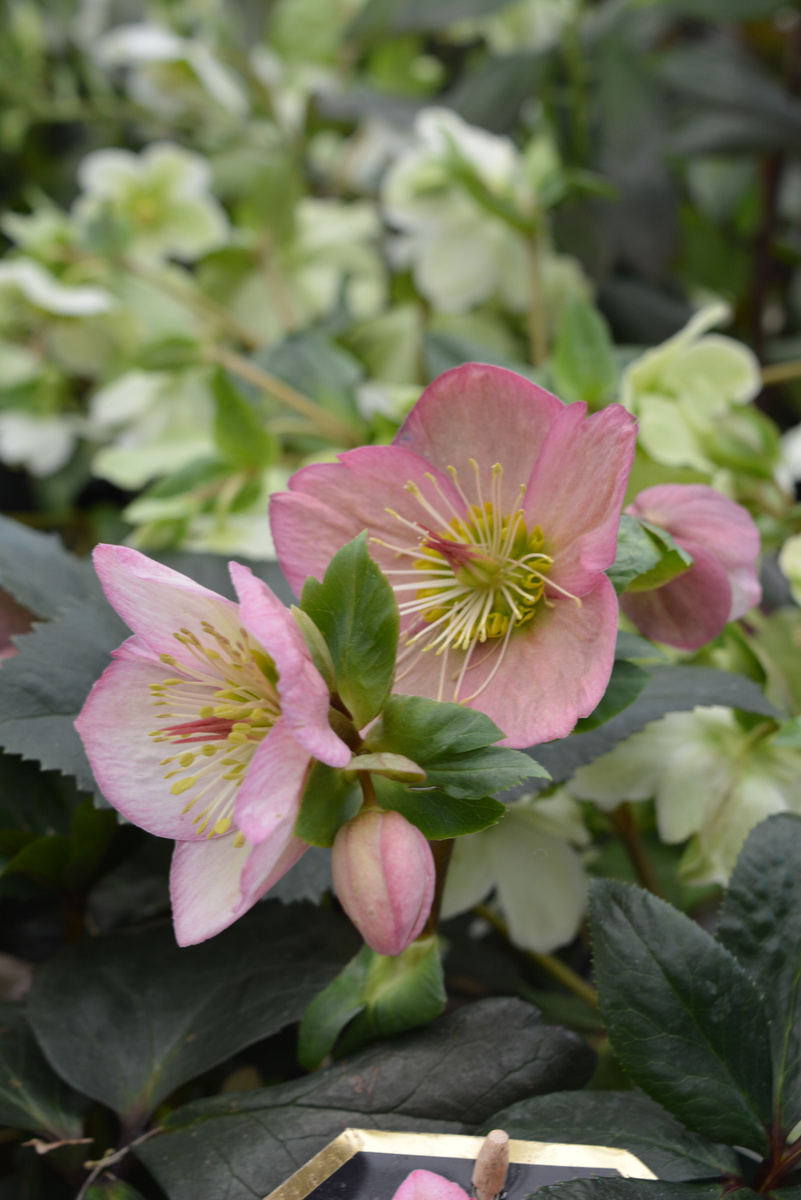
OBSERVATION: Flowers & Flower Decay:
REsearch
practical skill
Easter Observation:
Throughout the holidays I saw many flowers that I recorded for observational research. Due to the warmer time of year more flowers were in bloom, so I was keeping an eye out for the flowers that I had researched. We also had daffodils in our house, so I photographed them as they were decaying and blooming to further reinforce my understanding of flower life and plant anatomy.
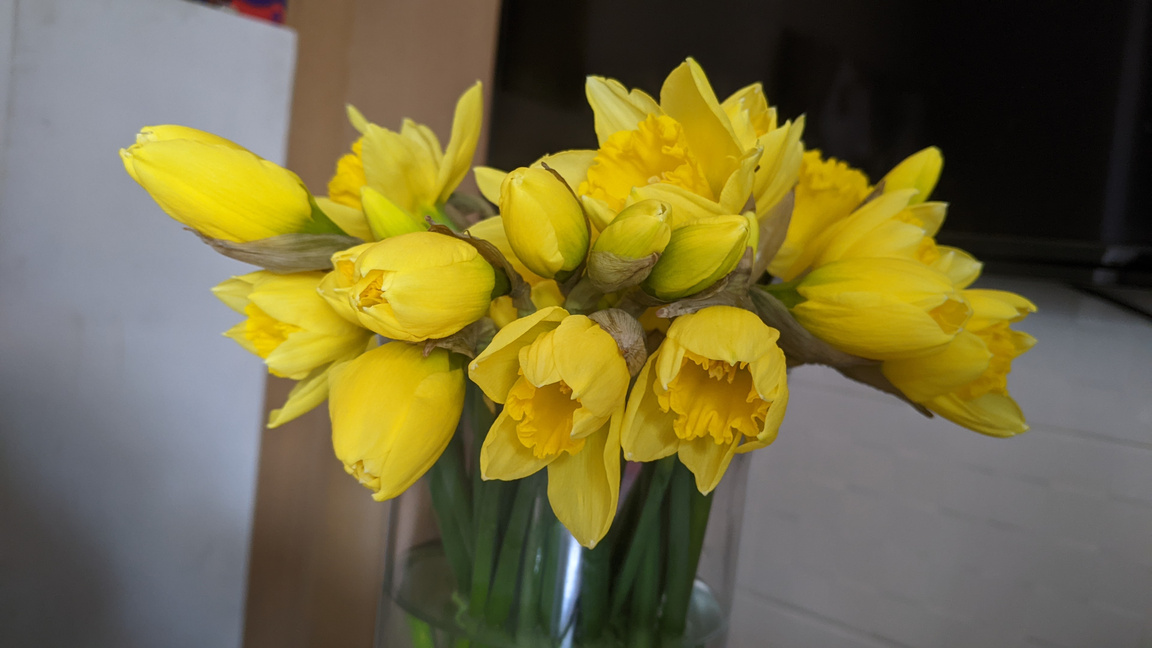
Daffodils:
Easter Flowers at B&Q:


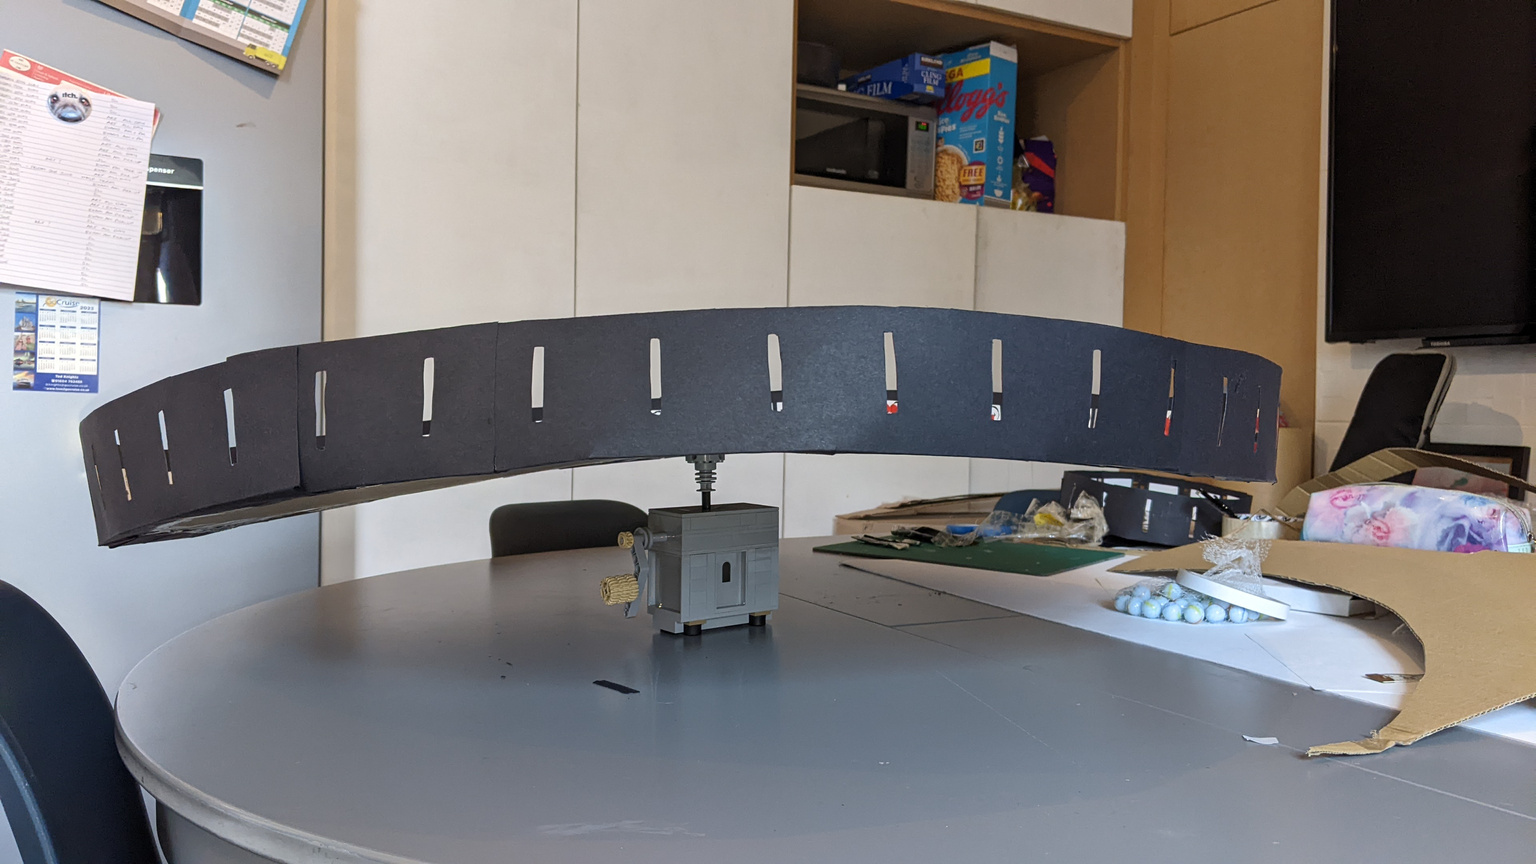
Spin Tests & Development: Lego for Functionality
Lego gear test
Planning:
Due to my brother's love of Lego, I have access to gears and mechanics through my brother. In order to test spinning through gears, my brother offered his Lego knowledge to build me a spinner for my test zoetrope. While he worked on that, I borrowed some of his Lego in order to create an idea of a frame to spin the walls separate to the floor.
planning & production
presentation
practical skill
Creating a frame:
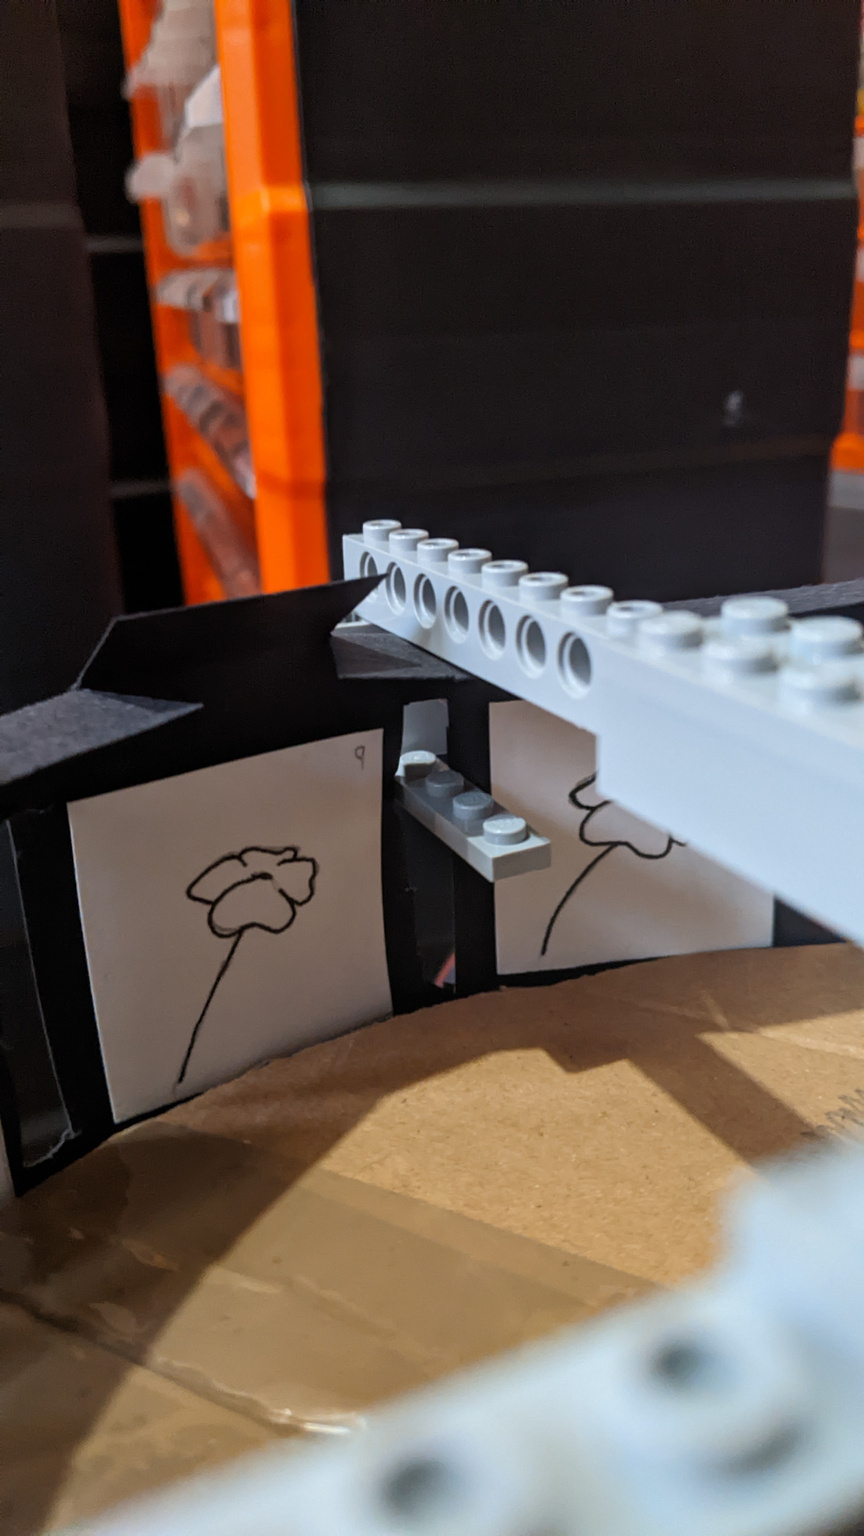
I am not very skilled with Lego so my frame is not very structurally sound. I created a cross bar across the roof of the zoetrope and joined it to the walls with hooks into the viewing slits. I then finally attached a spindle to the centre of the frame, which would theoretically attach to a gearbox below (if it were to work to spin only the walls separately to the floor - this would allow people to stand inside, as if the model was representing a gallery exhibition room).
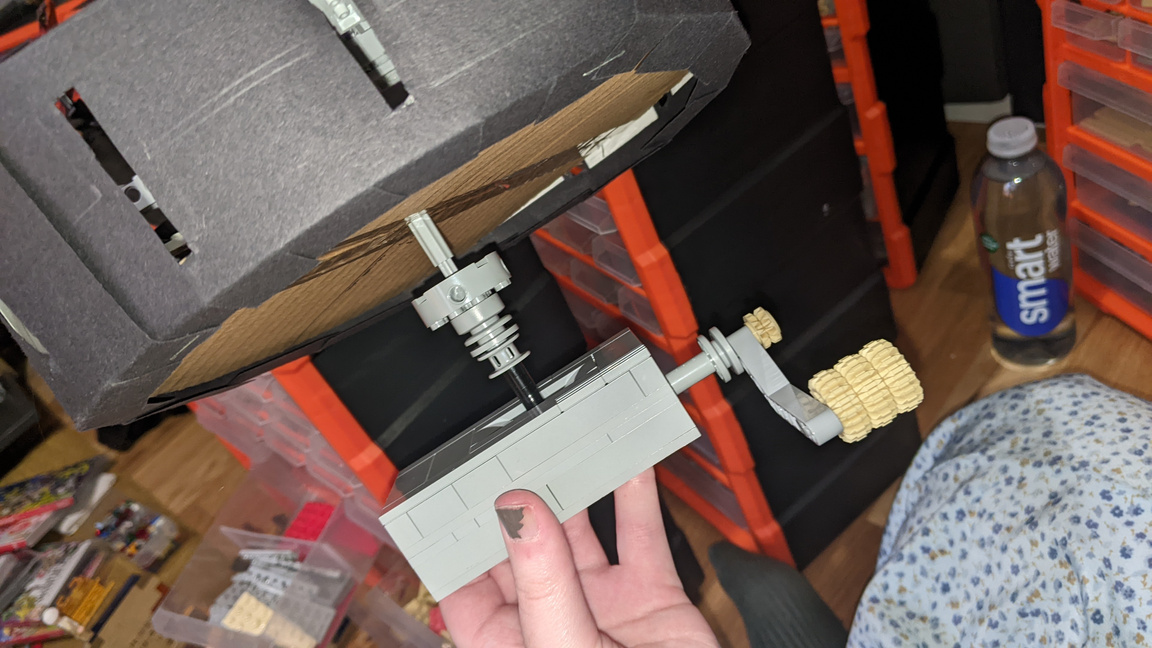
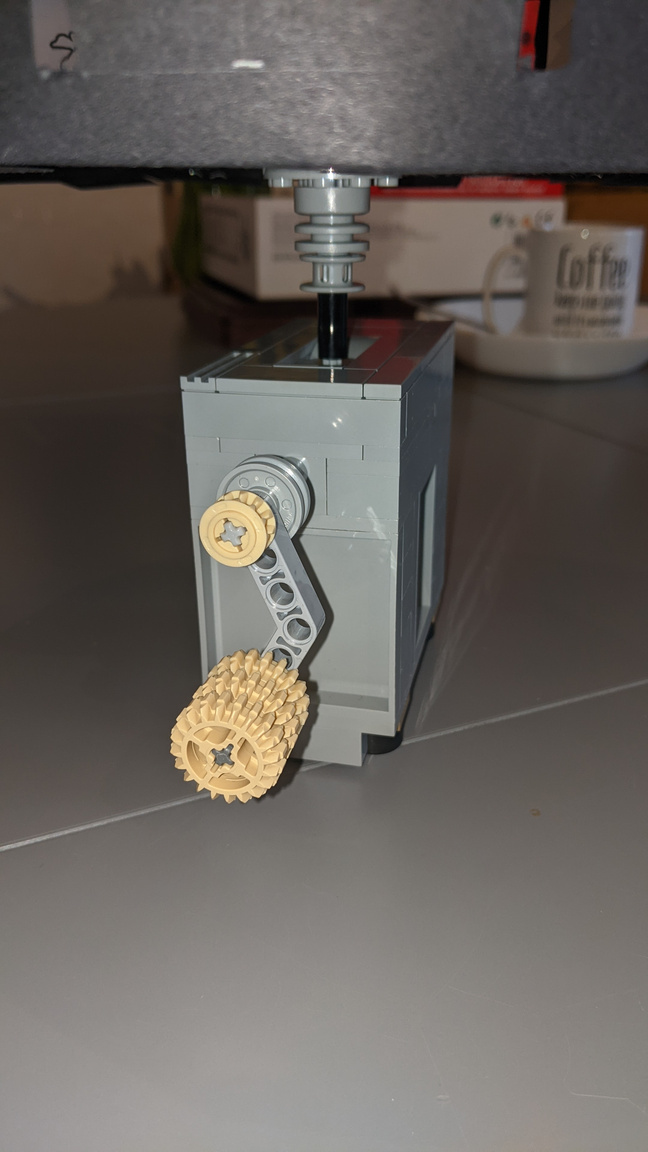
My Brother's Lego Gearbox:
My brother created a spinning mechanism from a Lego gearbox. He added a spindle to the gear mechanism and created a small platform for the base of the zoetrope to rest on. After surrounding the mechanism with a box, he lengthened the handle and added a taller base so that it could stand on its own without needing to rest on the edge of a table (for the handle to turn). Lastly, he added horizontal tires to the bottom to stop the box from slipping.
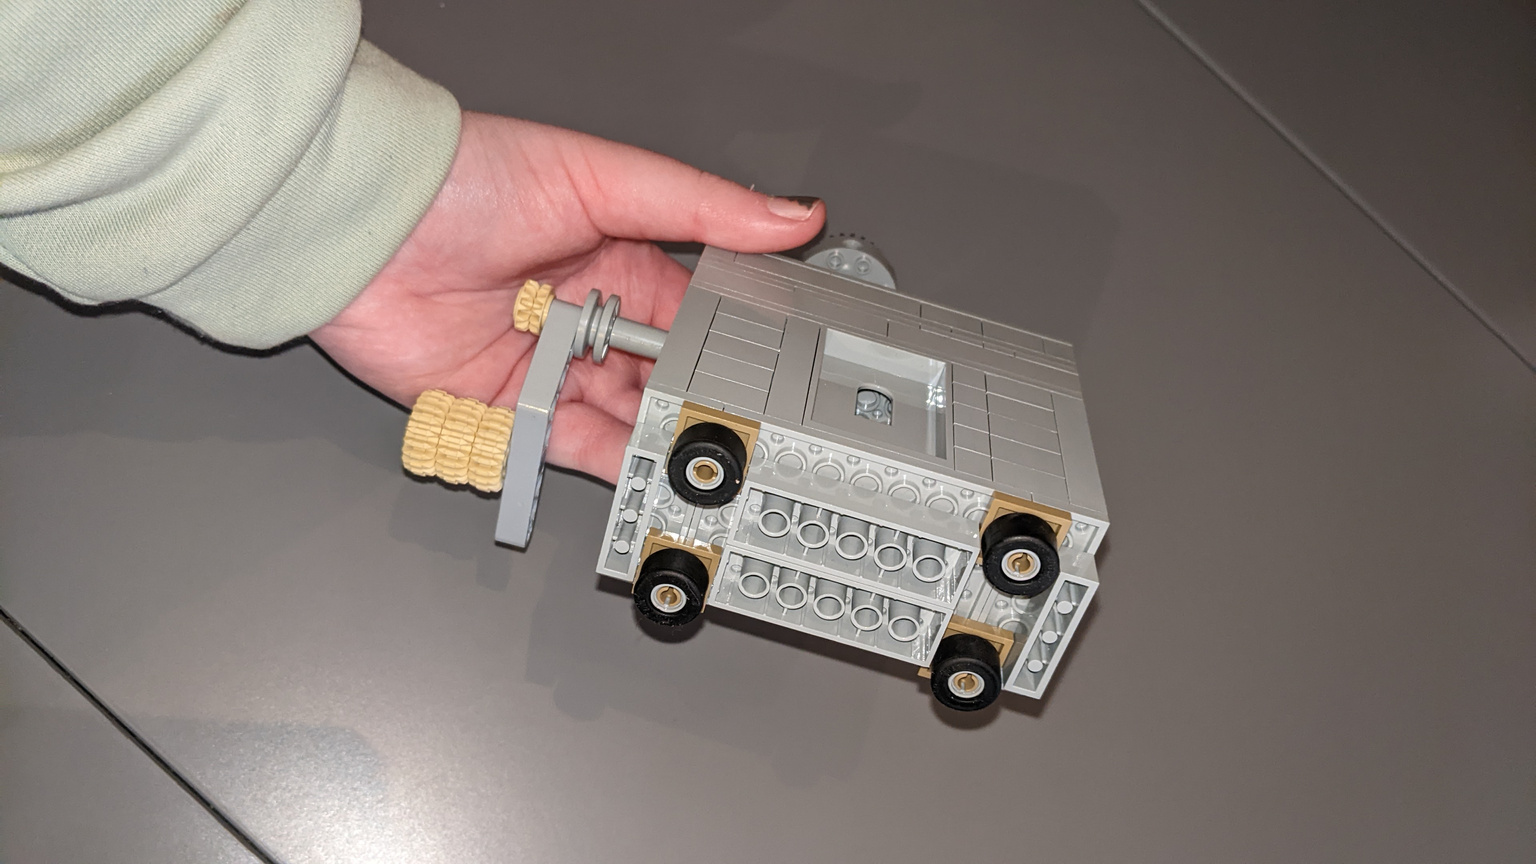
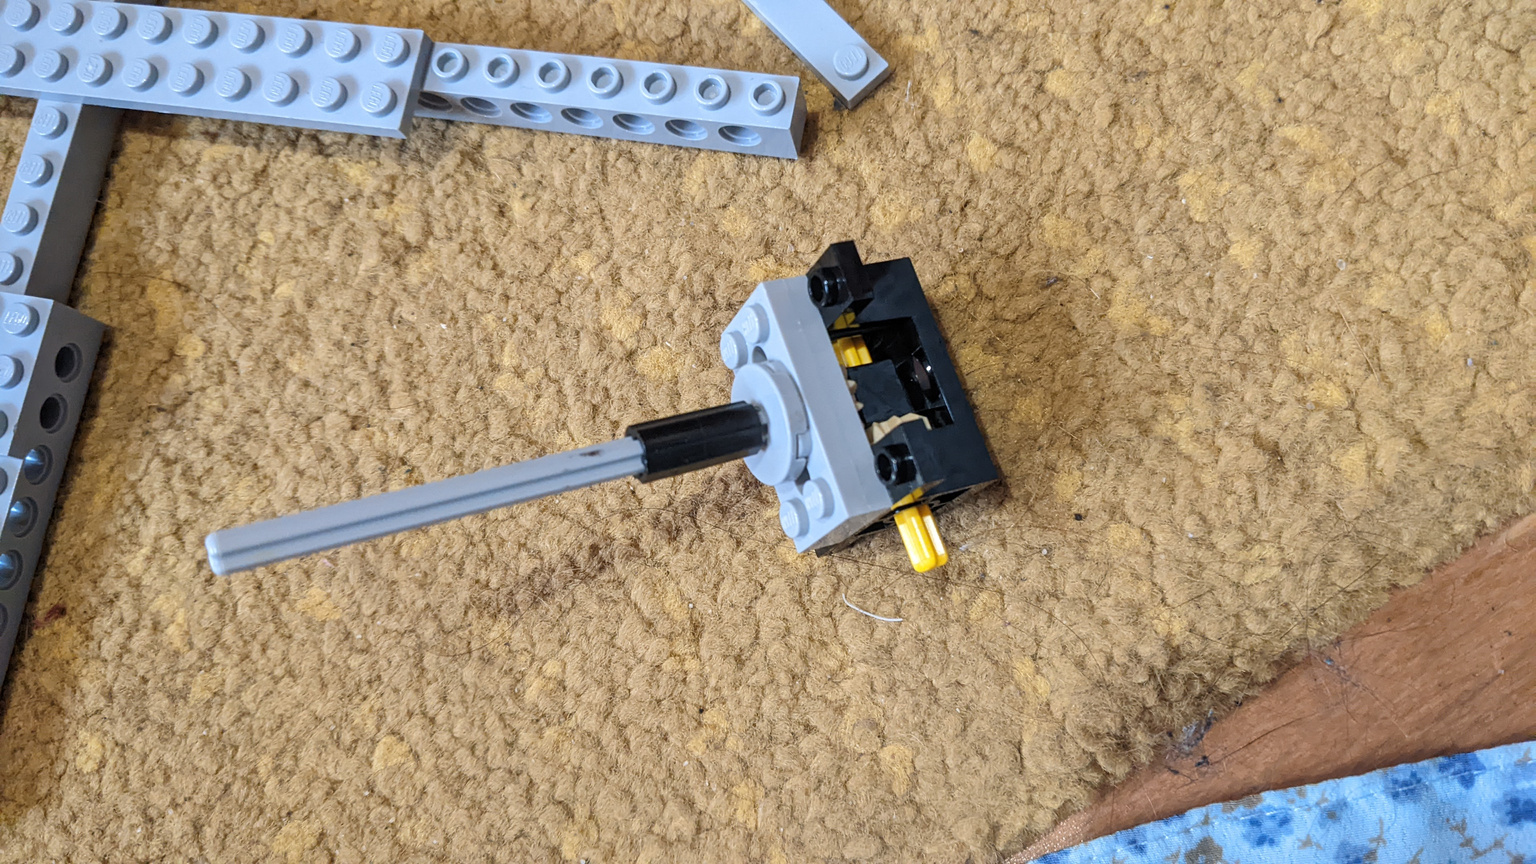
Final gear spinner:
Test Conclusion
I will most likely be using an improved/enlarged version of my brother's Lego gearbox spinner to use in my final zoetrope. It is incredibly efficient, sturdy, and easily controllable.
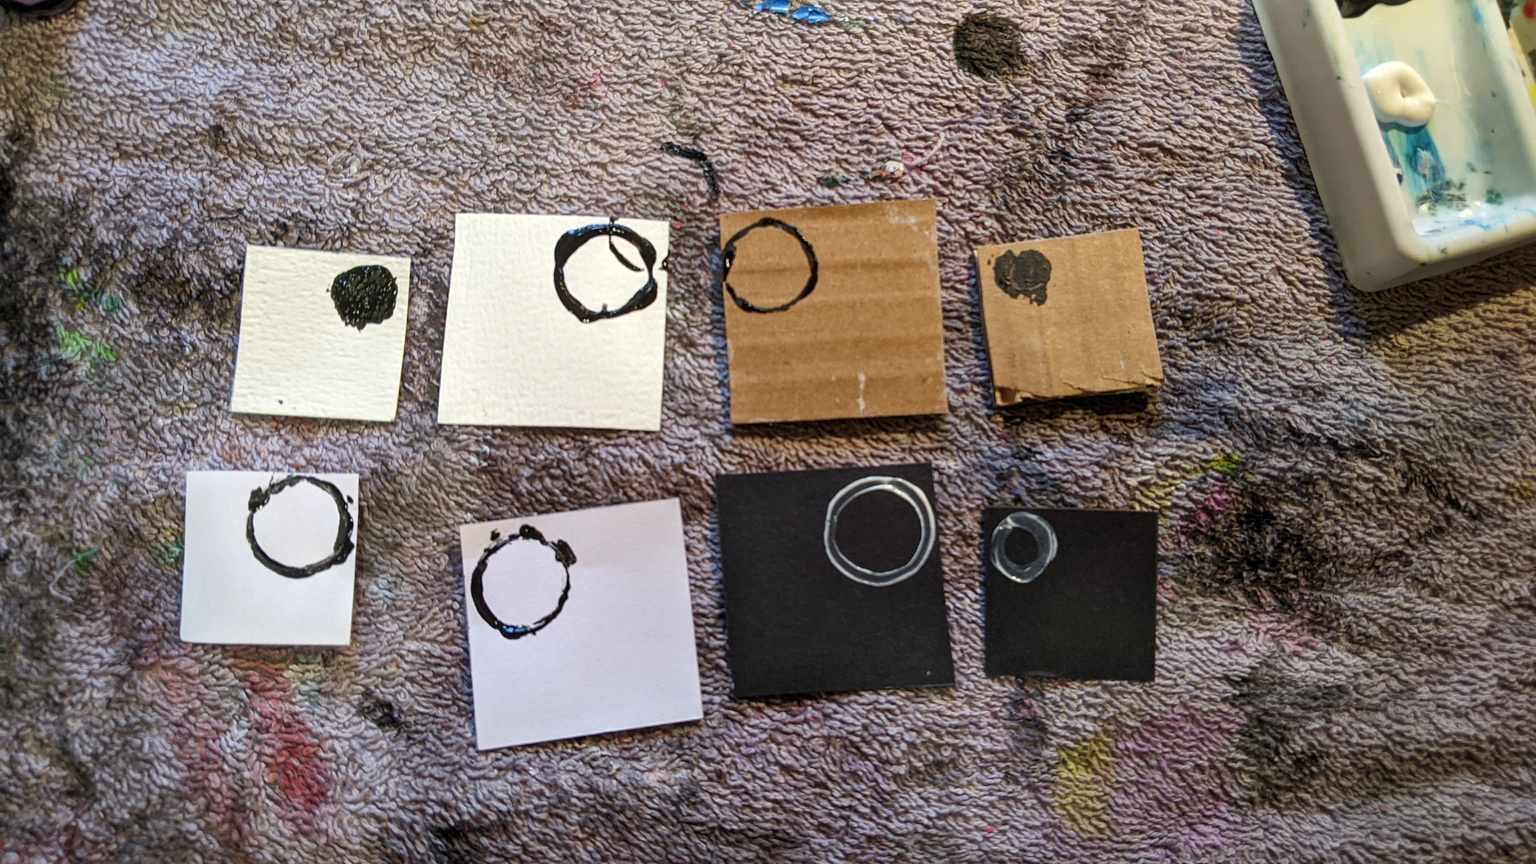
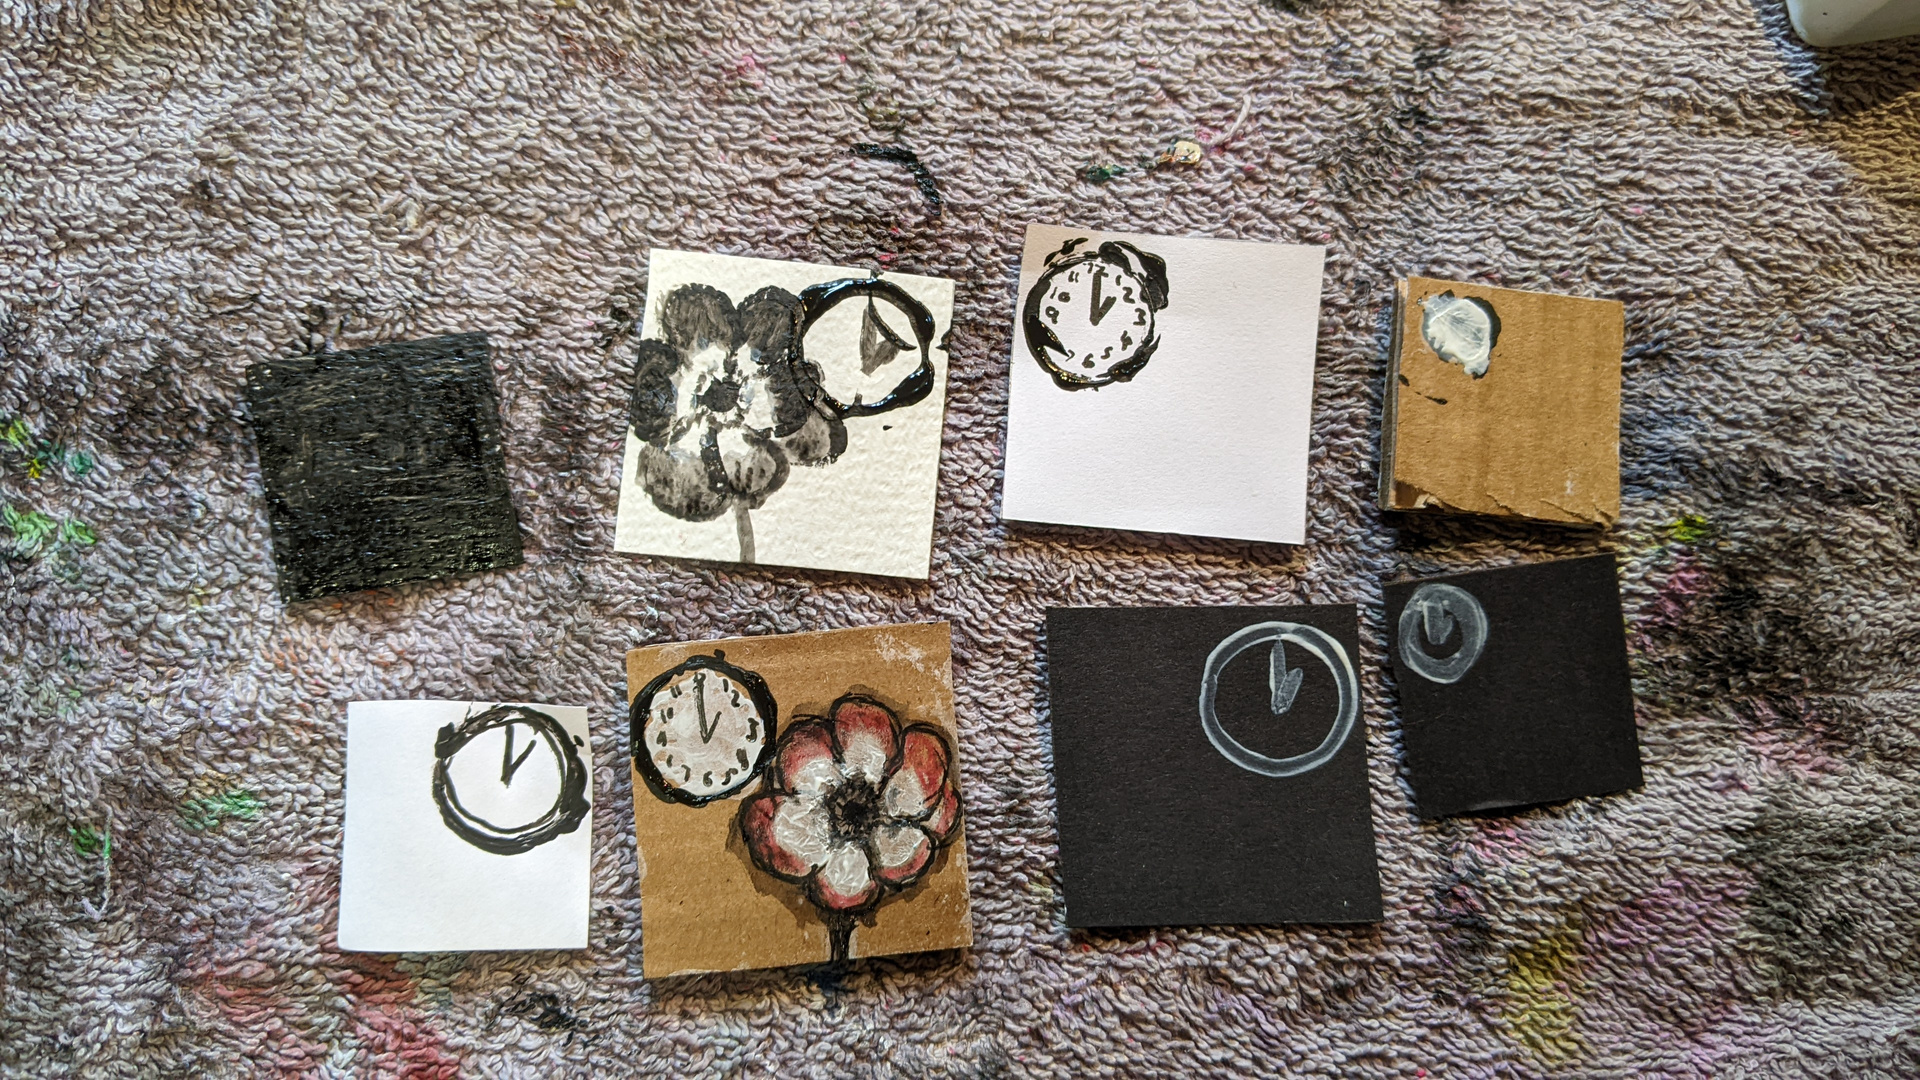
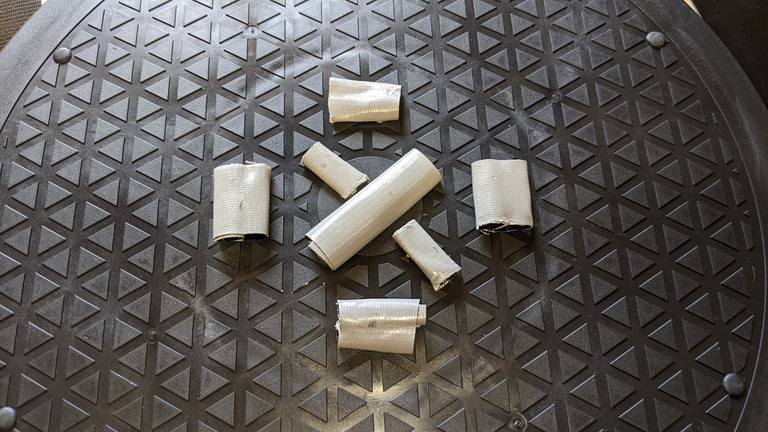
FRAMES: Canvas Material Tests
Testing different media on different materials (3cmx3cm and 4cmx4cm) to decide on which to use for the zoetrope frames.
Material being tested:
Water colour paper
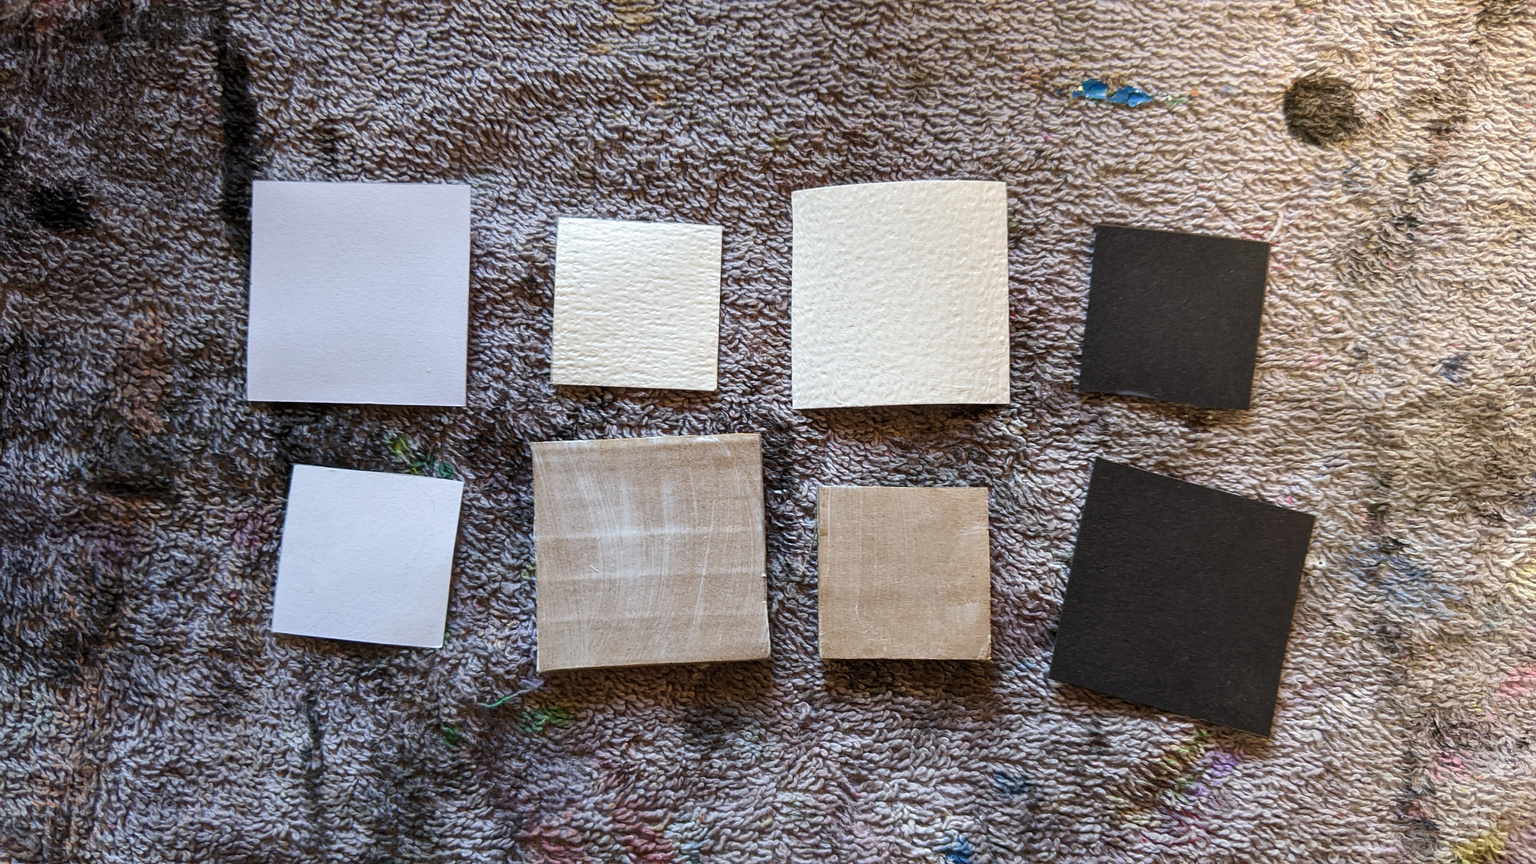
Regular paper
Cardboard
practical skill
presentation
planning & production
Evaluation
Thin black card
Tests:
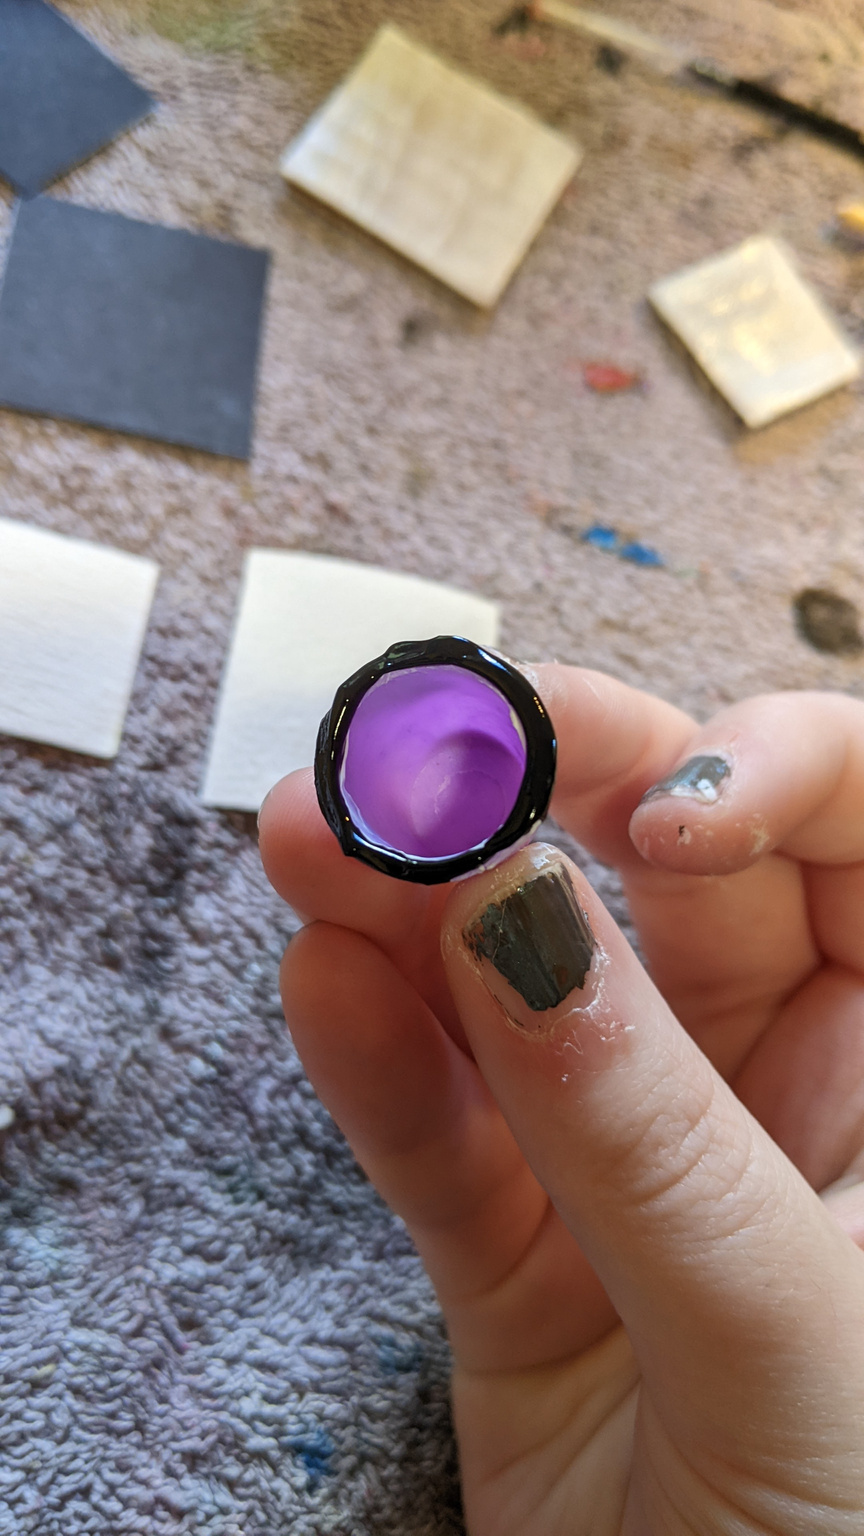
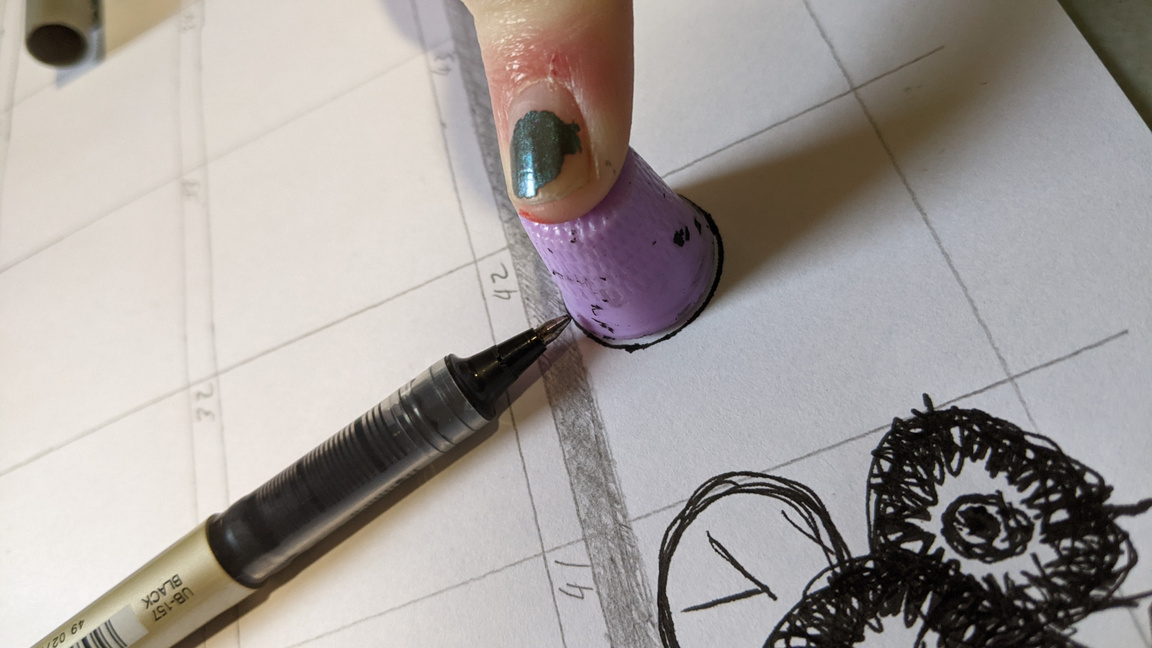
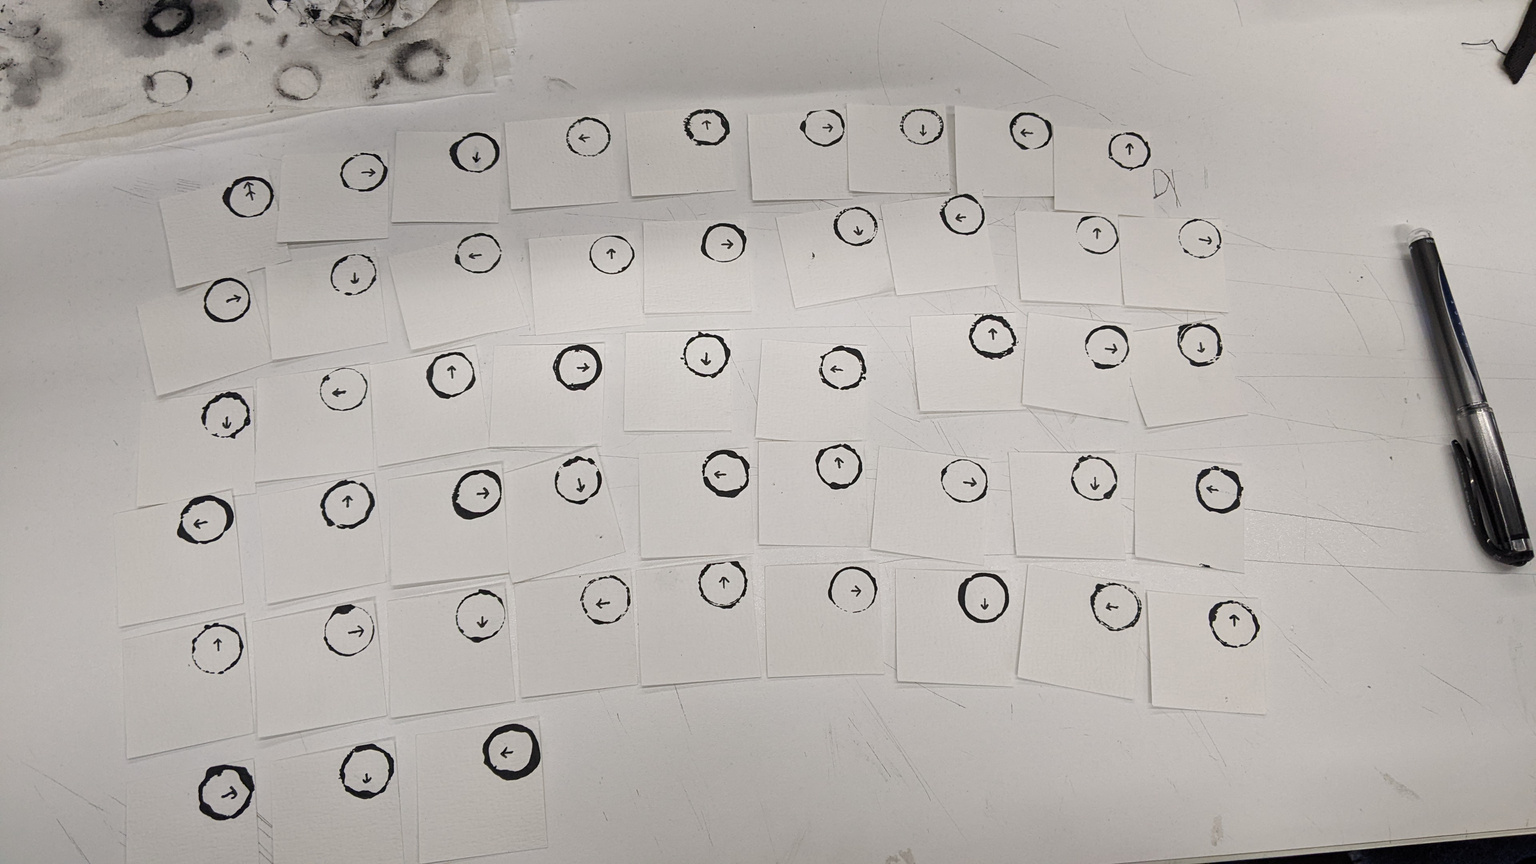
Testing ways of printing the clock evenly. I knew that I didn't want to hand-paint every clock on each frame, as this would be way too time consuming and uneven. Instead I used a thimble to create he circular markings by dipping them in black acrylic paint. As shown by the tests below, the circles vary in shape due to malformations in the plastic of the thimble and unevenness of paint along its edges. I hand-painted the white circle on the black card in order to test hand-painting, and while this circle turned out fairly evenly, it would be more difficult to draw a perfect circle on every frame in the same size and position than it would to print.
I thought about using cardboard and painting the front white to appear like a canvas, but this would take too much time and could look messy.
Test Conclusion
I found regular paper too flimsy to paint consistent layers on. The black paper/card was interesting and had a solid texture, but I don't think it would be too clear to see visually with a zoetrope unless the colours of the flower were particularly bold. I would need to spend a lot more time on each frame building up layers for this, as well as with the white paint for the clock as it is particularly thin. Cardboard would give a really intriguing texture and would be the most like a tiny canvas, but it bent and ripped easily and I would again have to build up layers for the flower to be bright enough. The brown neutrality of the background would also maybe not contrast against the subject enough. Visibility and visual clarity is highly important for the zoetrope to function. Watercolour paper is the best choice due to its thickness, bright colour, and ability to carry layers of paint. I also found that using a black ink pen was the best choice to draw the clock hands as paint was too thick and uncontrollable. Conclusion: I will be using watercolour paper.
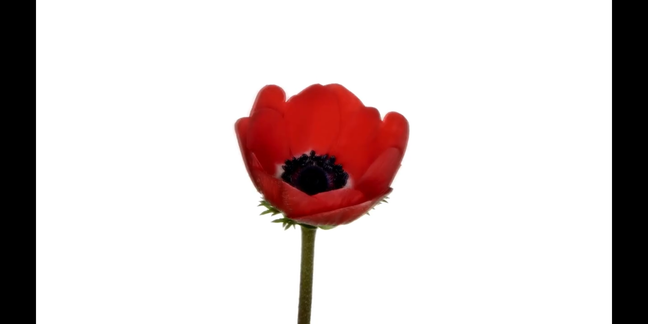
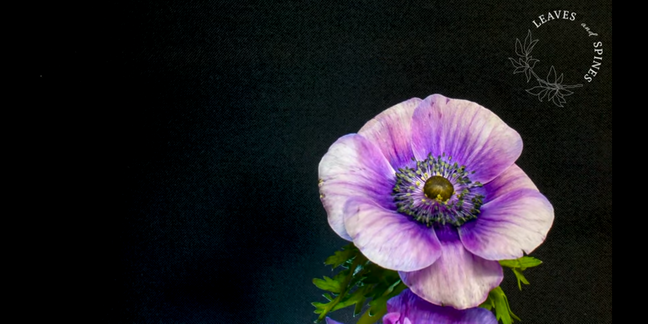
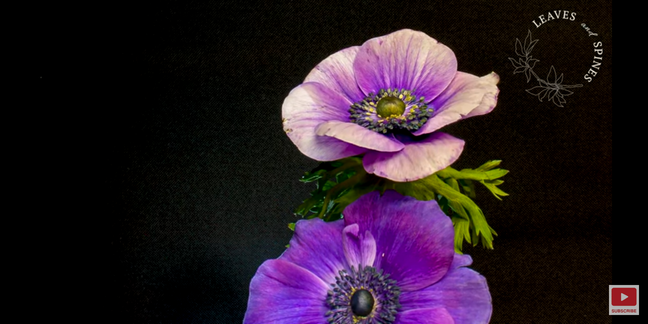
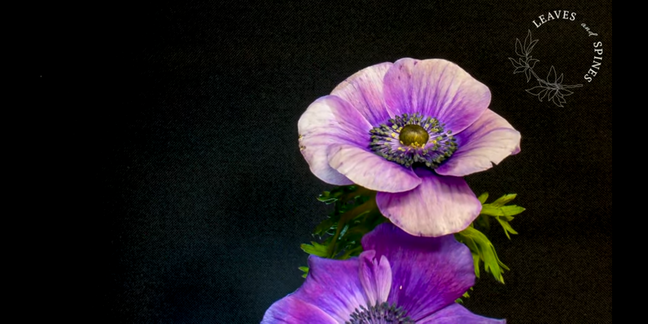
FINAL DECISIONS: Which Flower(s)?
Deciding which flower, or flowers, I will be using for my final zoetrope:
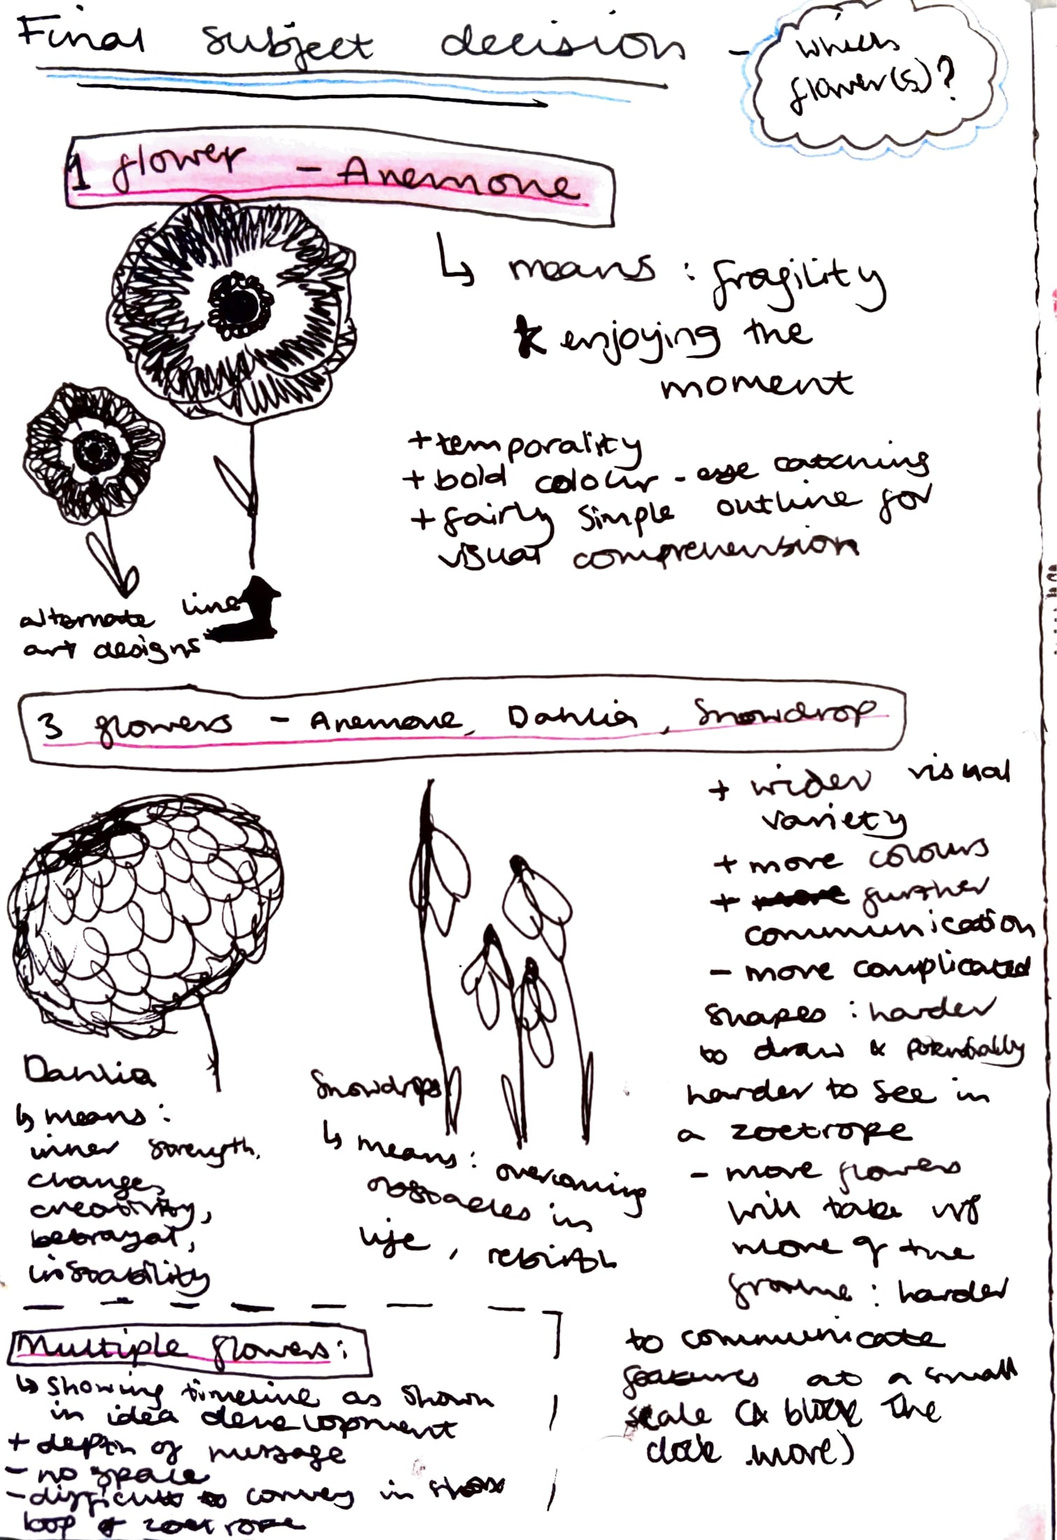
Test Conclusion
I chose to use a single anemone for metaphorical and floriographic significance, as well as visual clarity through simplicity.
planning & production
presentation
Evaluation
FINAL DECISIONS: Which Medium?
Deciding which media I will be using for my final zoetrope:
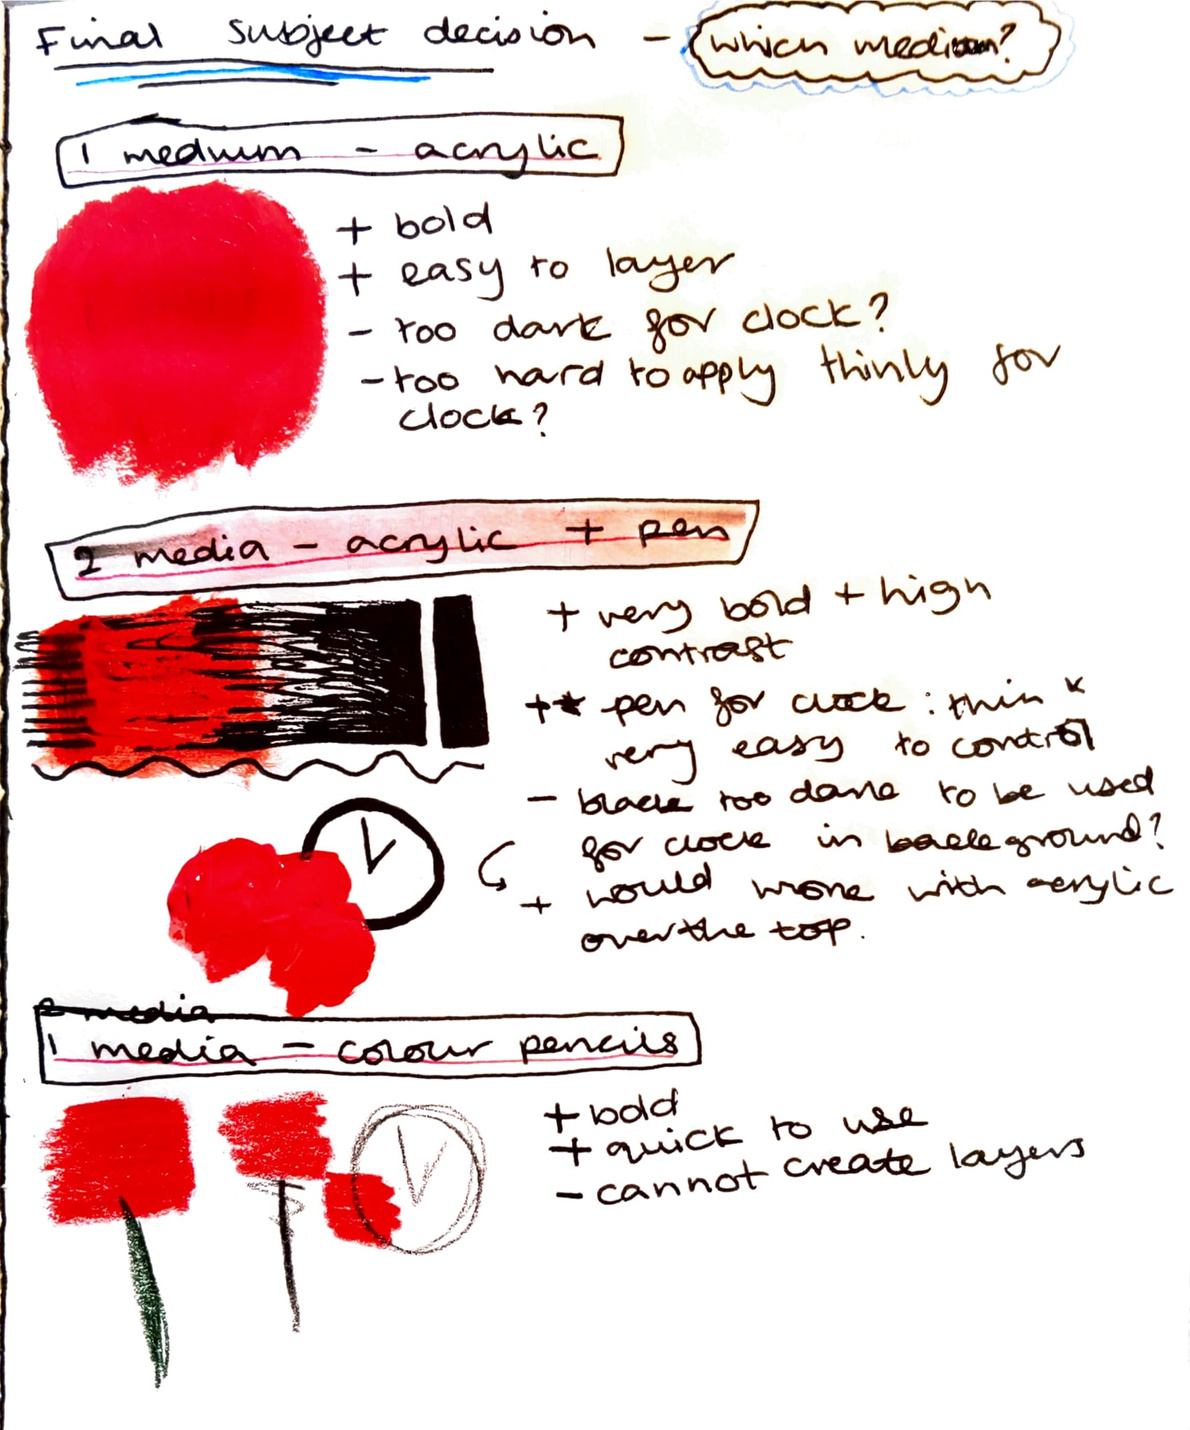
Test Conclusion
I chose to use acrylic and pen for the frames due to the strong colours through less layers and ease of application.
planning & production
presentation
Evaluation
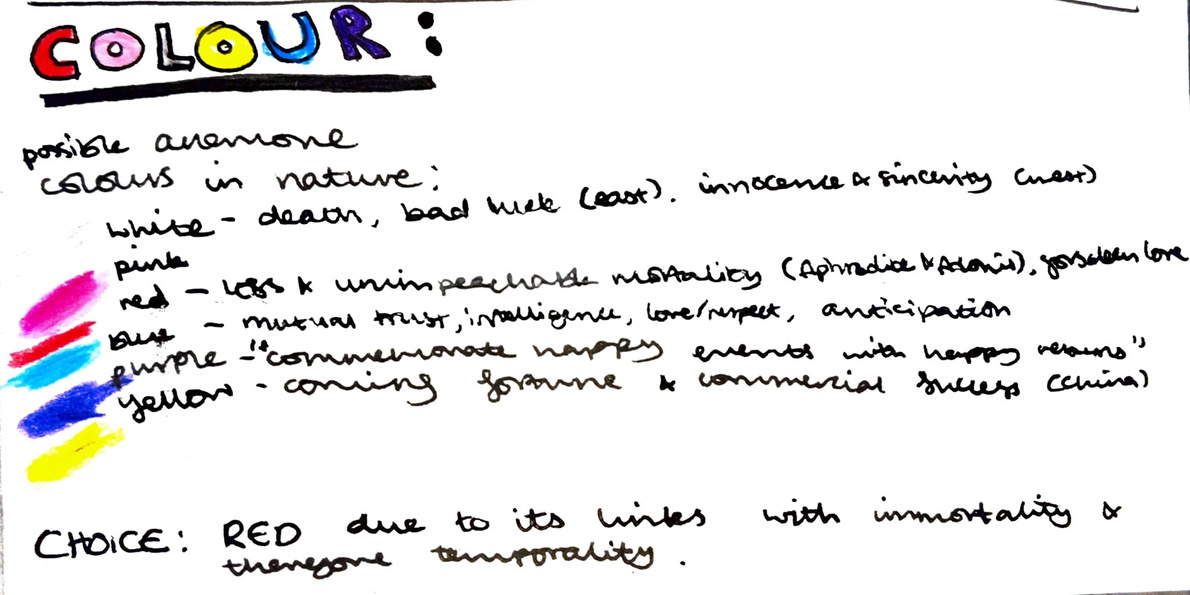
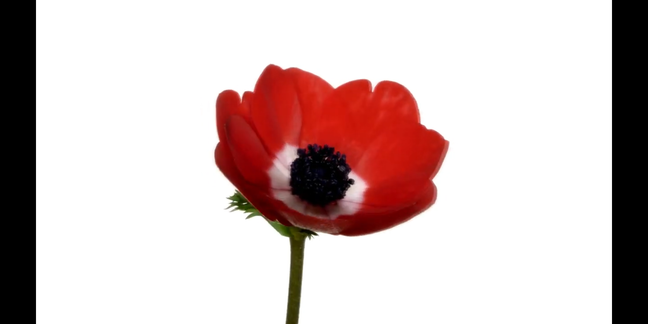
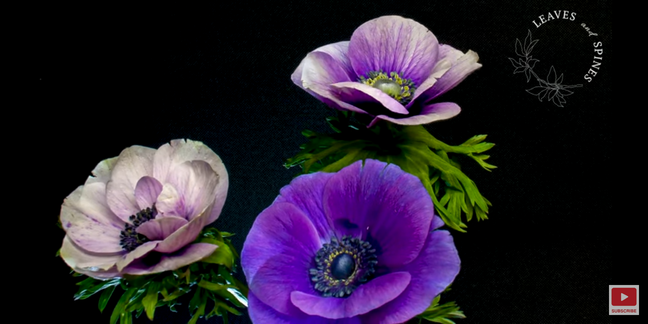
FINAL DECISIONS: Which Colour?
presentation
planning & production
Researching Anemone colour and significance to decide which colour to use for my final zoetrope:
Evaluation
research
Conclusion
Anemone colour meaning information from (Gaumond, 2021a).
I will paint a red anemone for the reasons stated. Red will also be the most visually striking.
Planning For Final Animation:
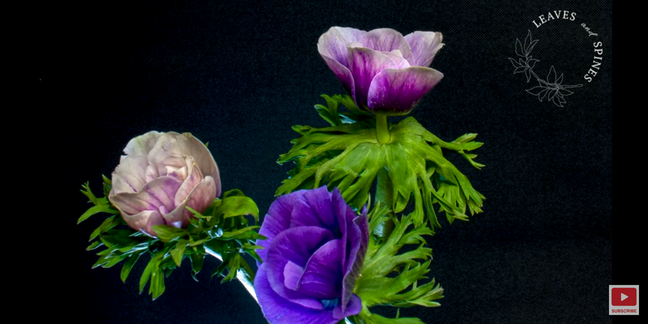
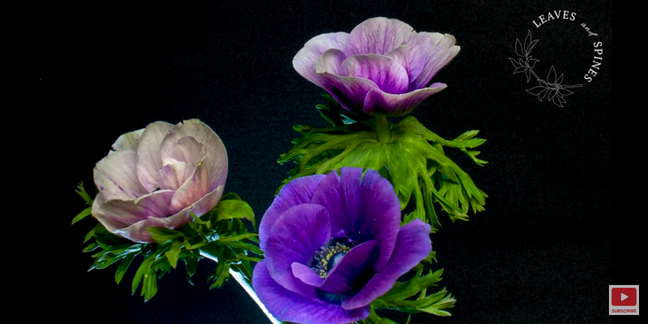
Finding references for my final animation in order to understand the anatomy of Anemone growth and decay.
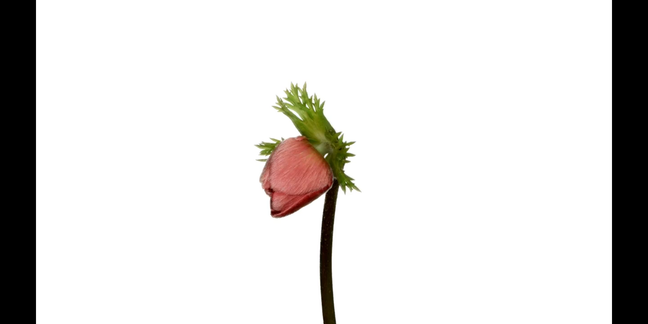
References:
I based my animation on these two references:
research
planning & production
Evaluation
Reference 2 from (Leaves and Spines TIME LAPSE, 2022) .
Reference 1 from (The Garden of Bob, 2022).
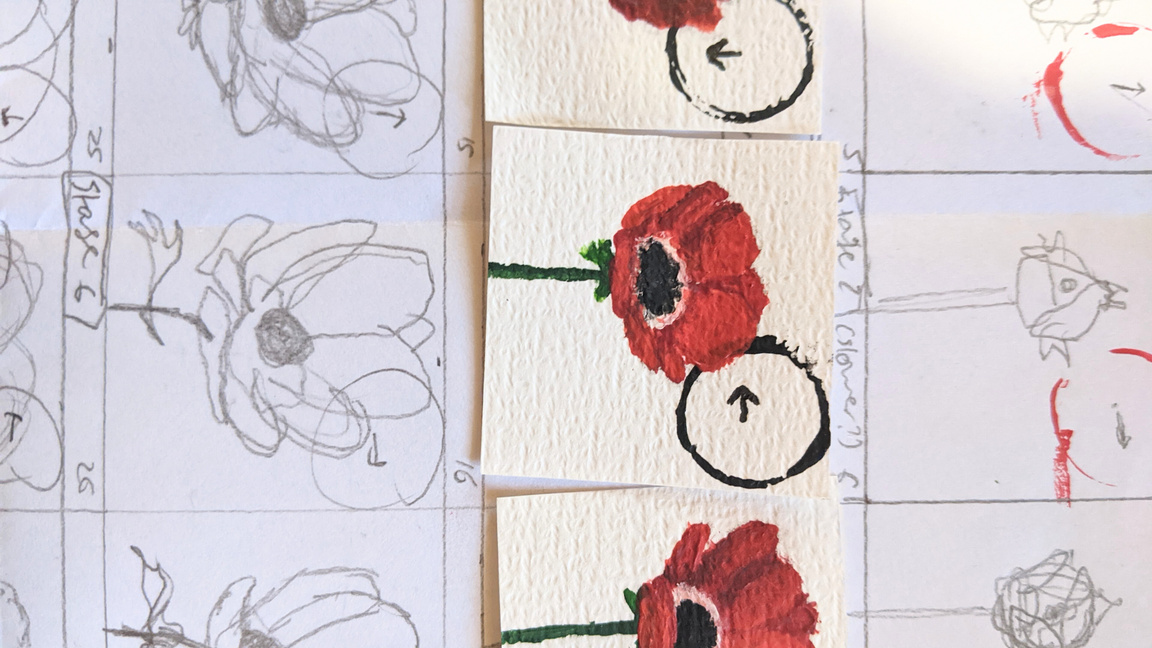
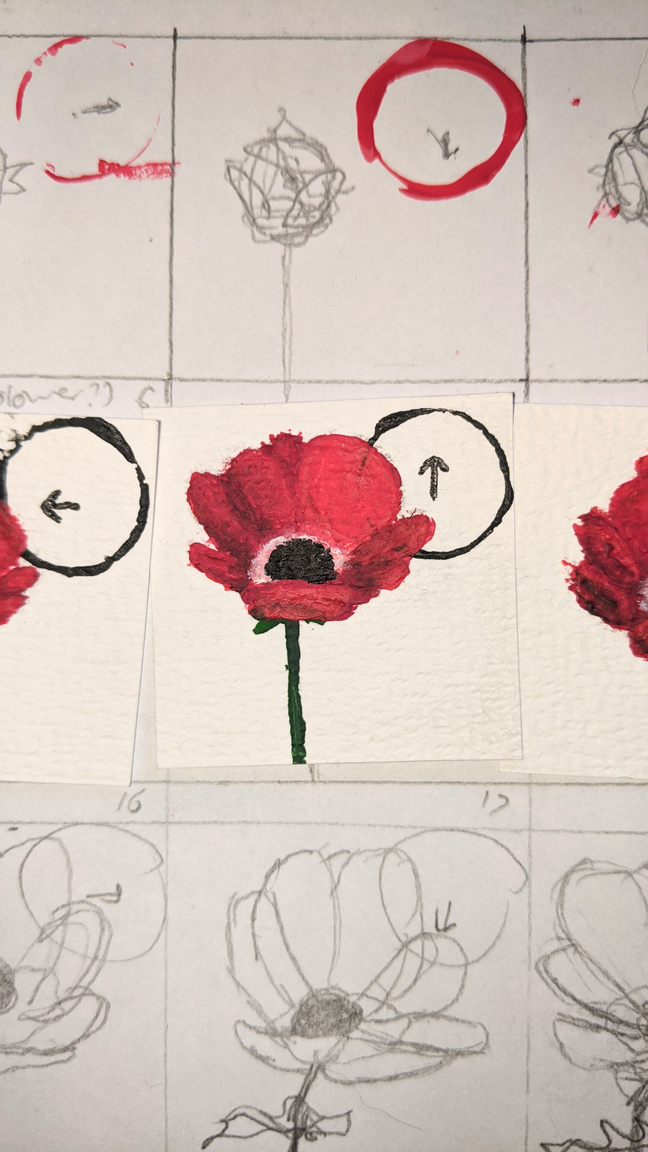
Key-framing:


As I did in the Pecha Kucha, I turned each timelapse into key frames with screenshots. The first reference was perfect for the Anemone growing and blooming, and I took a basic understanding of the anatomy of anemone decay from the second reference. I then sketched out the process of Anemone growth and decay from my understanding of the key frame references. This was extremely helpful in learning the shapes that make the flowers and how they grow from one stage to the next.
Understanding the anatomy of Anemone growth through sketches:
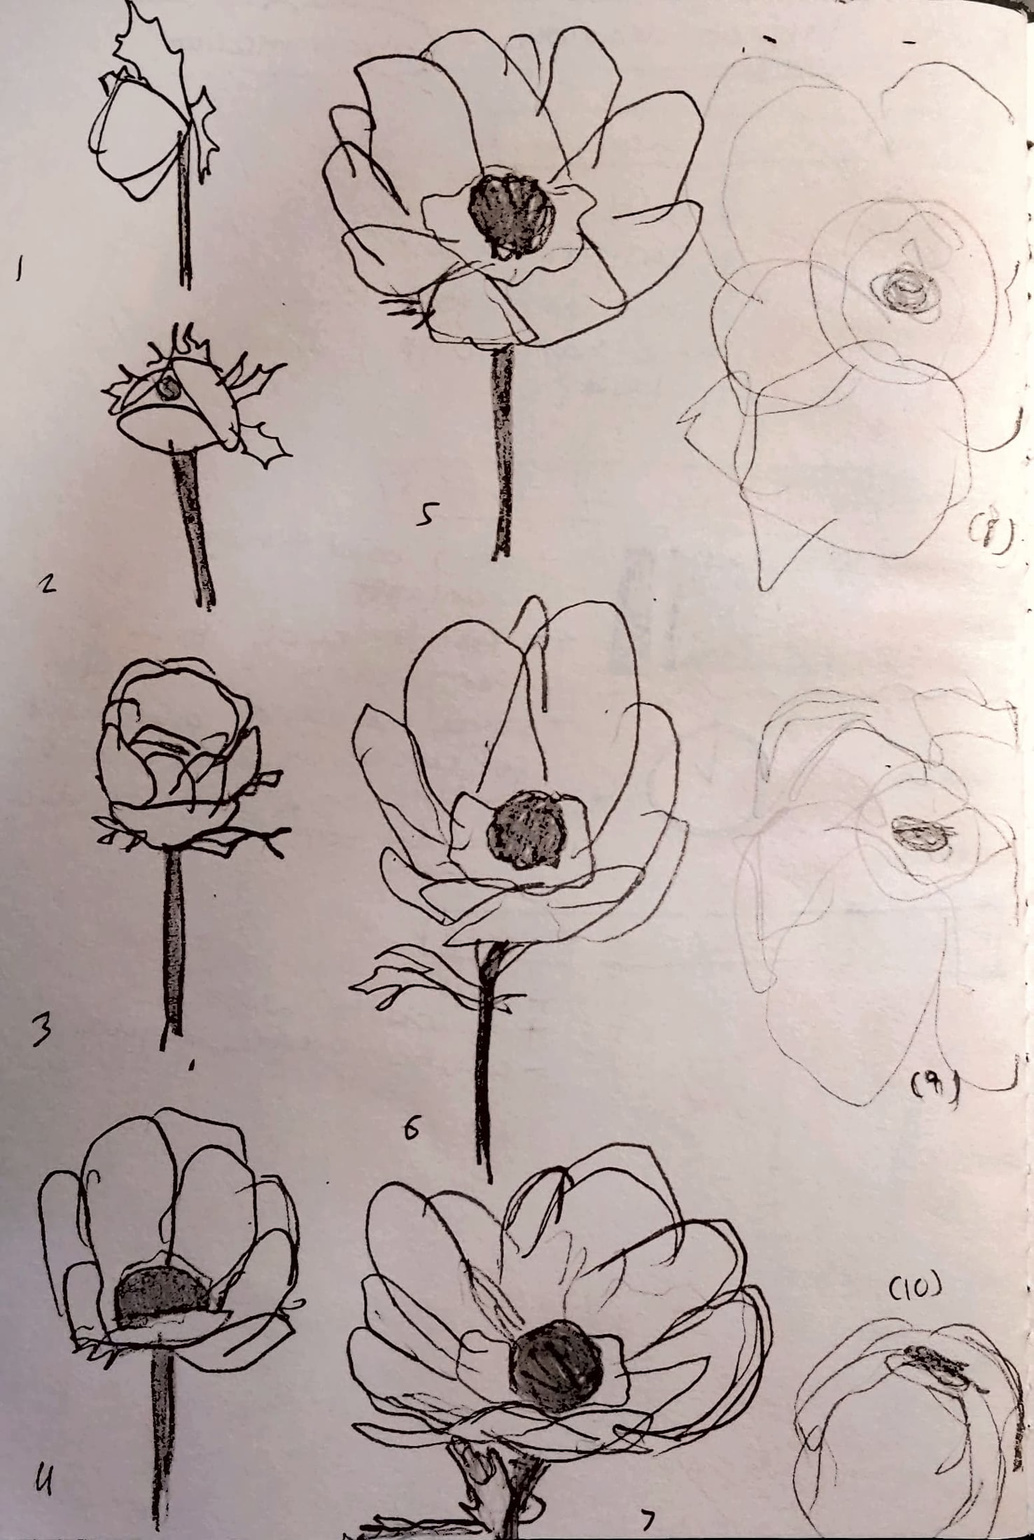
Planning how to loop the growth-decay cycle:
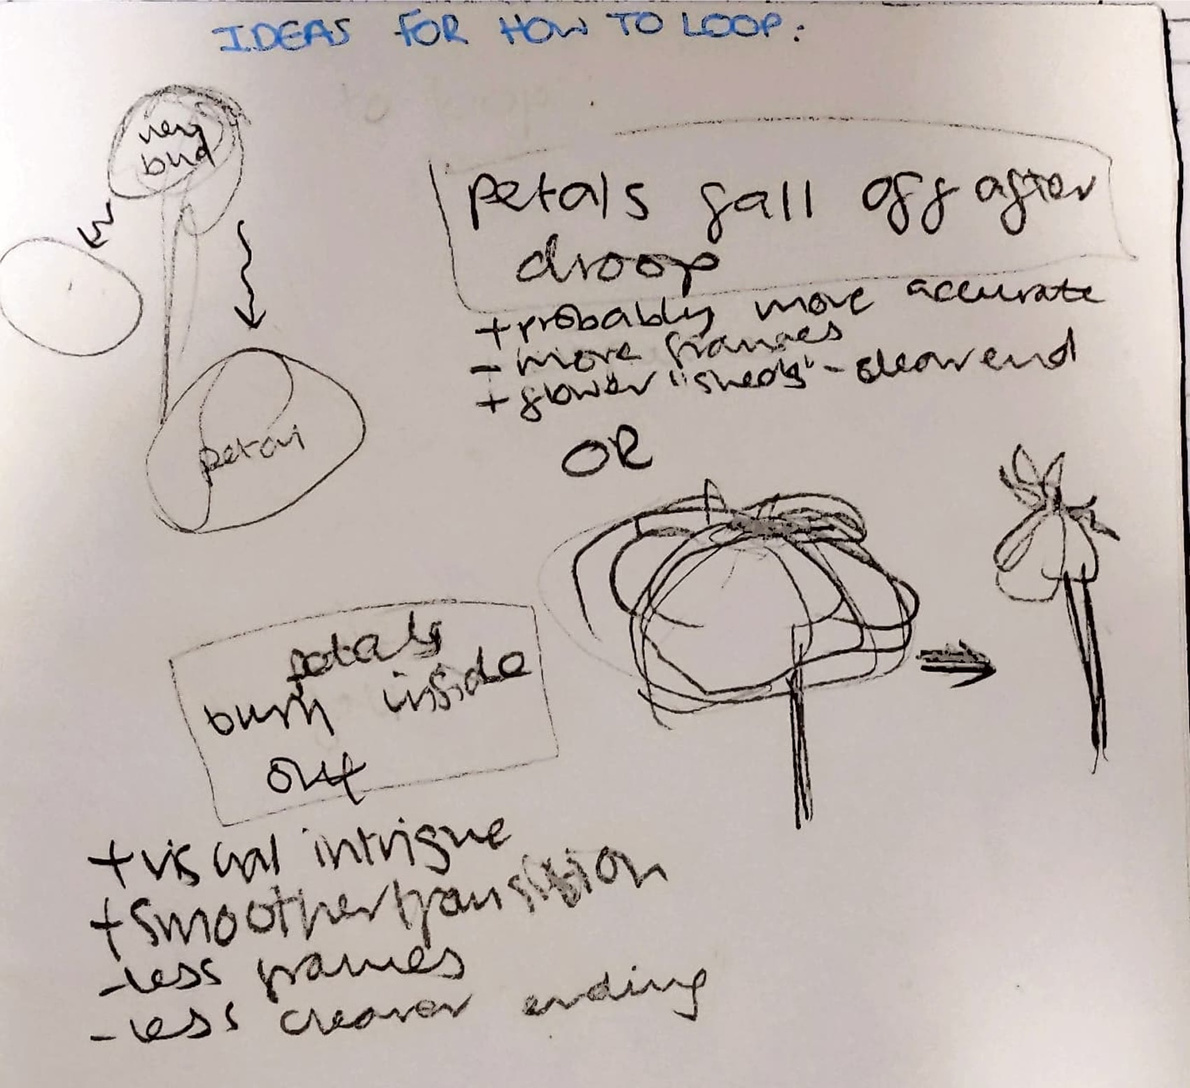
I sketched out two ideas for how to loop my animation. I ended up deciding to have the petals droop and fall off to reveal the new bud.
Planning For Final Animation: FINAL FRAME PLAN
Using my research, key-framing and understanding of anemone anatomy to create a sketched version of my animation.
planning & production
Evaluation
Table:
Last tests:
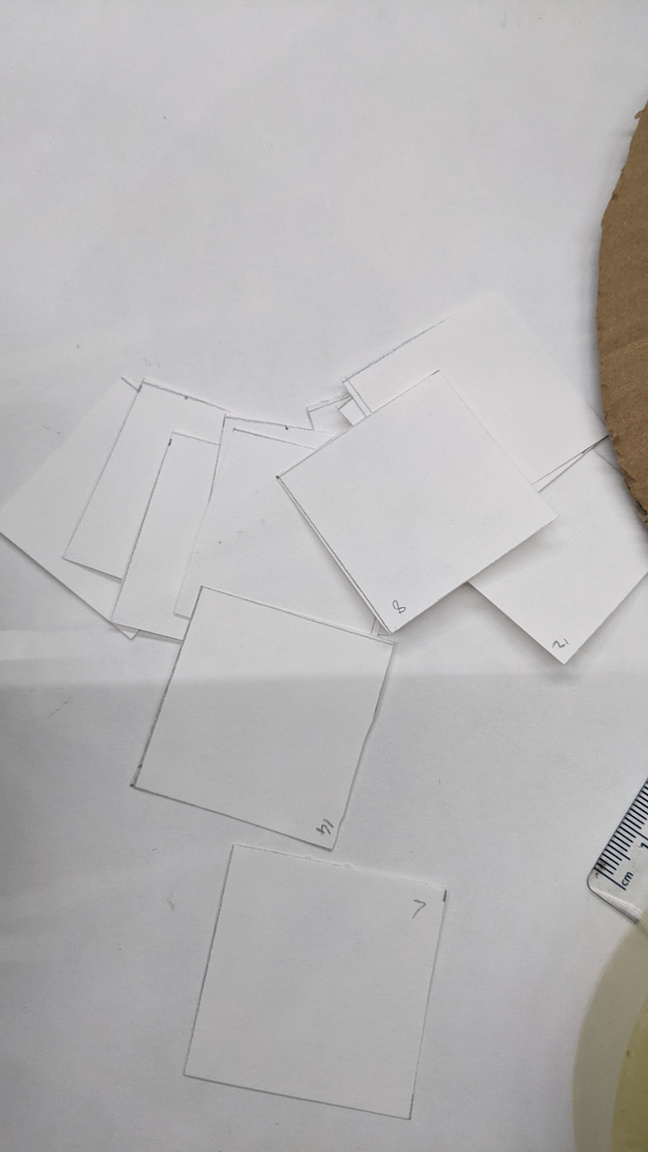
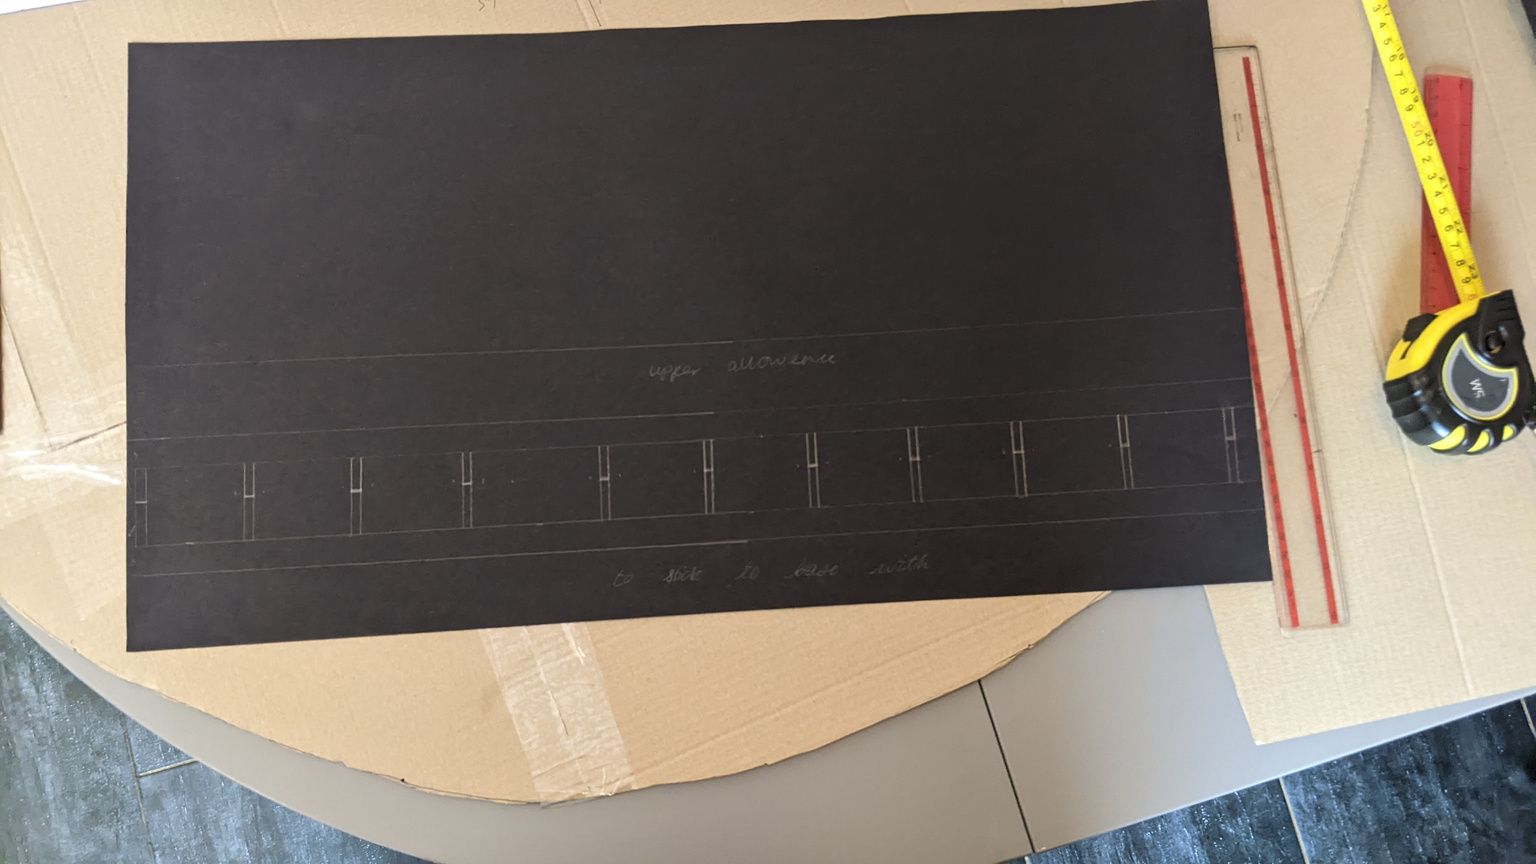
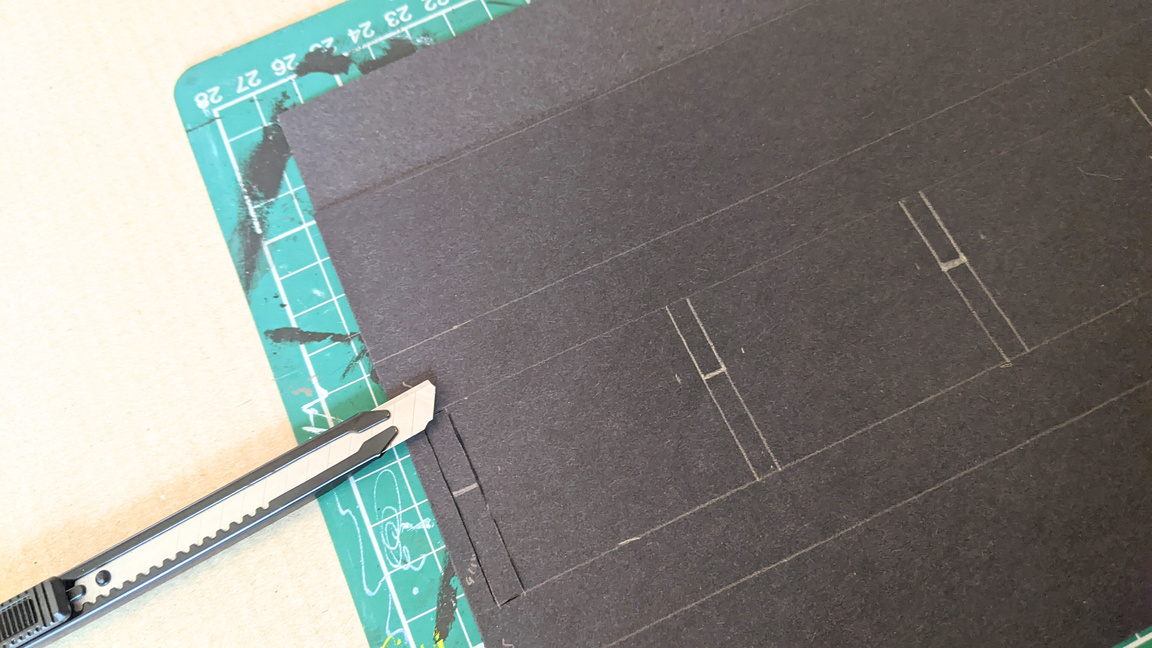
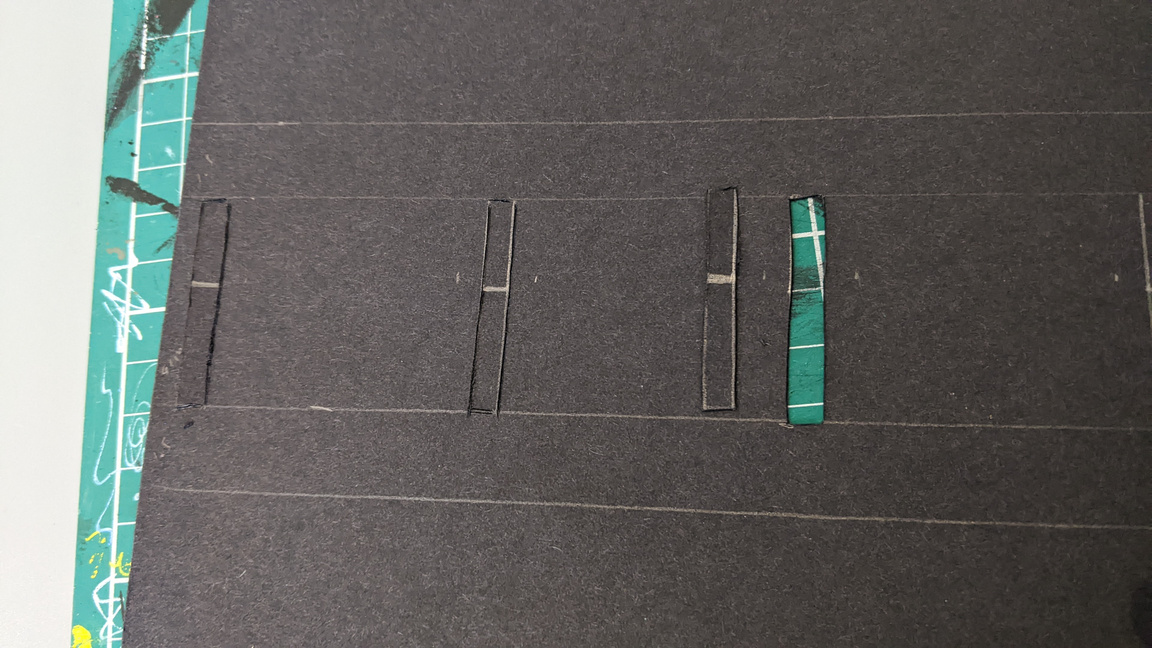
I drew out a table of 4x4cm squares and numbered each frame.
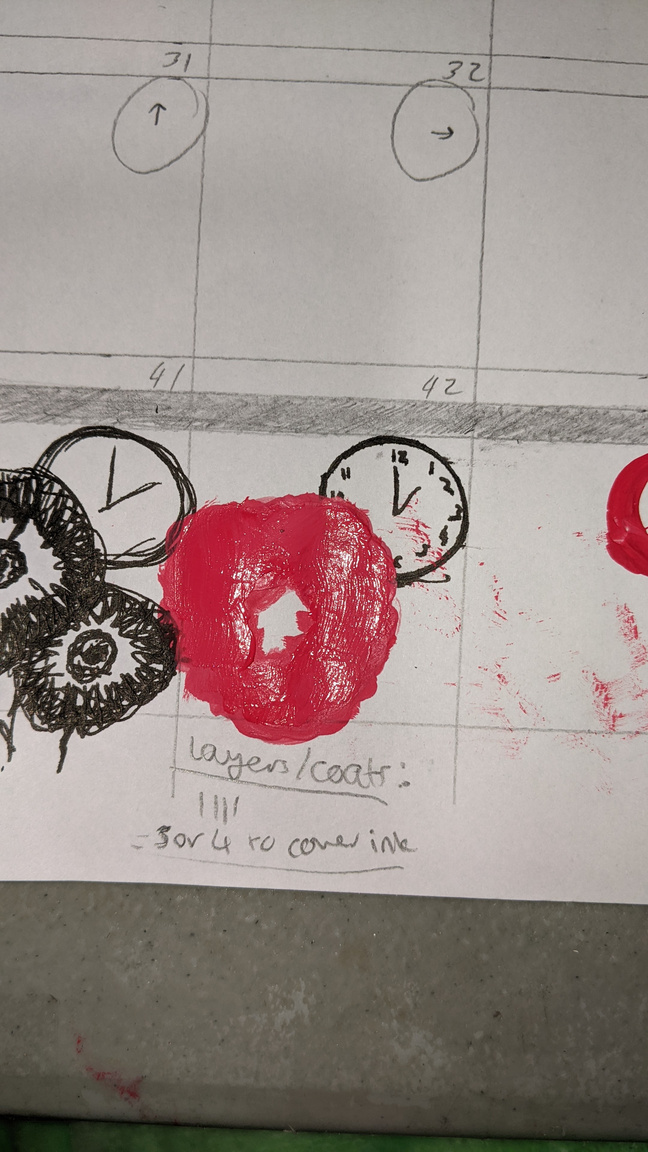
Just before i started animating with sketches, I did a few final tests. These tests helped me to see if I wanted to add details with a pen, such as texture on the petals or numbers on the clock, and whether I should use pen for the clock rim instead of stamping paint with the thimble. I also tested to see the amount of layers of acrylic it would take to fully cover a dark black line, to see how much stamping the clock would be visible through the petals of the flower.
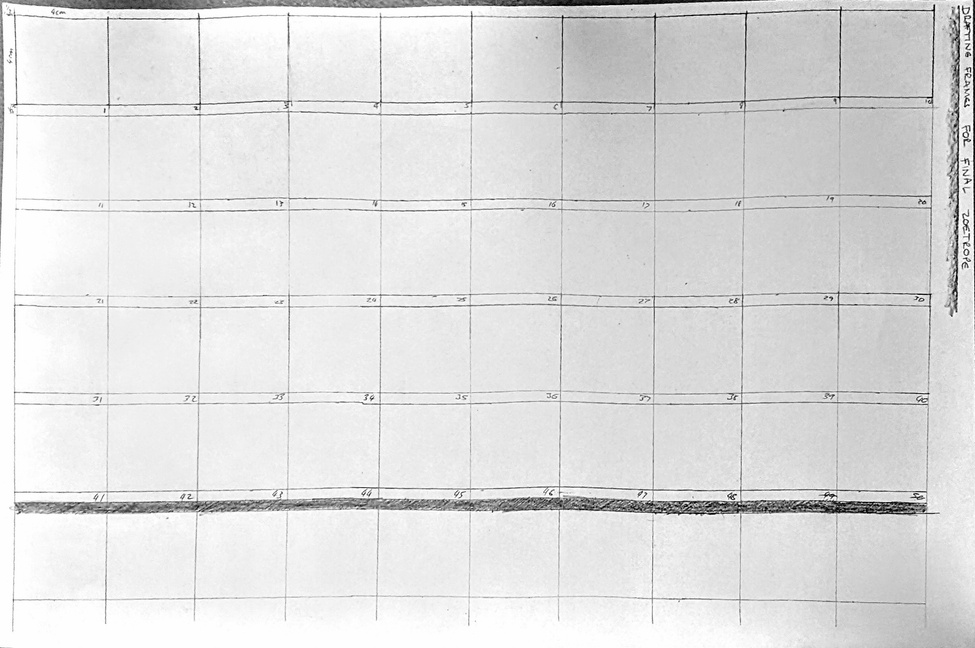
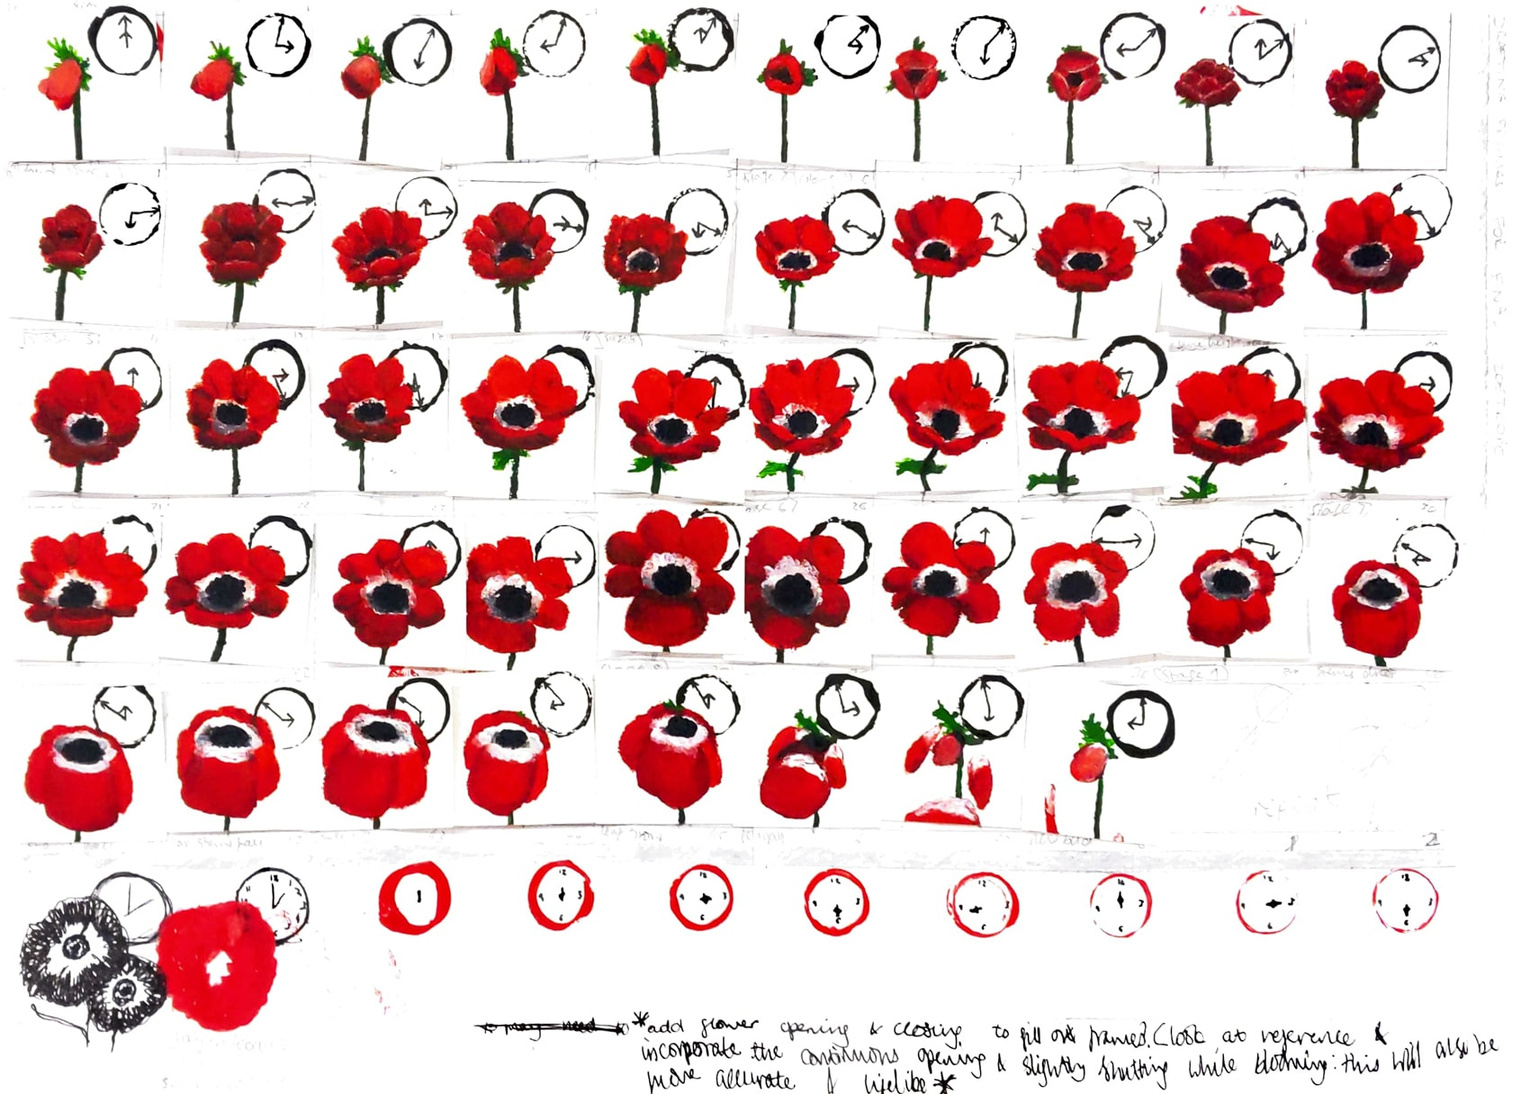
MASTER FRAME PLAN:
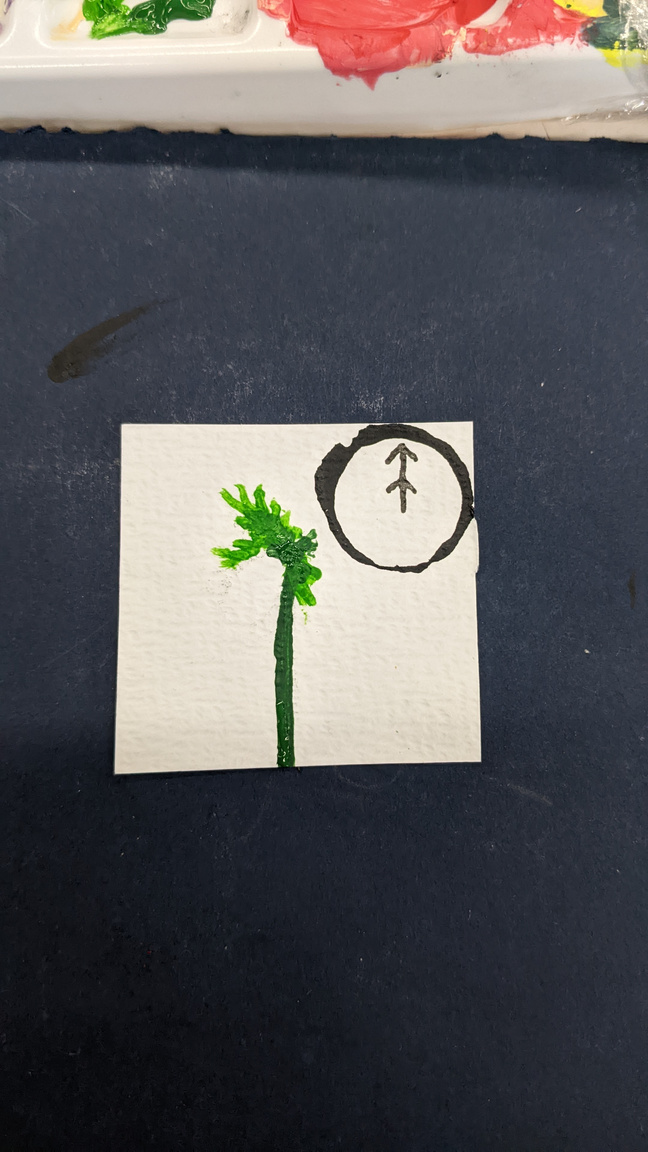
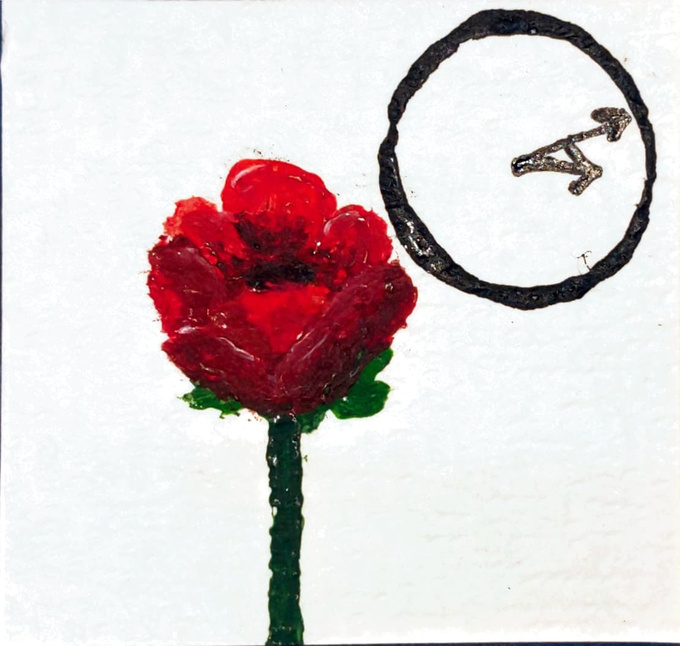
I started sketching the last frames in the loop in order to make sure the loop works. Before drawing the Anemone, I marked out the clock in each corner and drew the minute hand on each frame; I didn't draw the hour hand as I got confused when trying to draw it from scratch. I marked out roughly where I thought each stage of the flower growth (from the key-frames) should go to know how to pace the animation. I then worked frame by frame from the beginning to animate the flower growing and decaying.
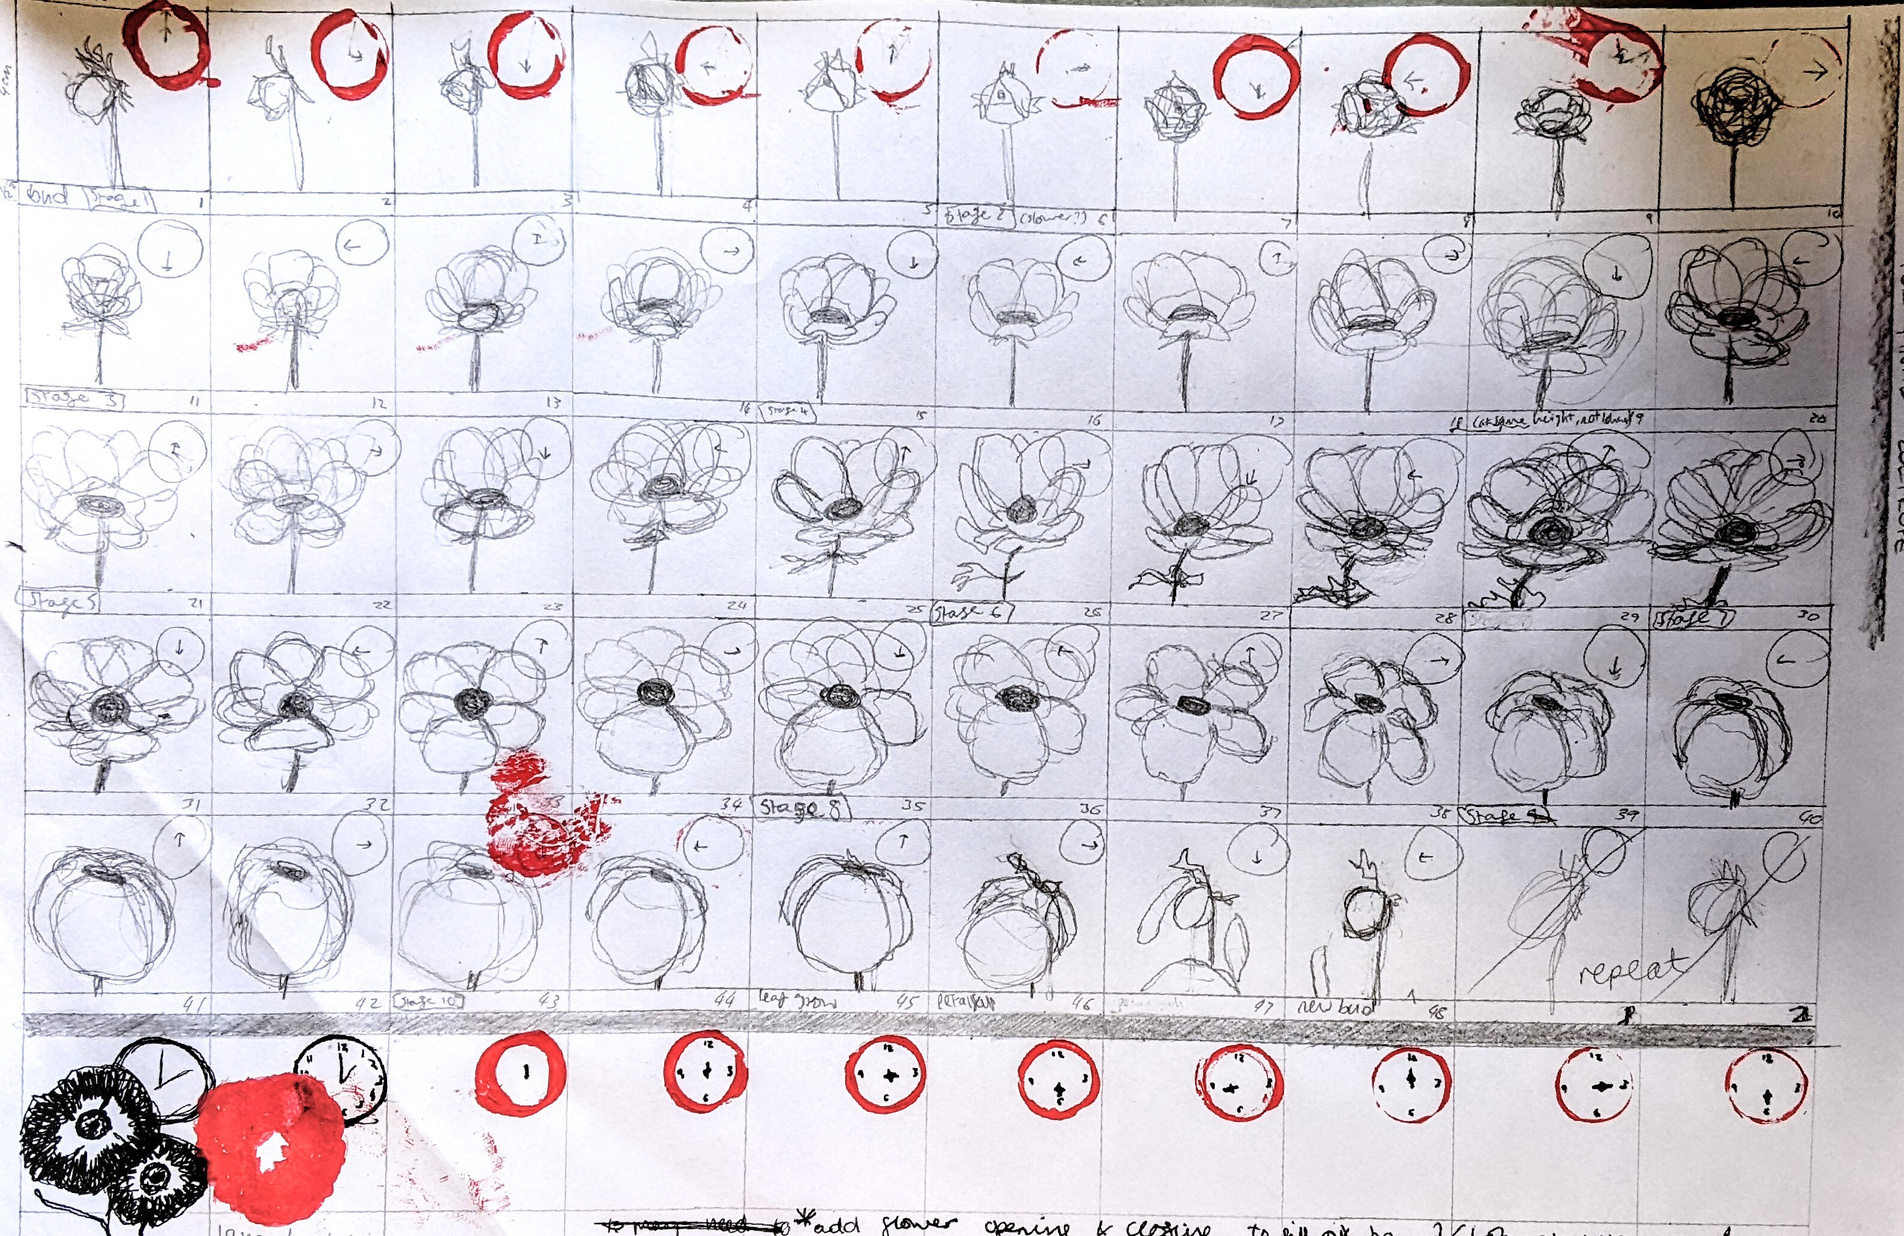
Complete animation & evaluation:
I scanned the frames and turned them into a GIF to see how the animation plays out. I am extremely happy with this sketched animation - I feel like the flower feels full of life as it moves around and bounces to blossom. I am also pleased with the realistic movement that resulted from using a reference for my key-frames. I love the timing of the movements as they grow through each stage of Anemone life. The loop feels seamless, although it is not 100% accurate to how a real anemone would decay/die; I am really pleased with how I managed to loop it convincingly in the limited amount of frames. Overall, I am extremely proud and happy with my sketched GIF animation, it is really pleasing and mesmerising to look at.

Week 5
Presenting a creative practice
presentation
Practical skill
evaluation
Reflecting on Week 4:
Evaluation
How will I polish & finalise my work for presentation?
Curating plan:
presentation
How do I plan to edit & curate my work?
planning & production
problem solving
Evaluation
presentation
TIME CONSTRAINTS: Limits to the project:
Making the Final Frames:
Process and reflection on making the final frames.
Evaluation
planning & production
practical skill
Process & Evaluation:
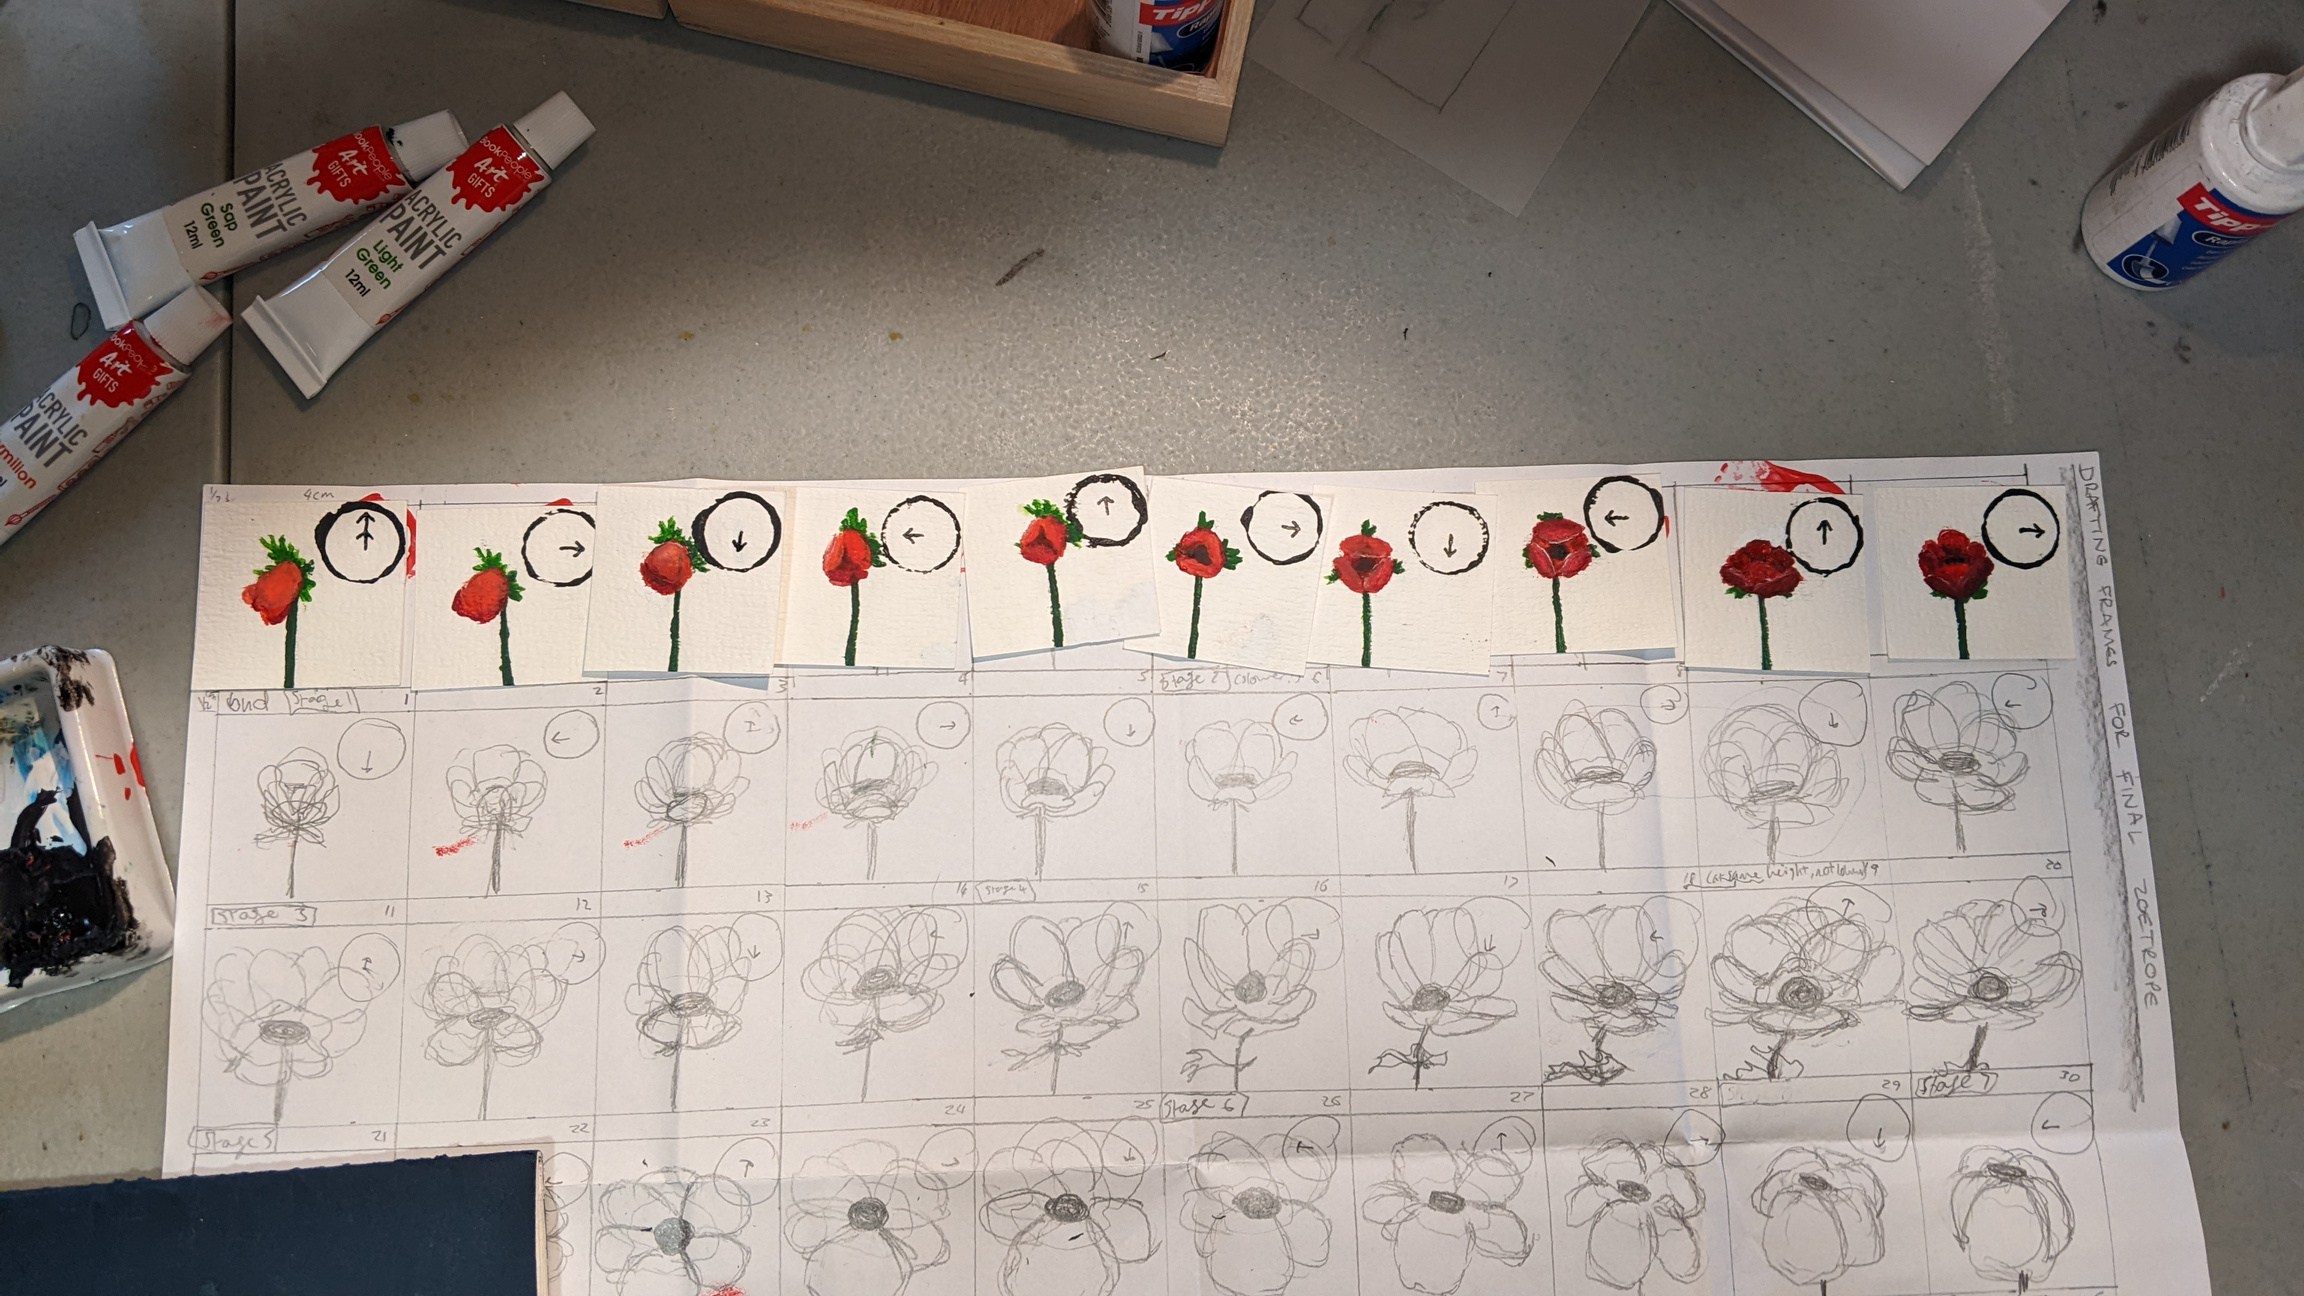
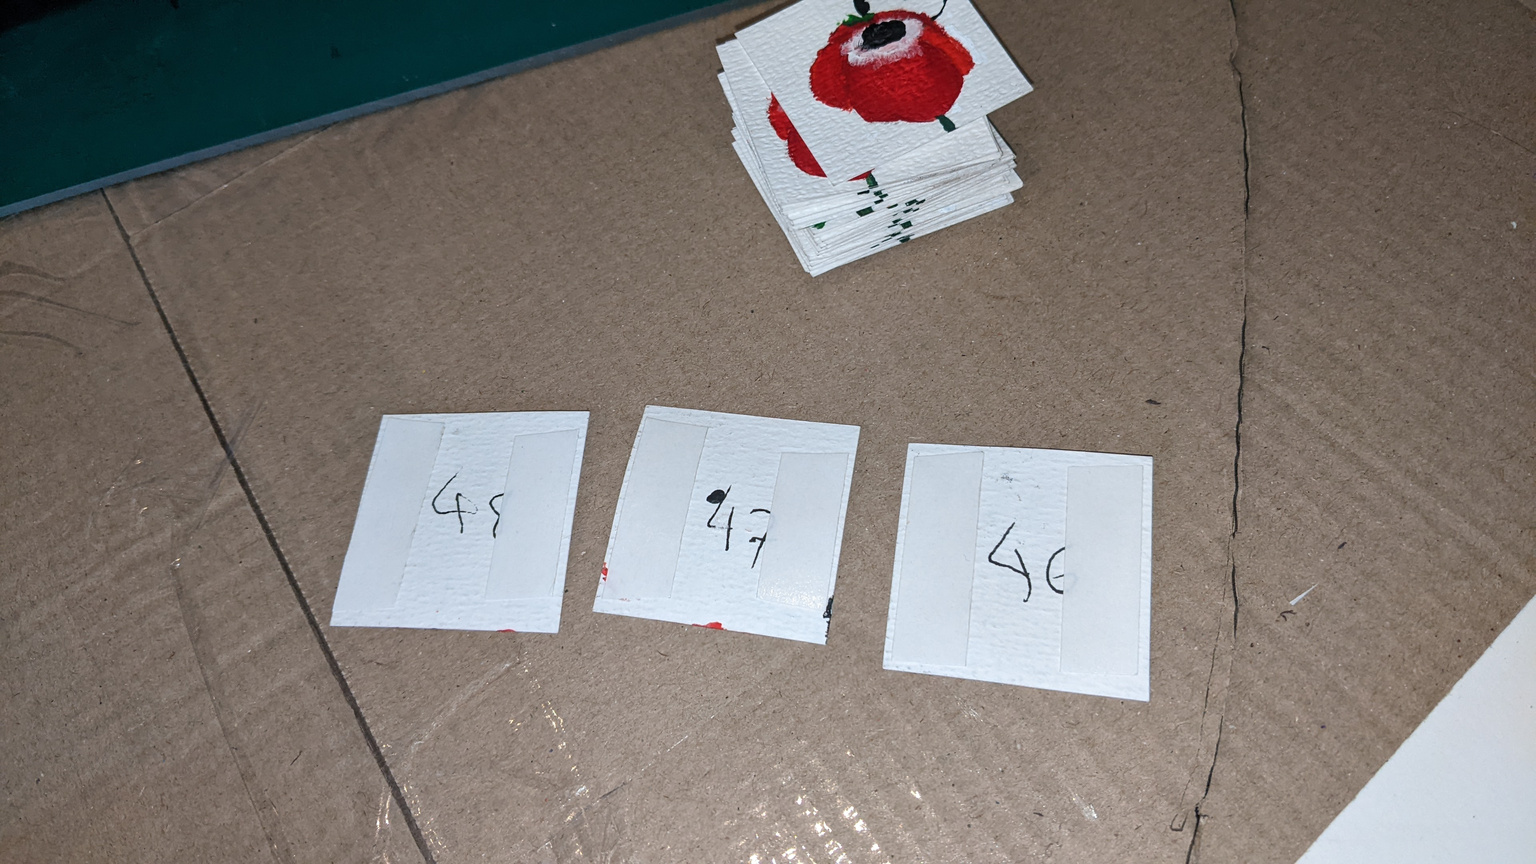
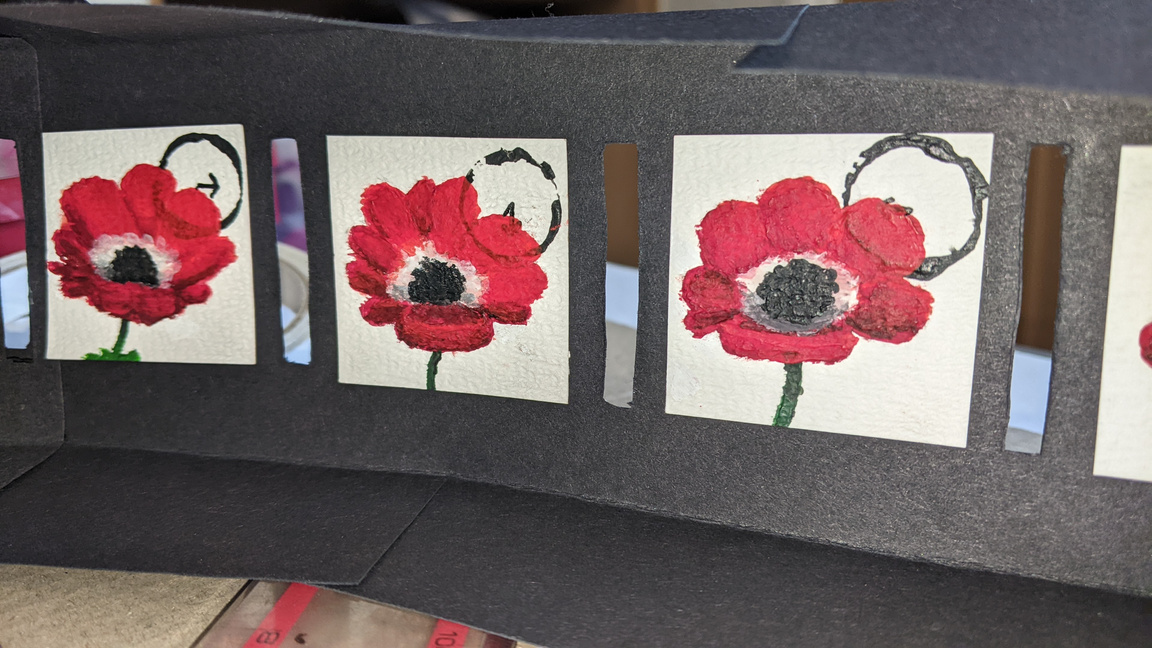
After cutting out all 48 pieces of 4x4cm watercolour paper, I used my thimble technique to stamp the outline of the clock onto every frame. I then added the minute hand as it repeats the same directional pattern across the whole animation. I made sure to note the frame number on the back of each frame in order to keep track of the correct order. I painted the frames in order, this made sure that each frame looked similar enough to the previous frame. With the first frames I kept the shading fairly basic as there were limited shapes, but as I progressed I spent more time on the more complex frames in an attempt to bring realism to the tiny paintings. At times I found the shading particularly difficult to get right; as I leaned further towards realism the flower's shape relies on accurate or visually clear shading. It was definitely easier with frames that were closer to the key-frames, as I had references for those.

Stamping the clock circles on.
Adding the minute hand with a black pen.
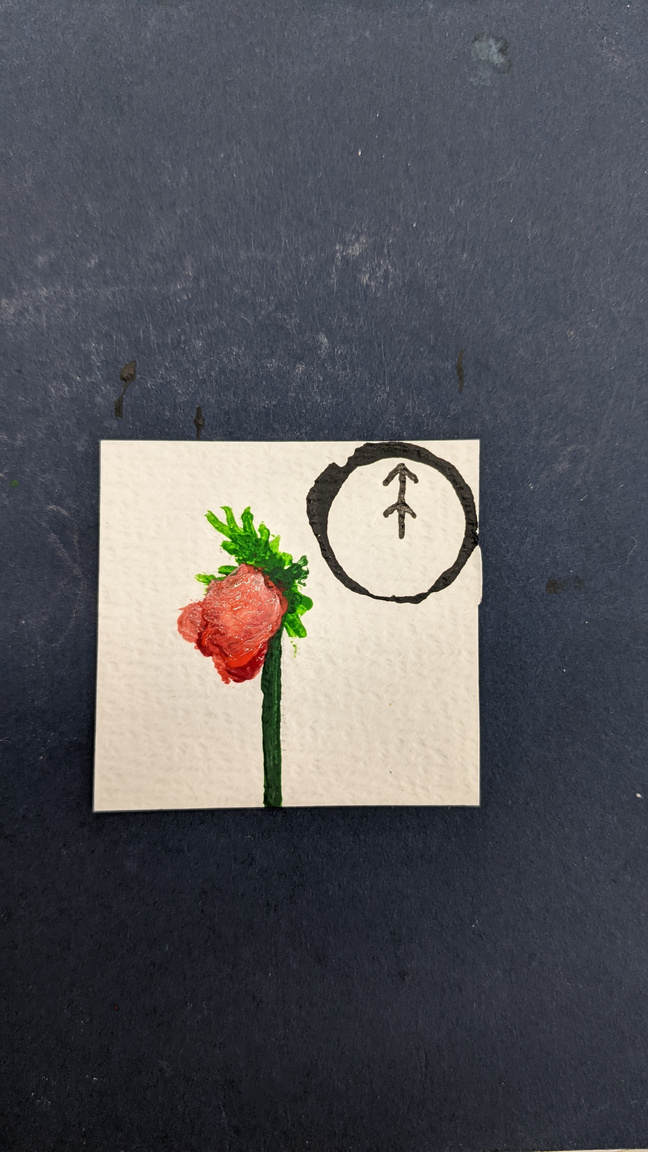
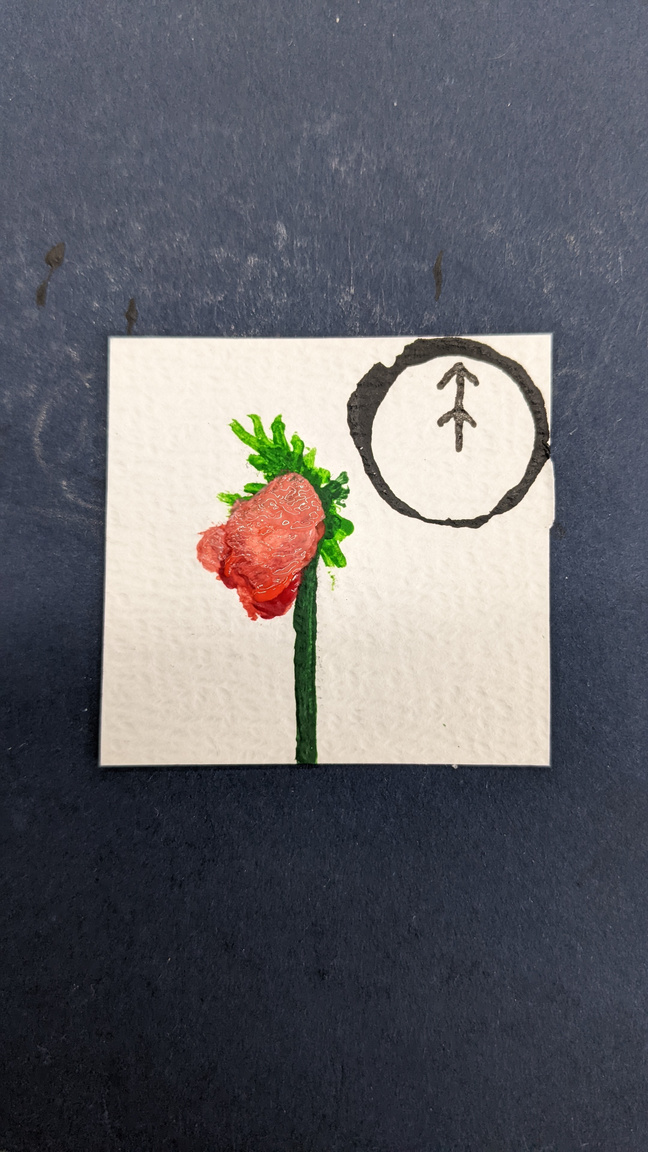
The frame with the best shading, #17.
The 2nd best, #16.
My progress with the frames - the first 18 frames.
The process for the first frame; an example of the more simple shading.
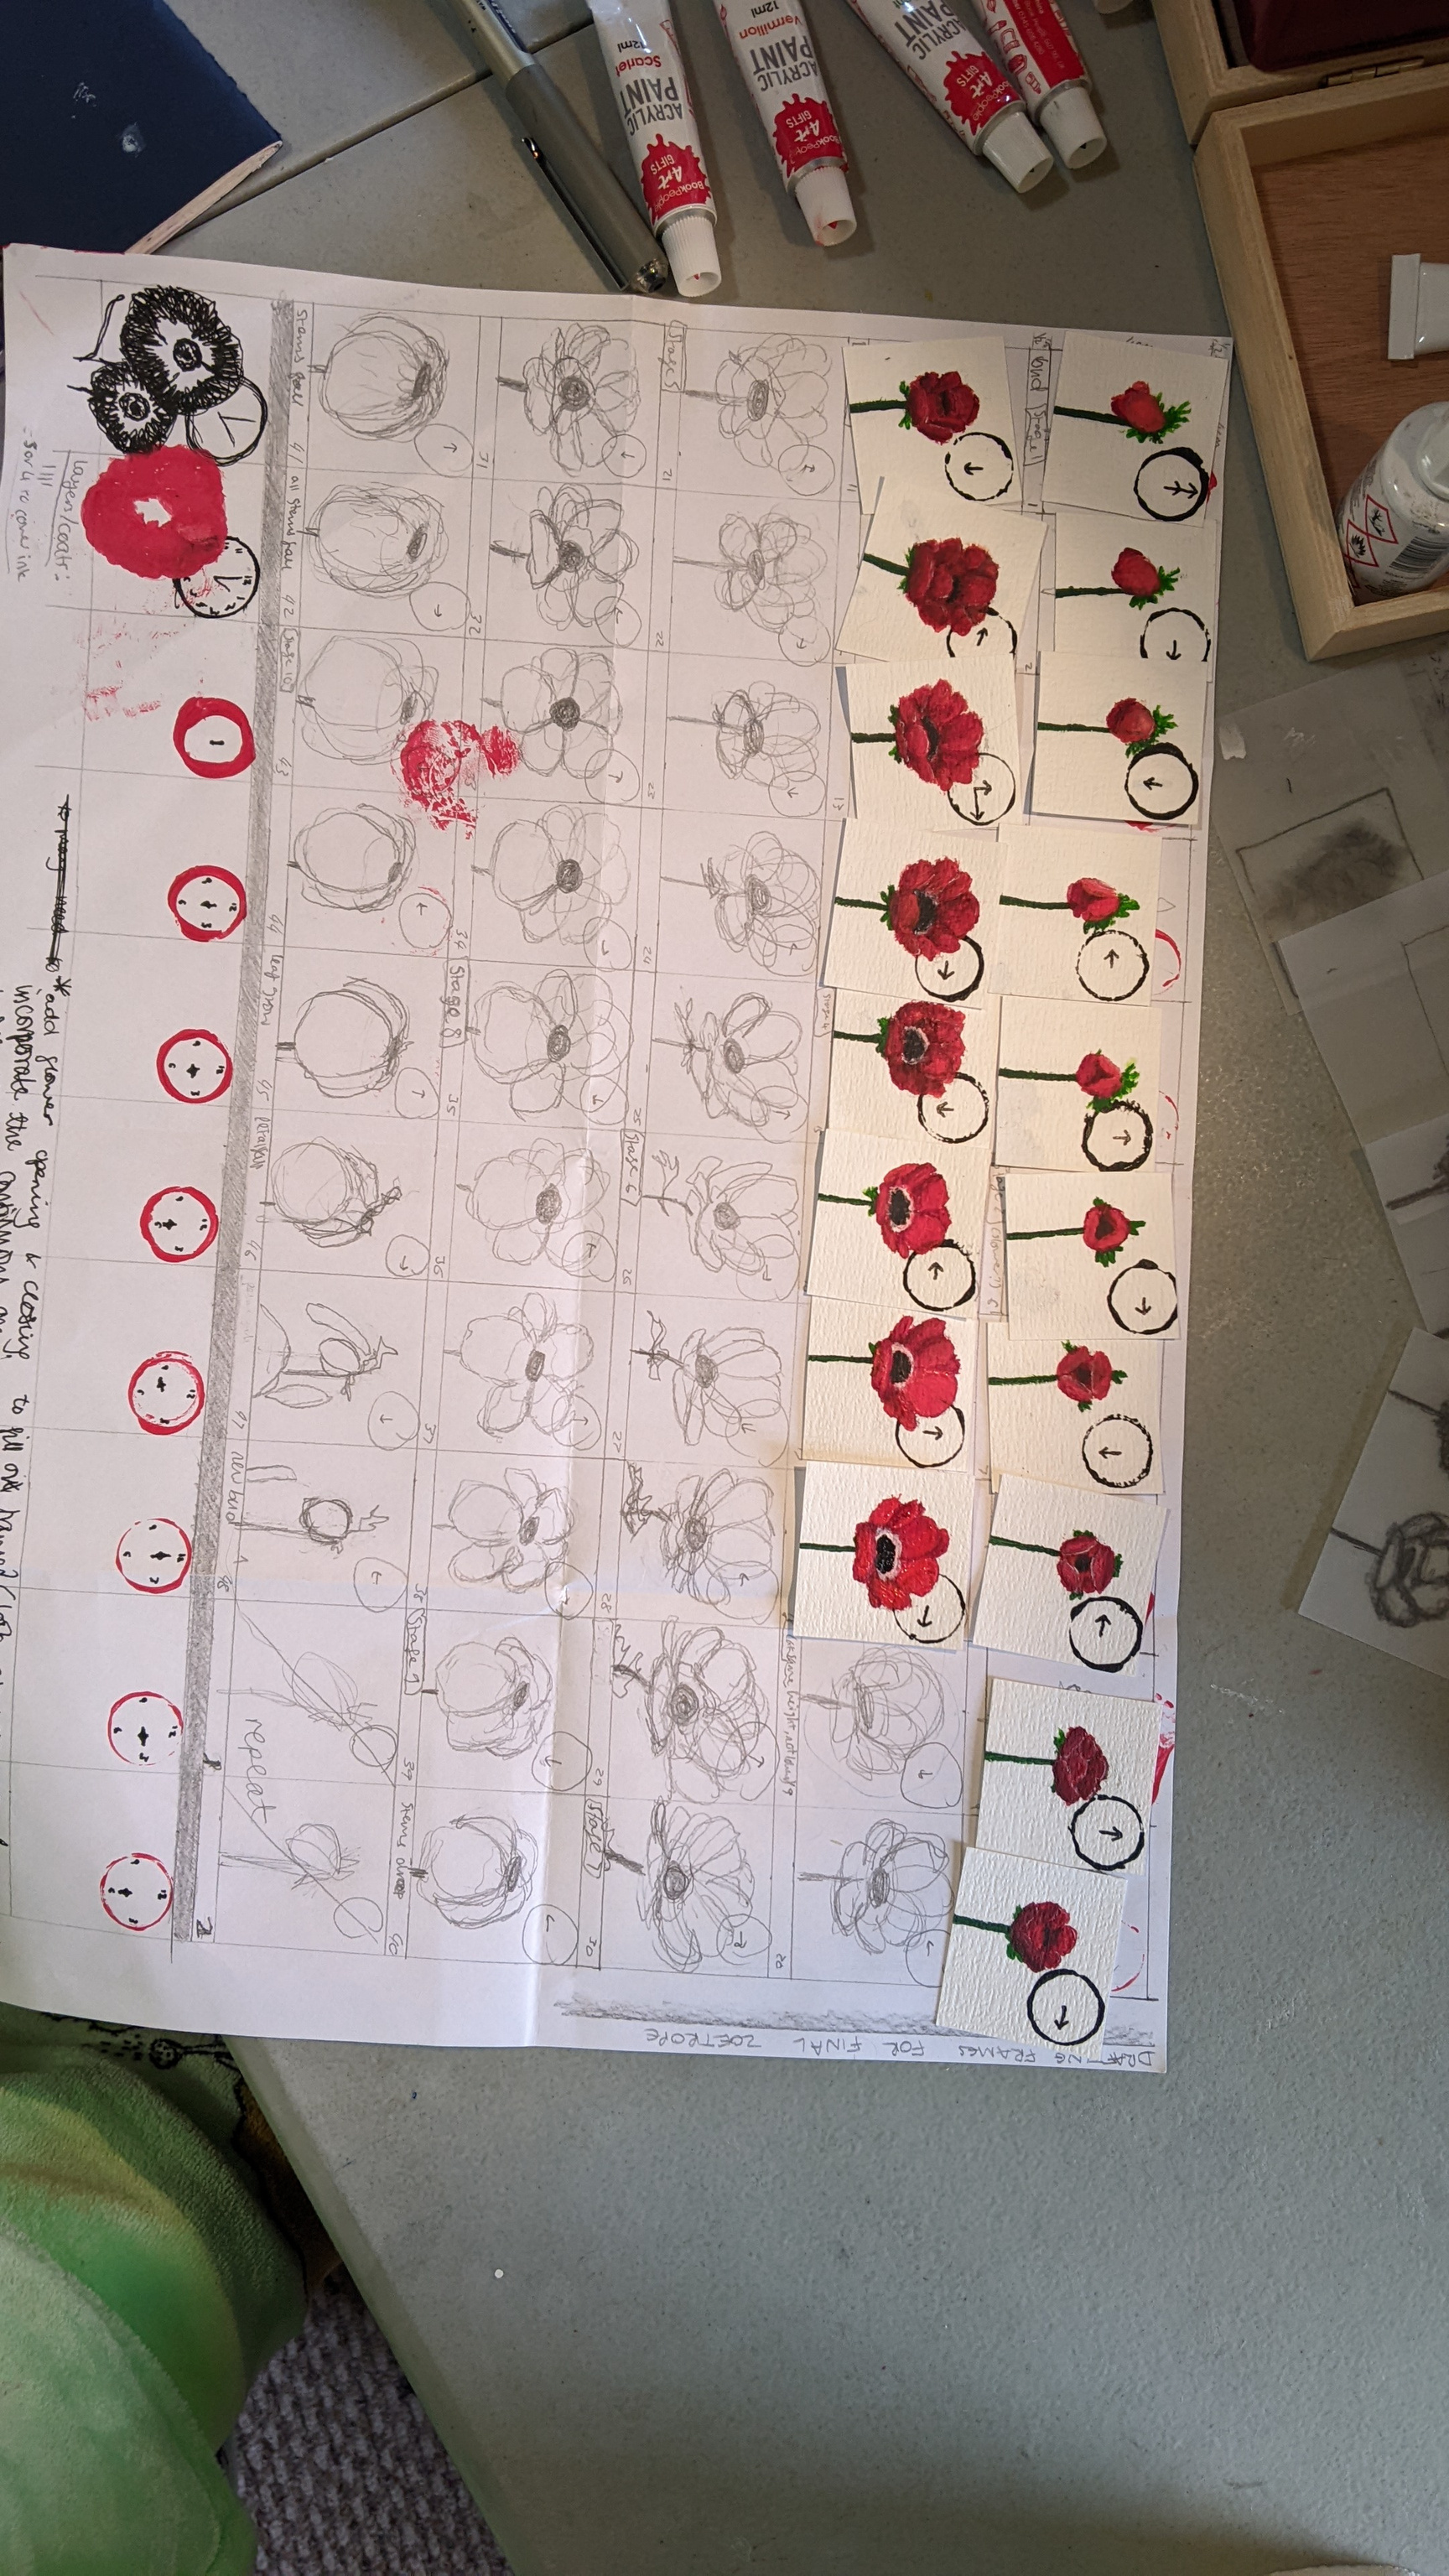
The last 4 frames.
I struggled with this part of the animation when painting, and I think it shows in the final animation.
Painting the frames took a lot longer than I expected and took all of this week. I am glad I spent this much time on the frames though, as they came out well individually.
Late Response to Maker's Morning:
Plans for what I would theoretically make if I had a lot more time.
planning & production
presentation

Maker's Morining: make something today you have wanted to but haven't had the chance. (answered theoretically)

Week 6
Consolidating and showcasing
Practical skill
Problem solving
evaluation
problem solving
practical skill
planning & production
Evaluation
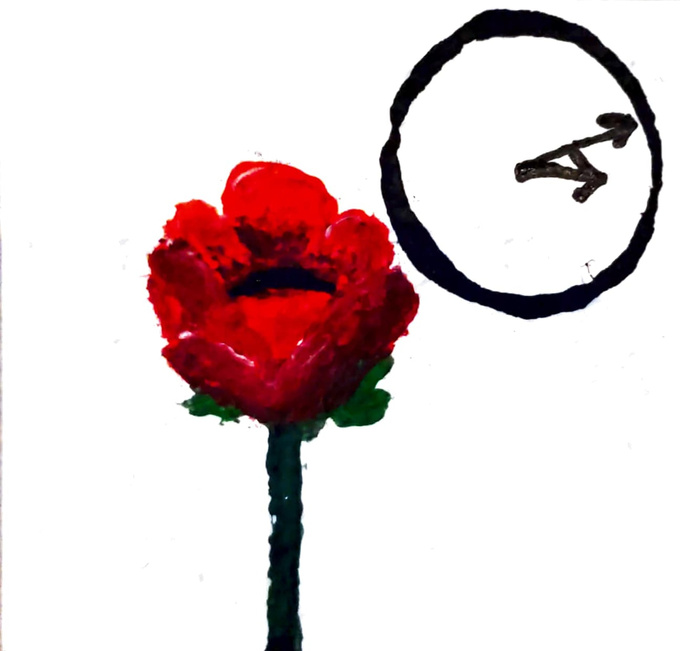
Completing the Frames:
Adding the second clock hand and turning the frames into a GIF.
Adding 2nd clock hands:
To make sure the clock hand progressed around the clock correctly, I added the clock hands at each hour first, before adding the in between frames. With this done, all frames were completed.
All finished final frames:
GIF & Evaluation:
I scanned every frame and turned the finished frames into a looping GIF. I am pleased with how the animation turned out, especially as I have never made a proper coloured animation before. When comparing the painted version to the sketch version, I feel that the sketch version is smoother in its movement, particularly at the start of the loop when the bud blooms. In the final frames, this occurs between frames 8-10, and it is clear that the transition between the bud being mostly closed to starting to open is not smooth due to the large difference in the flower's position and shape between frames 8 and 9. As I scanned the frames to make the GIF, I realised how big of a difference there was between these frames, and altered frames 9 & 10 a little bit by using a pen to make the black centres more prominent. While the motion is still no where near as smooth as in the sketch version, I hope it has improved it slightly in the final version. I am very pleased with the smoothness of the clock handles, I wasn't sure if it would work as it was a little bit hard to tell where Overall I am pleased with the outcome, it could definitely be improved in places but I think it turned out well. I do enjoy the bright colours and the better shots where the shading looks good and works correctly with the animation.
problem solving
Evaluation

problem solving
practical skill
planning & production
presentation
evaluation
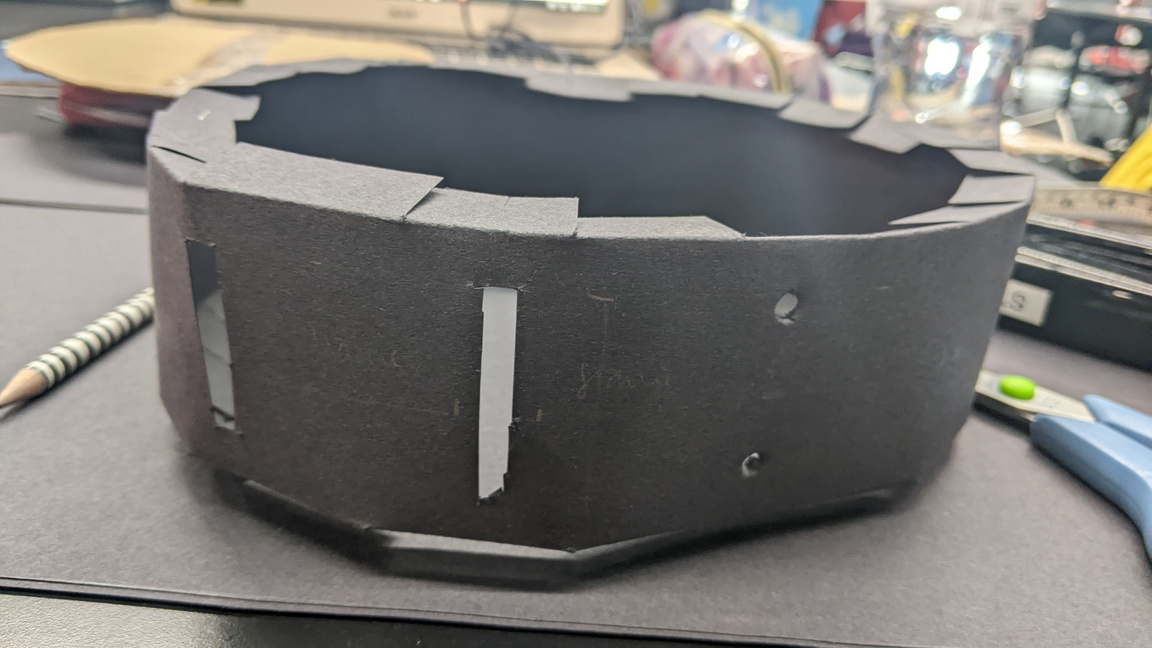
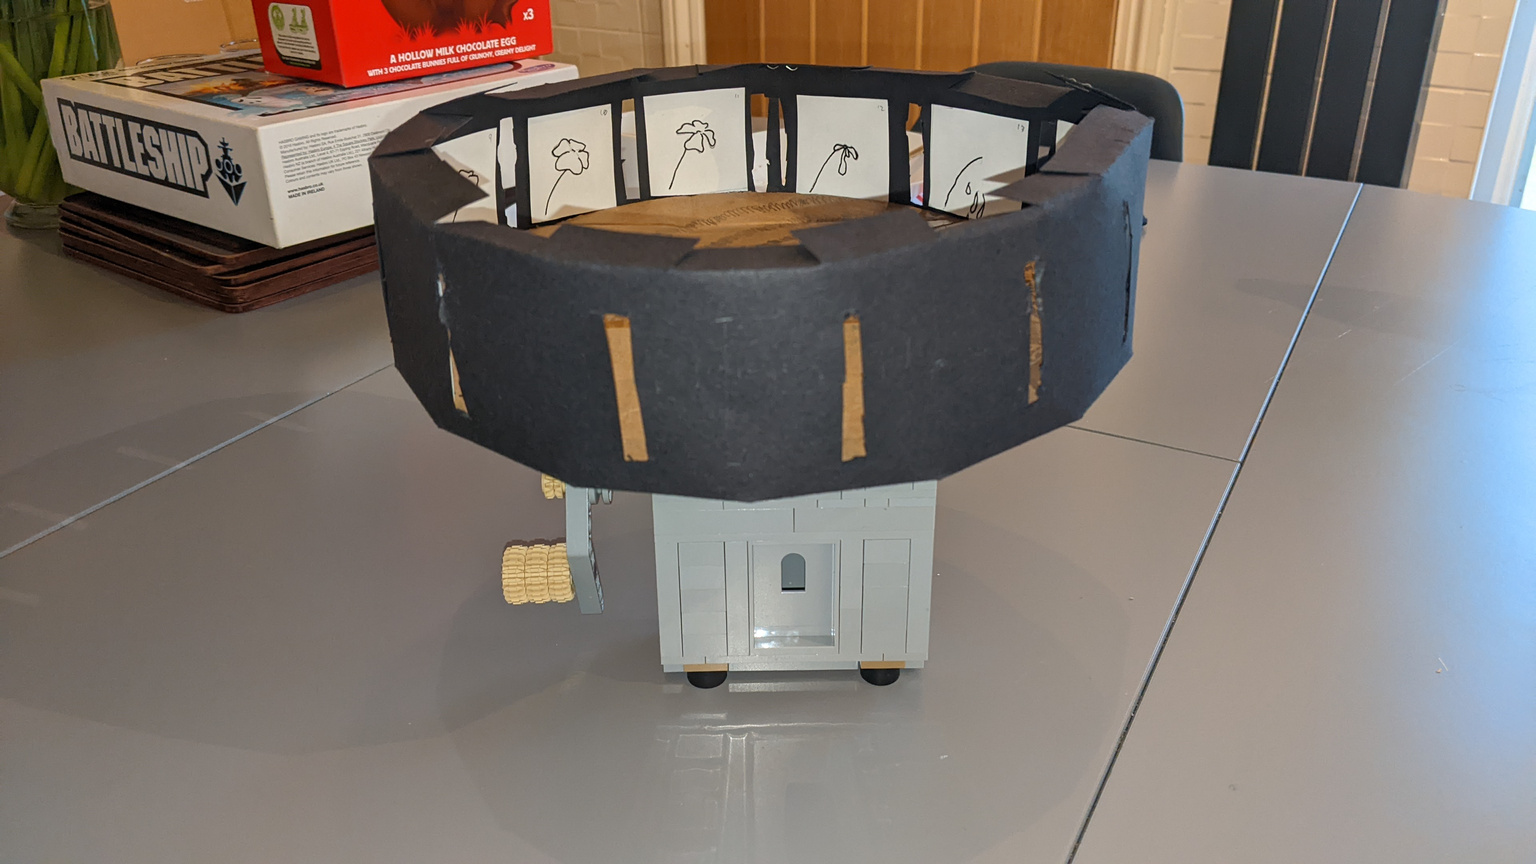
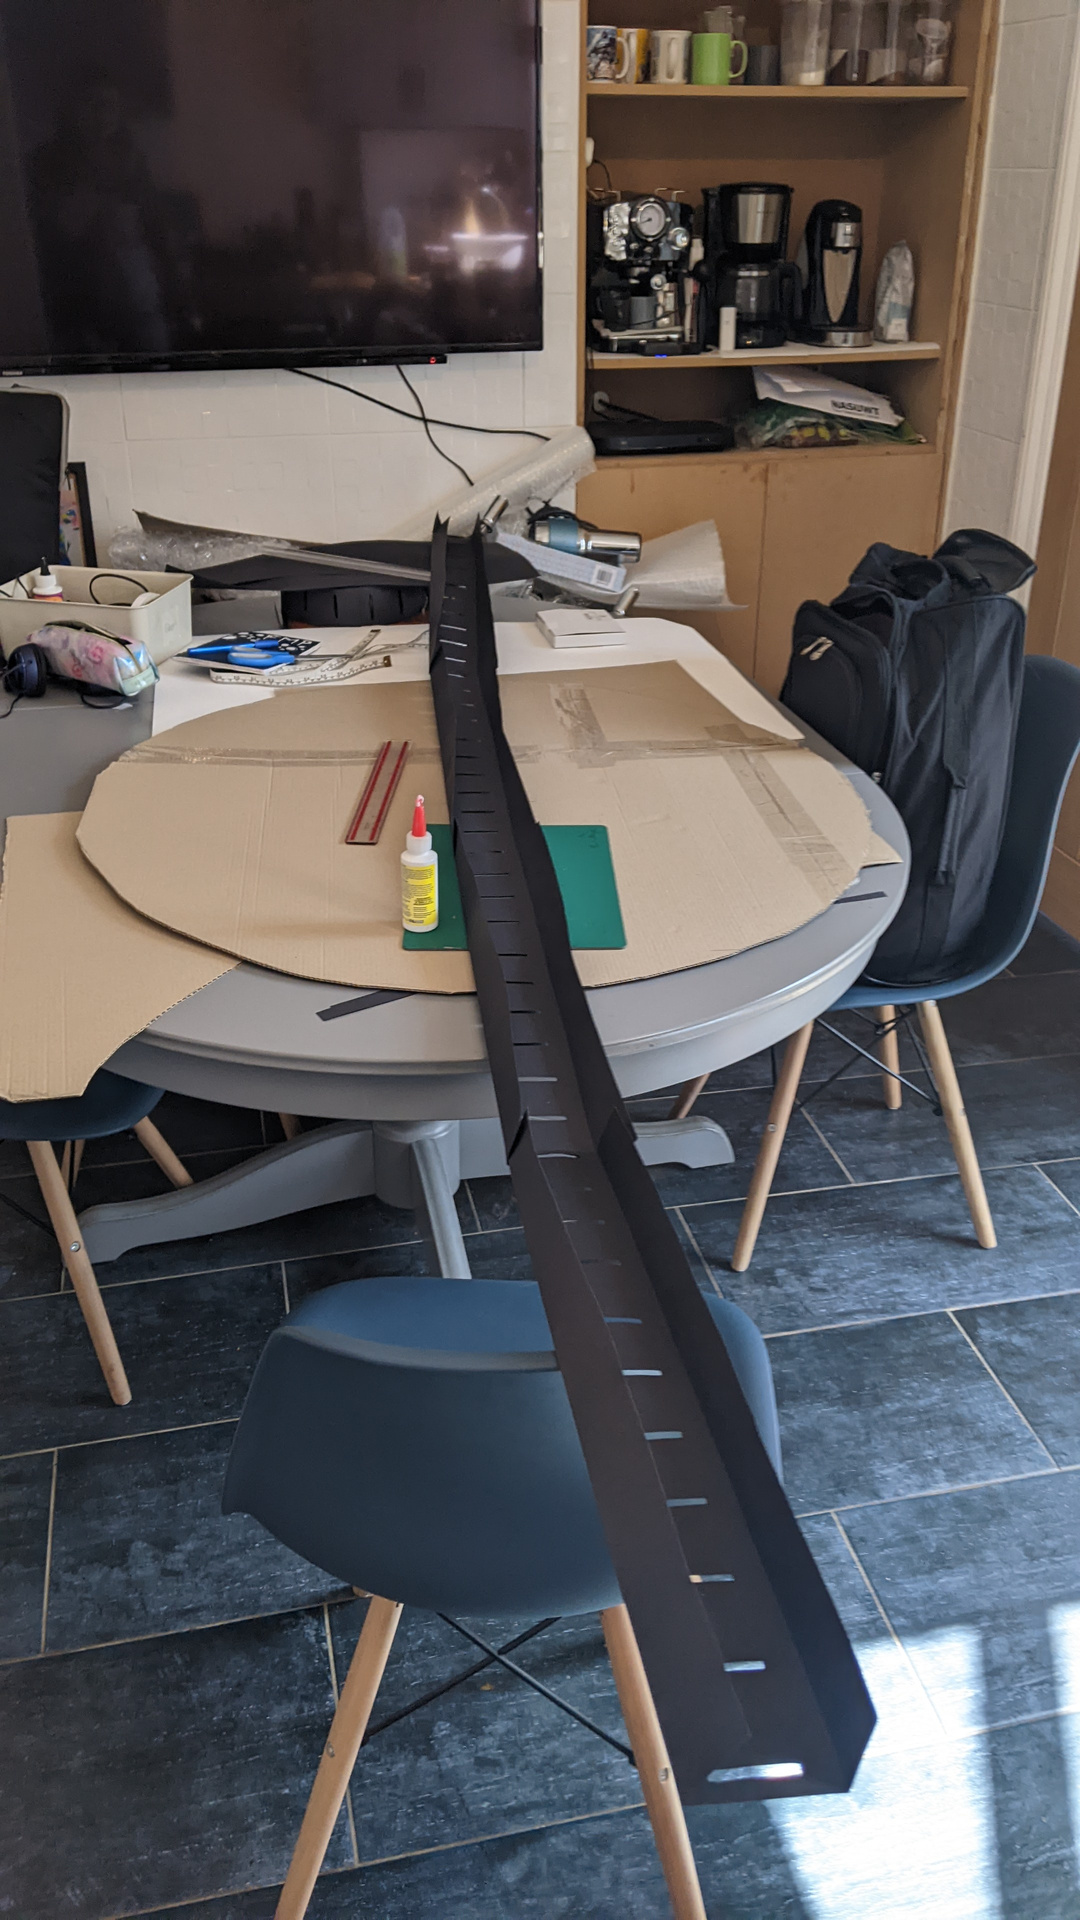
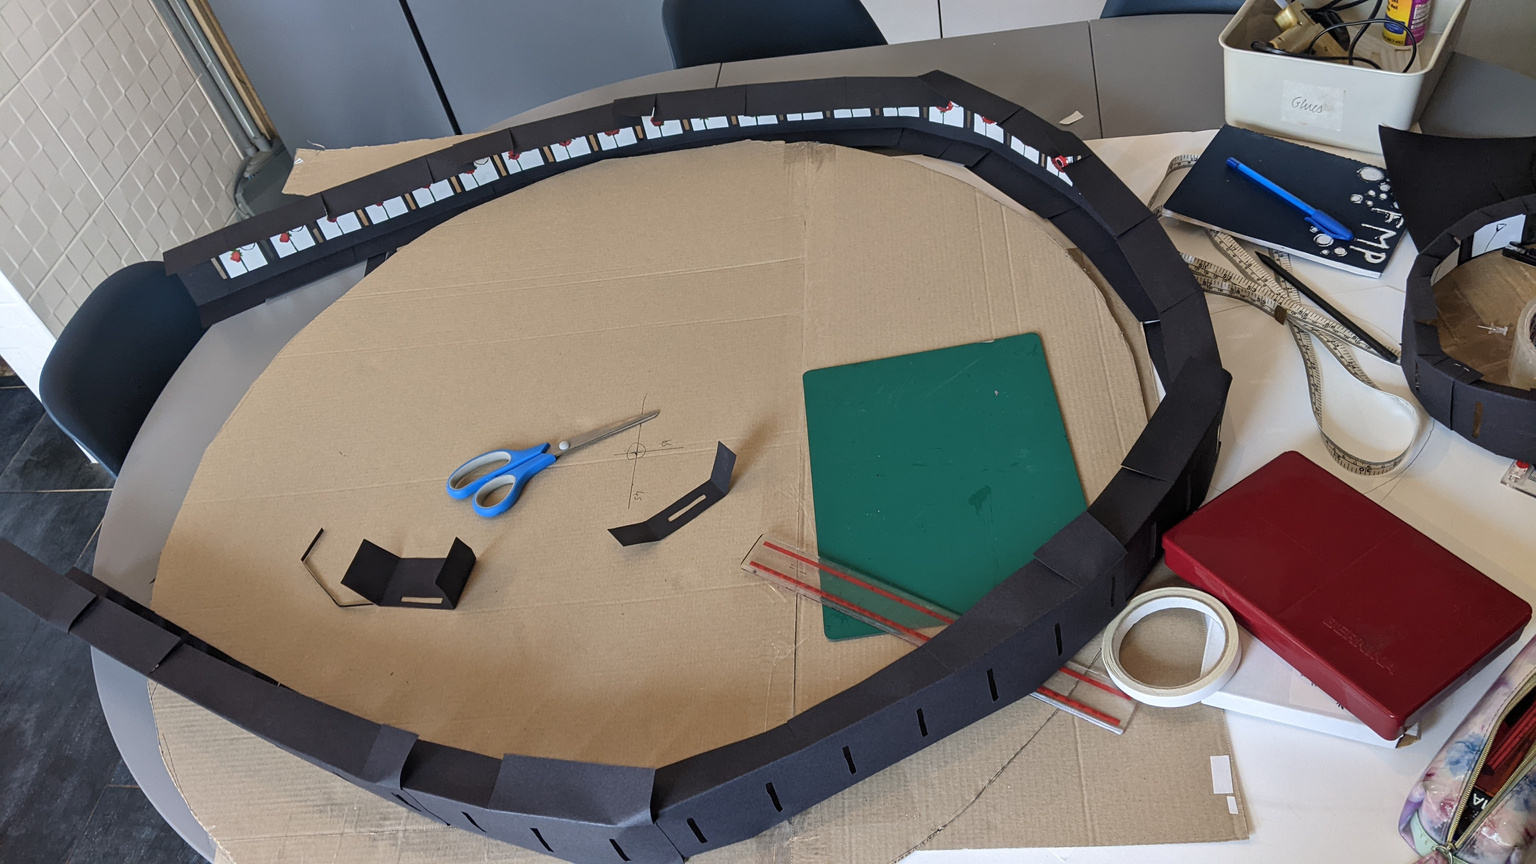
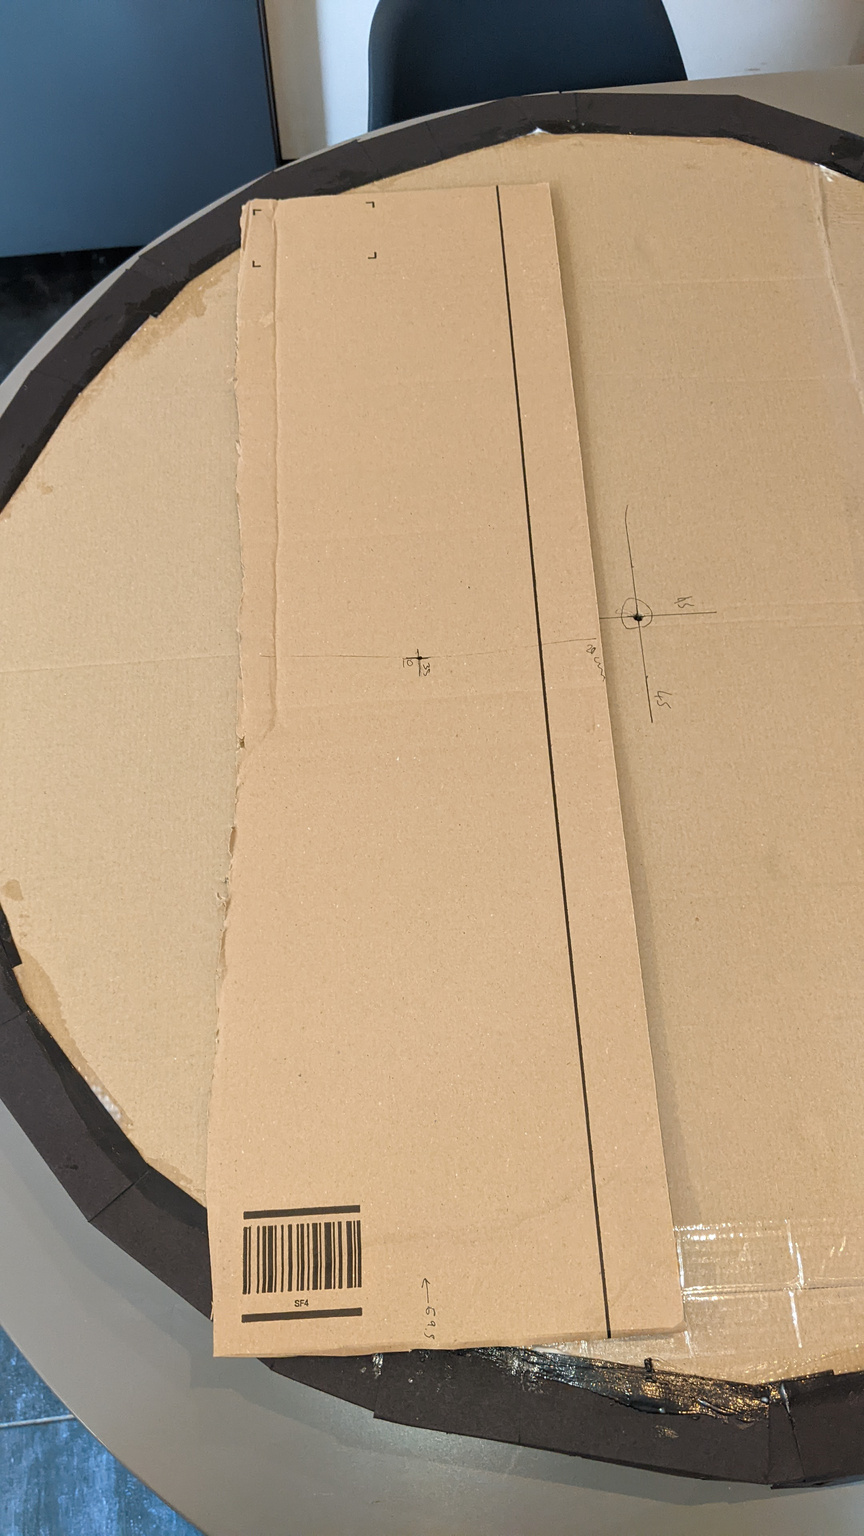
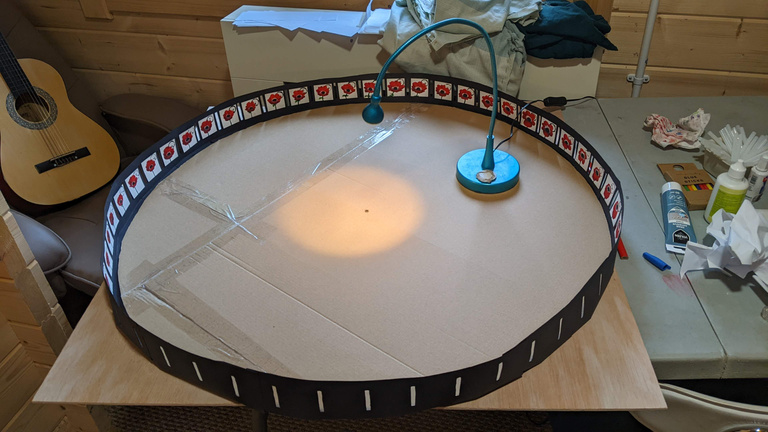
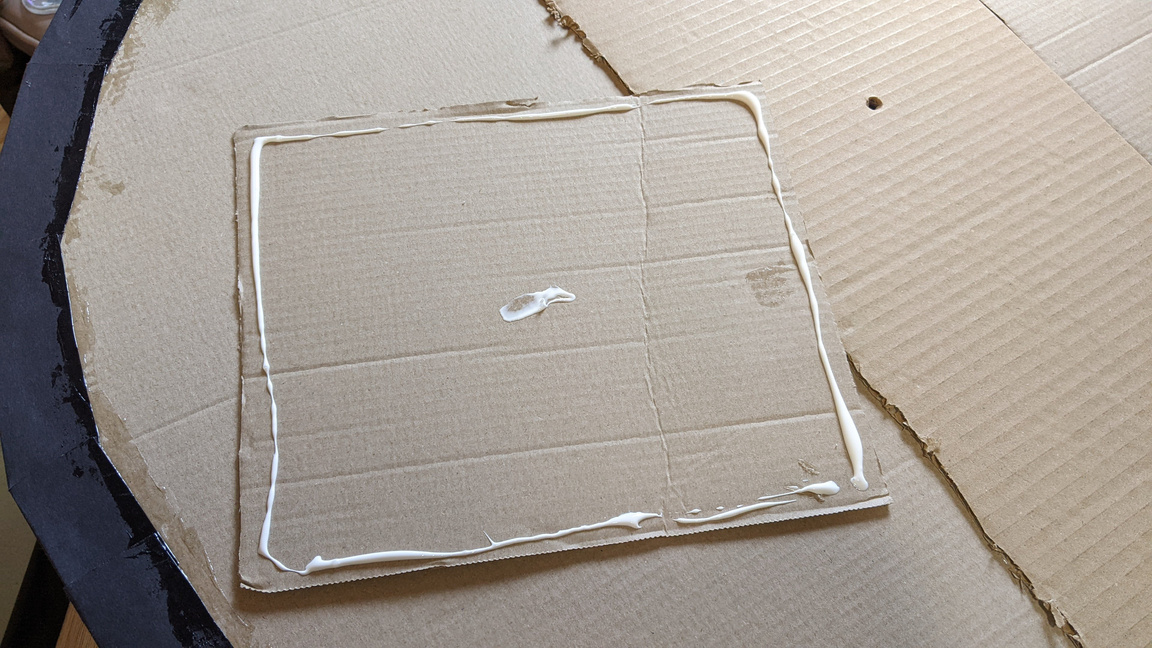
Making the Zoetrope:
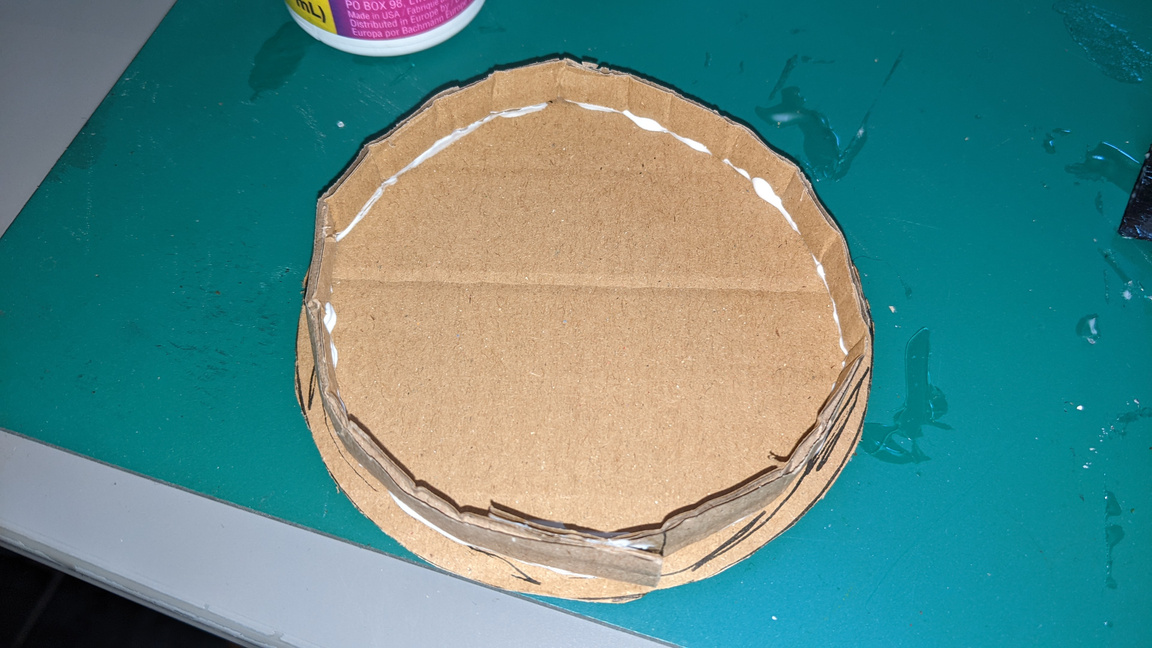
Building my physical outcome.
Making the base:
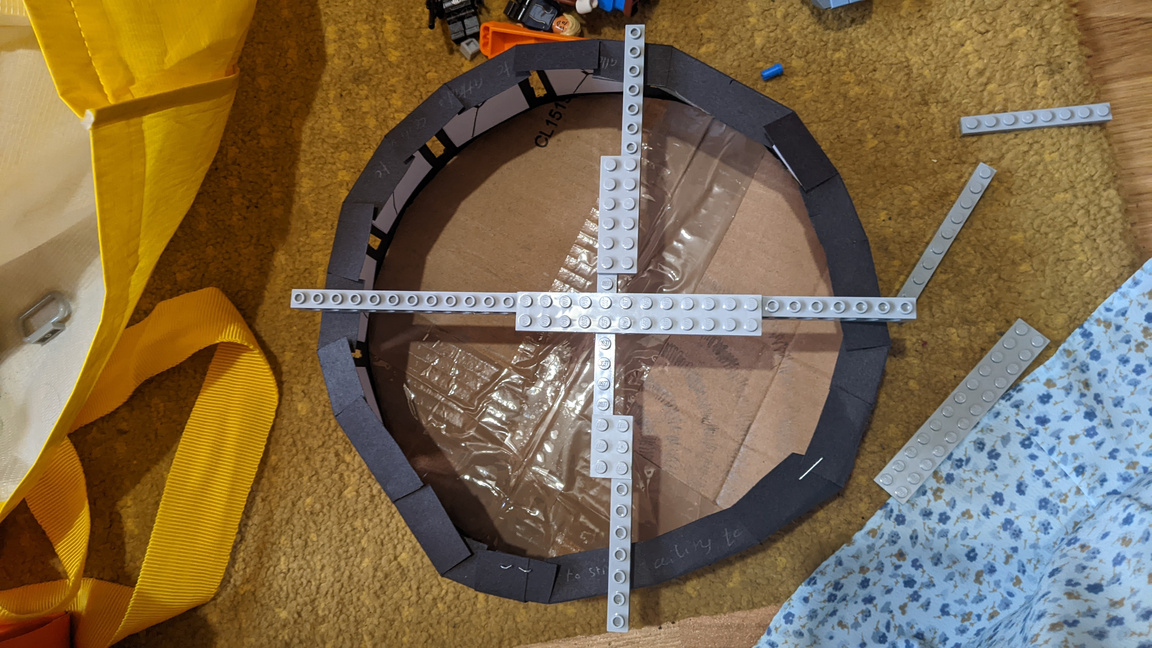
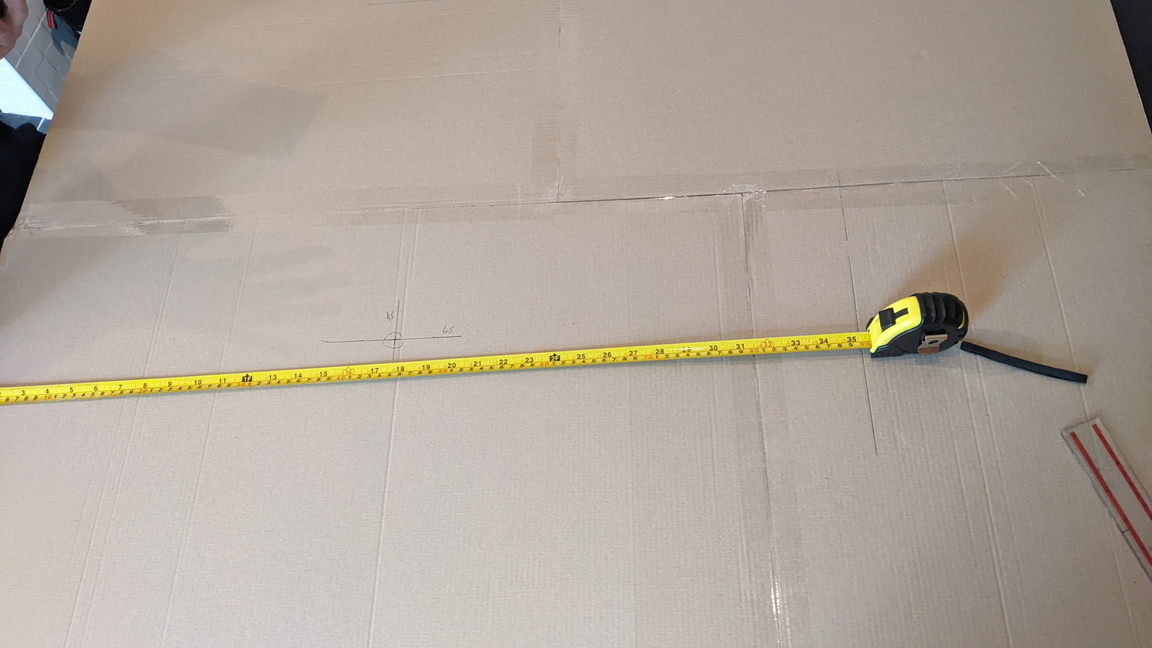
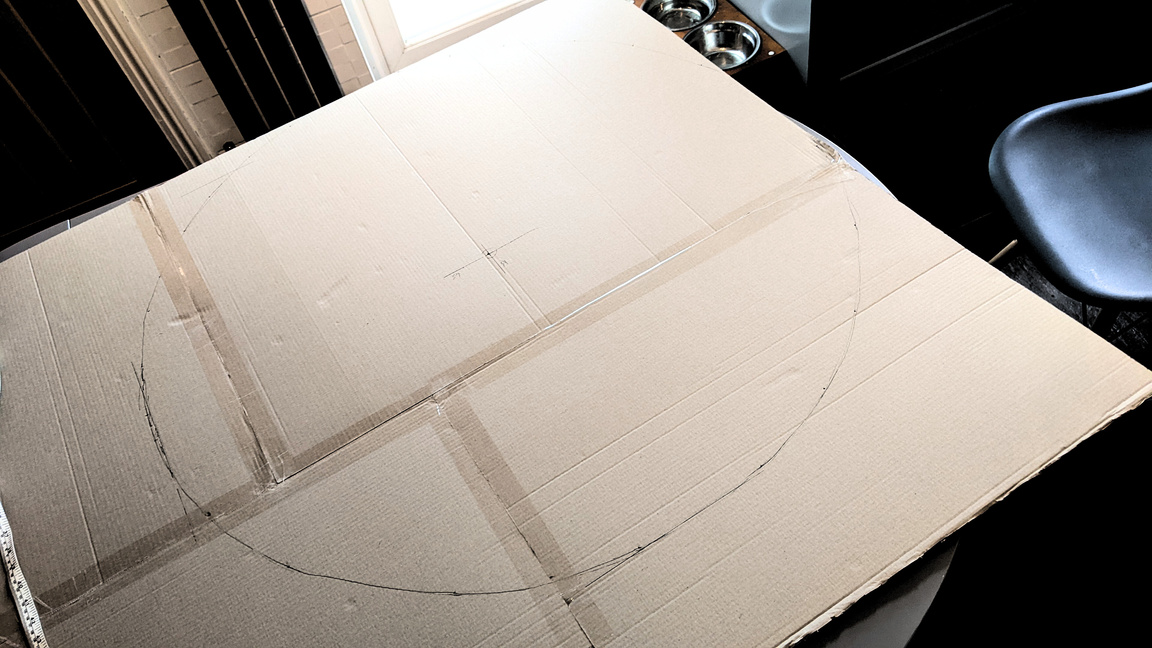
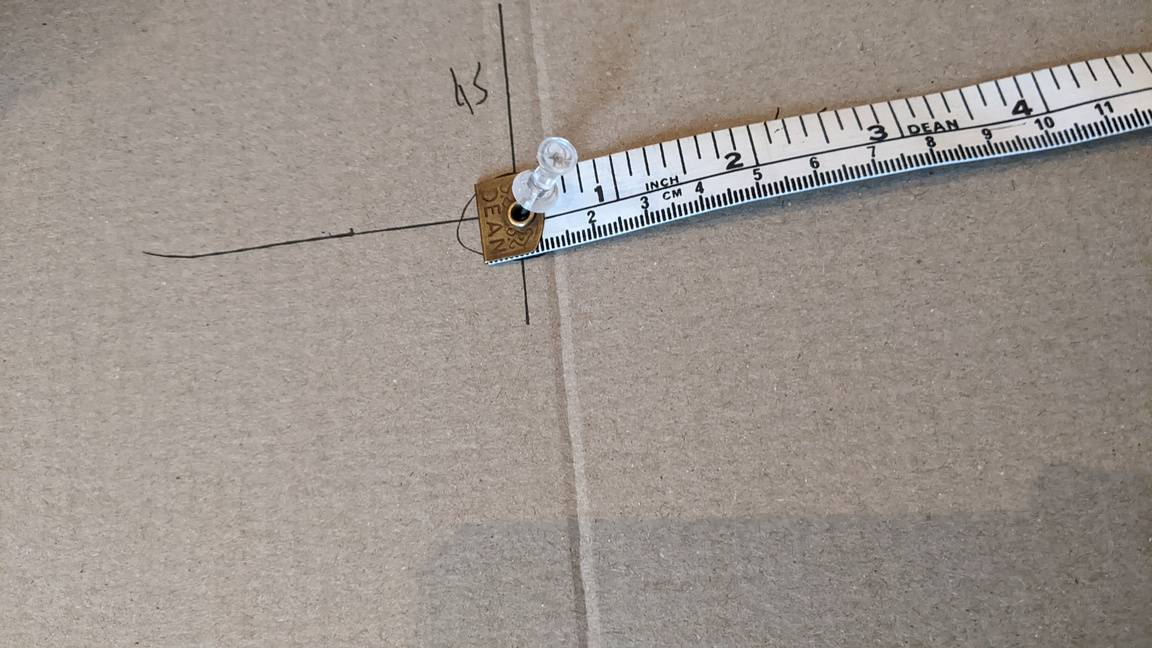
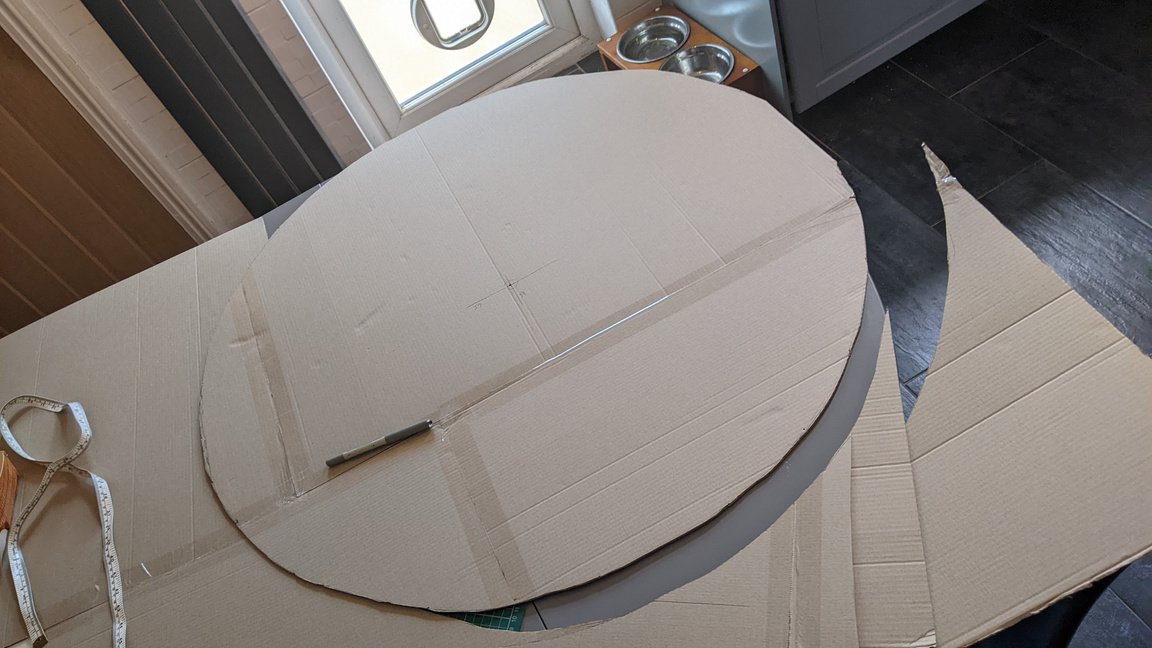
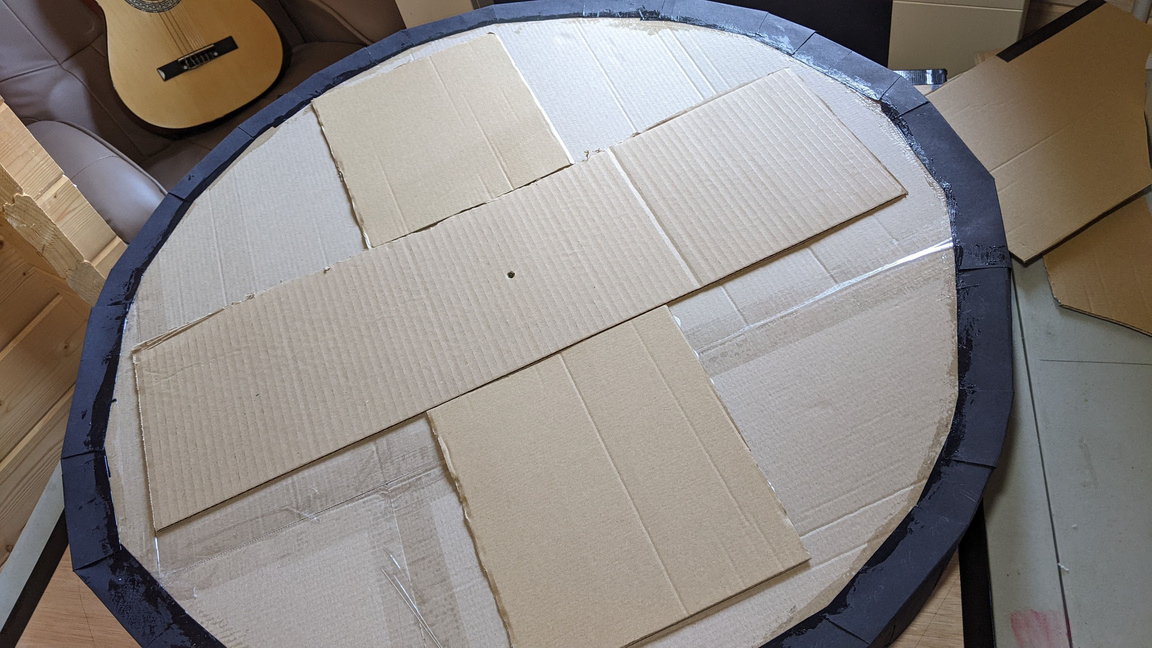
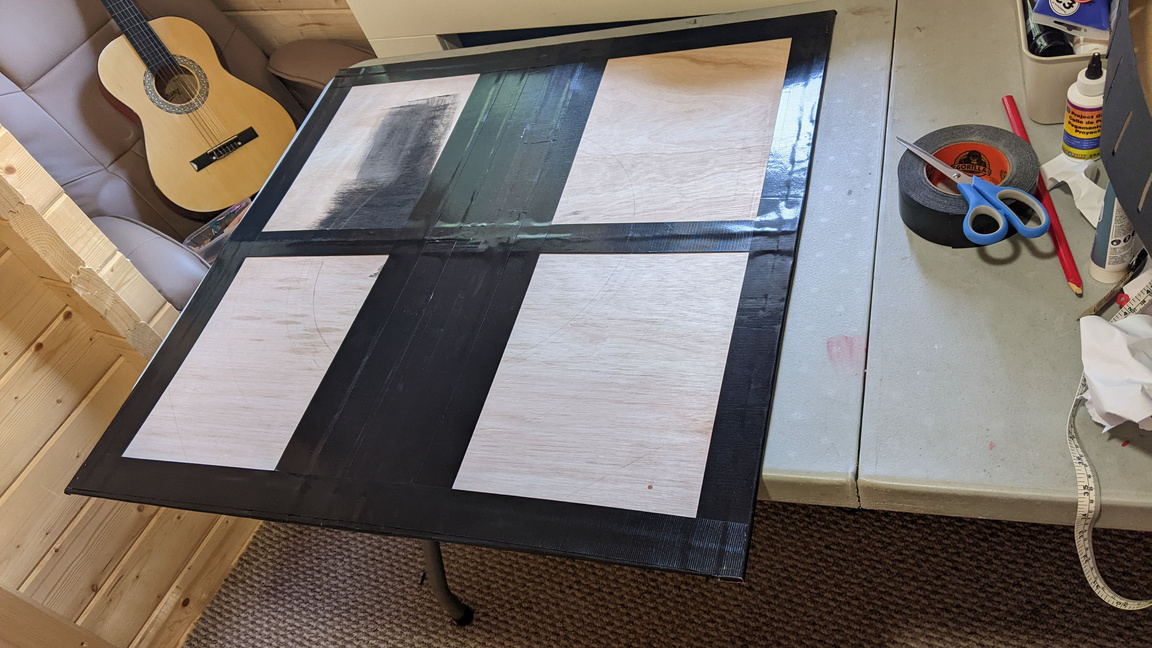
I started making my zoetrope the same way I made the mini one: by measuring and cutting out the base first. I decided to use cardboard again as it is super lightweight while also being sturdy, and I had access to an abundance of it. I didn't have a piece large enough, so I had to stick multiple boards together with tape. I used the same technique of using a measuring tape as a compass to make dots around where the circumference should be. I measured this a few centimetres larger than I had calculated for in order to be safe. I joined the dots in a sweeping motion to create the outline of the circle and cut it out to create my base.
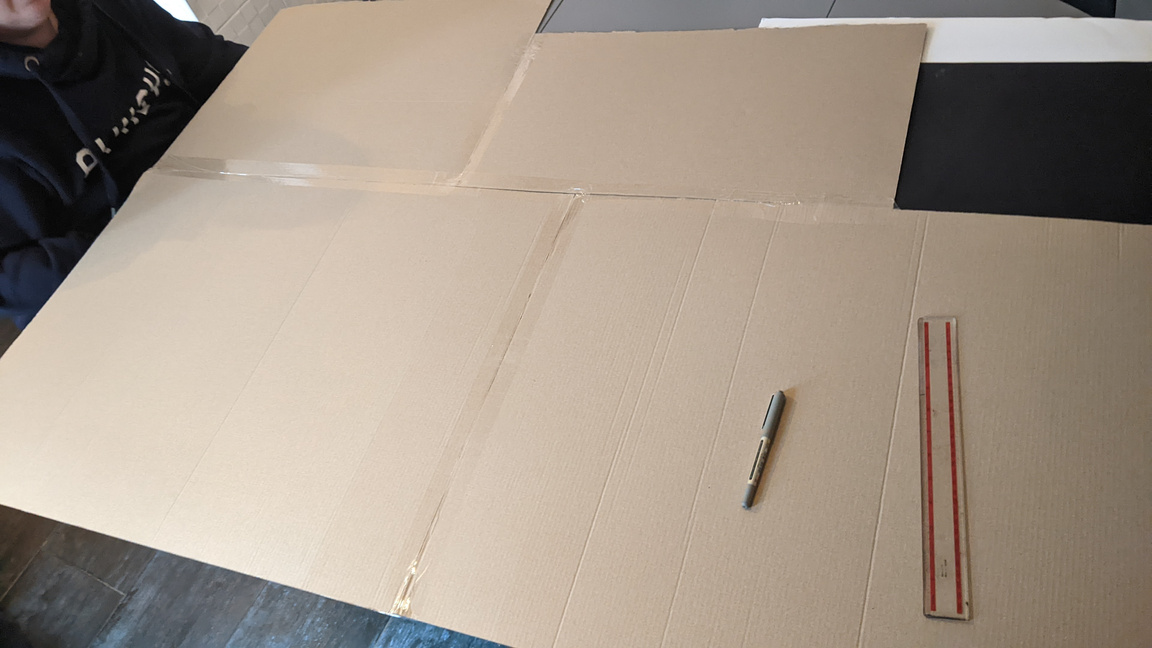
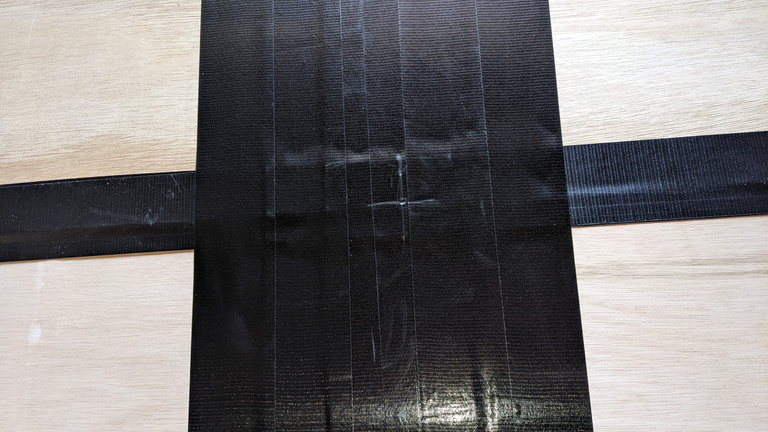
Material for the walls:
I used the same type of black card for the walls that I used for the test zoetrope as it keeps it shape well after being bent round the circumference. The contrast between the white paper frames and the black walls also worked well visually for the test outcome, as it shows the a clear distinction between each of the frames.
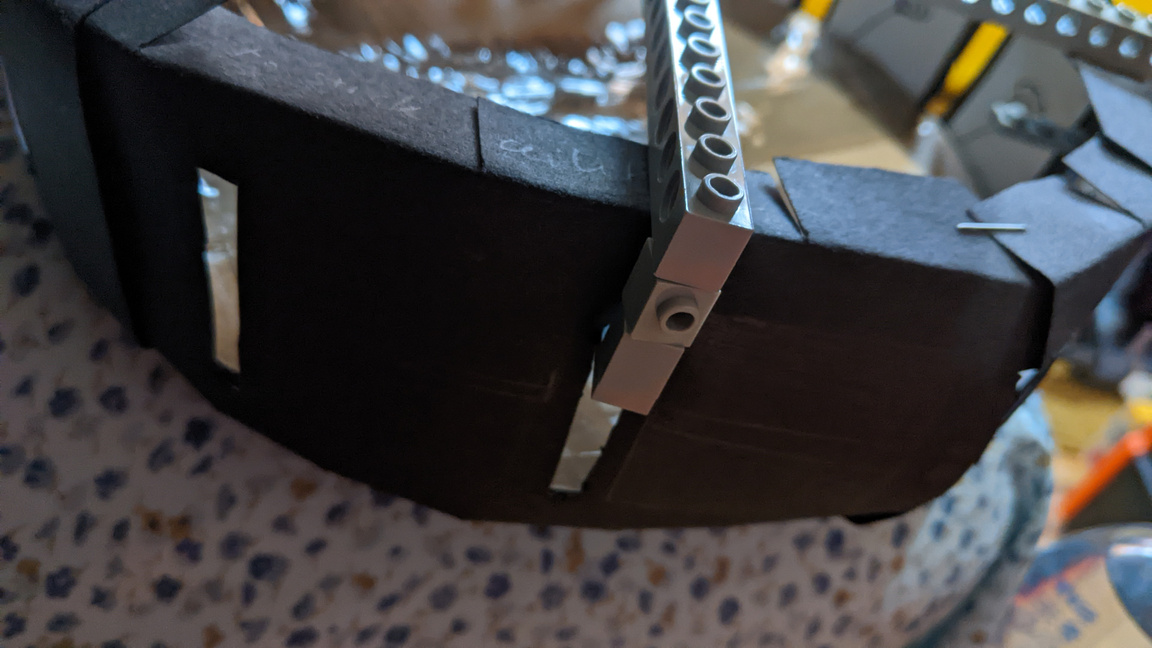
Making the walls:
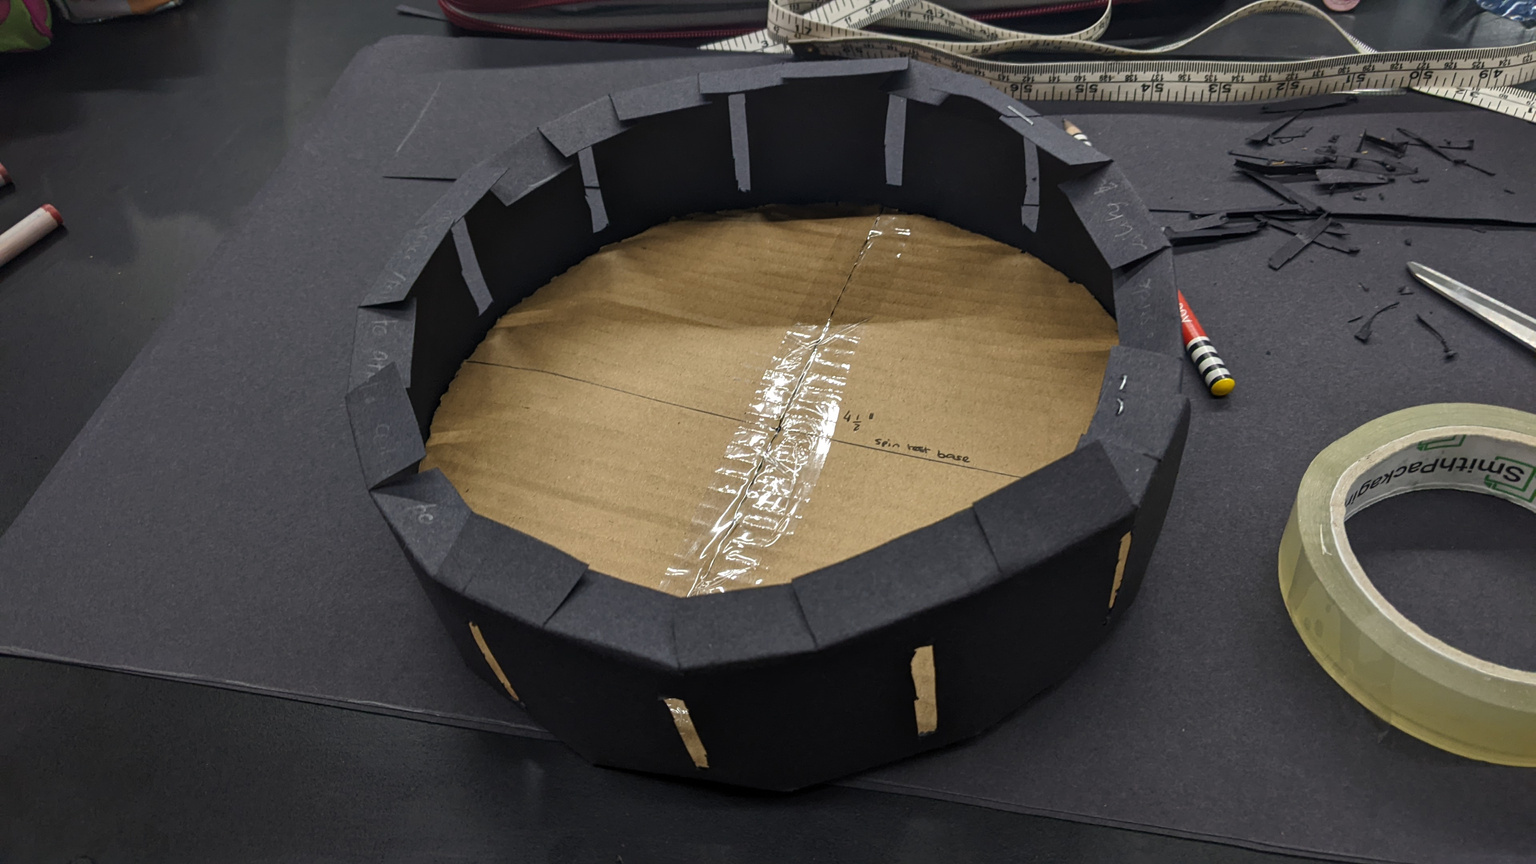
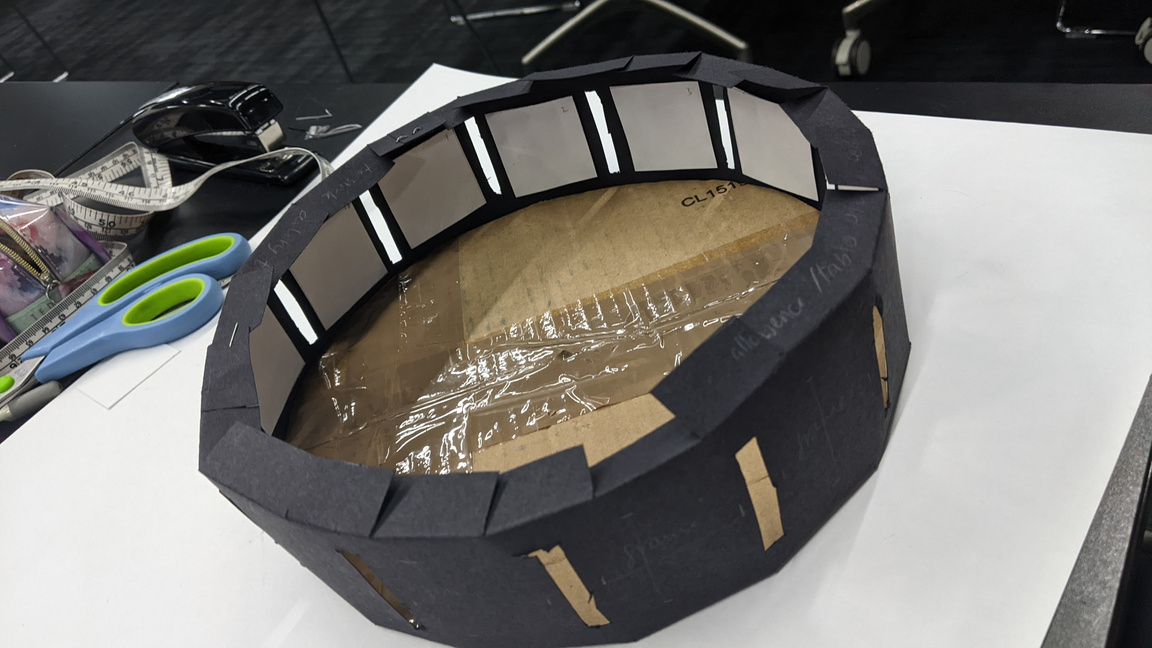
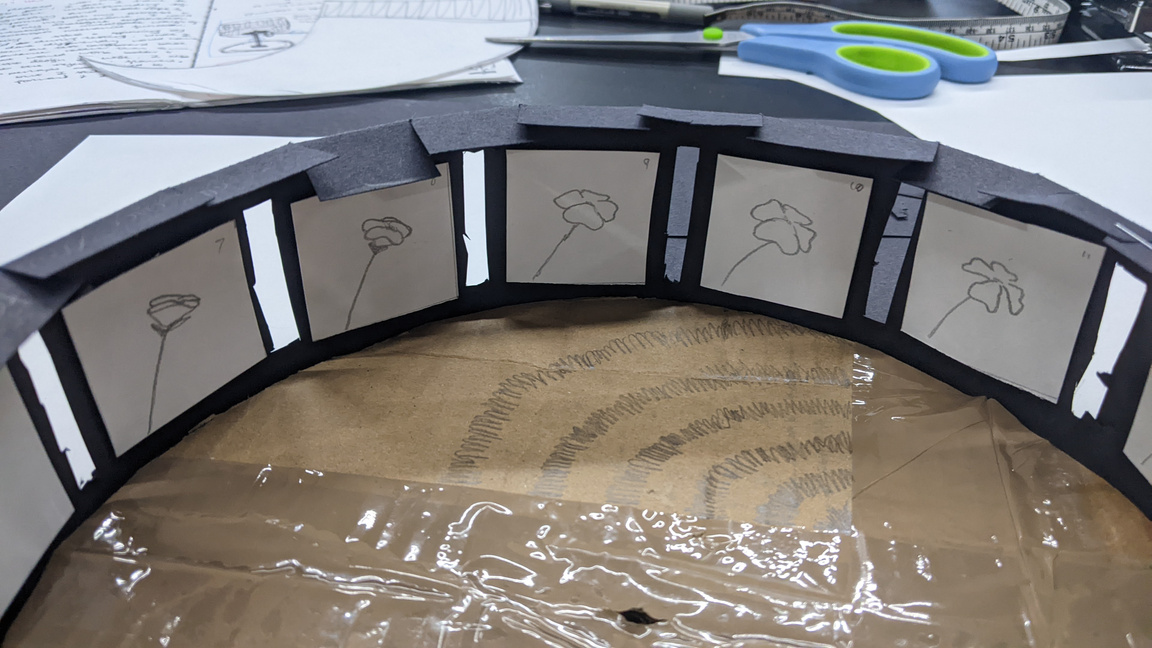
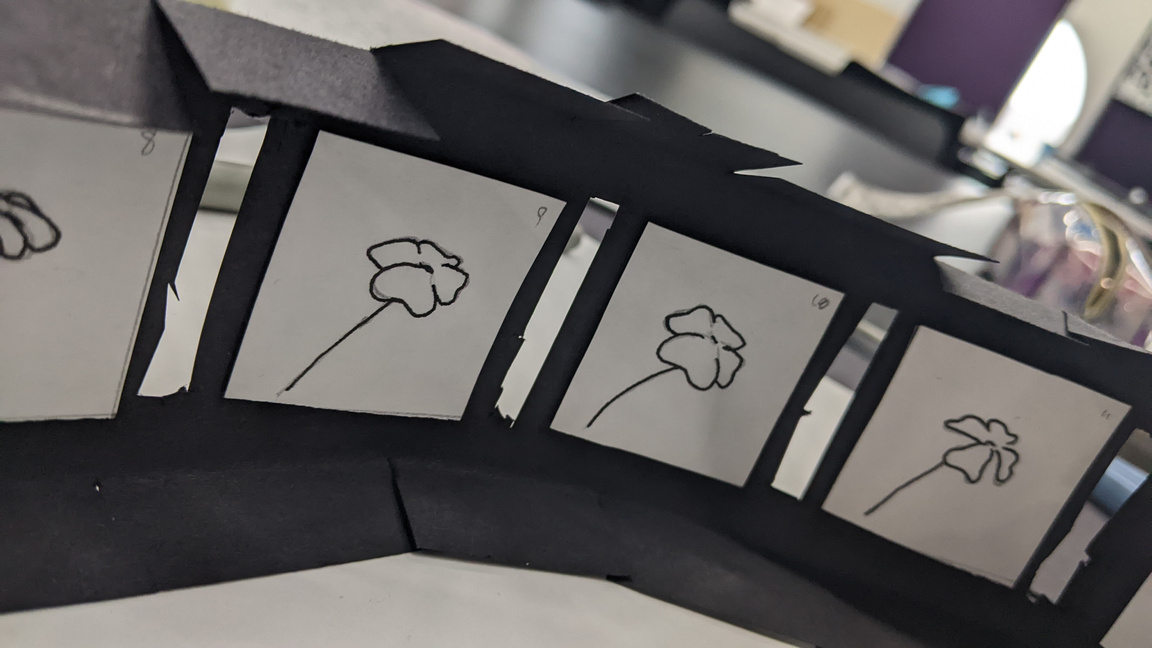
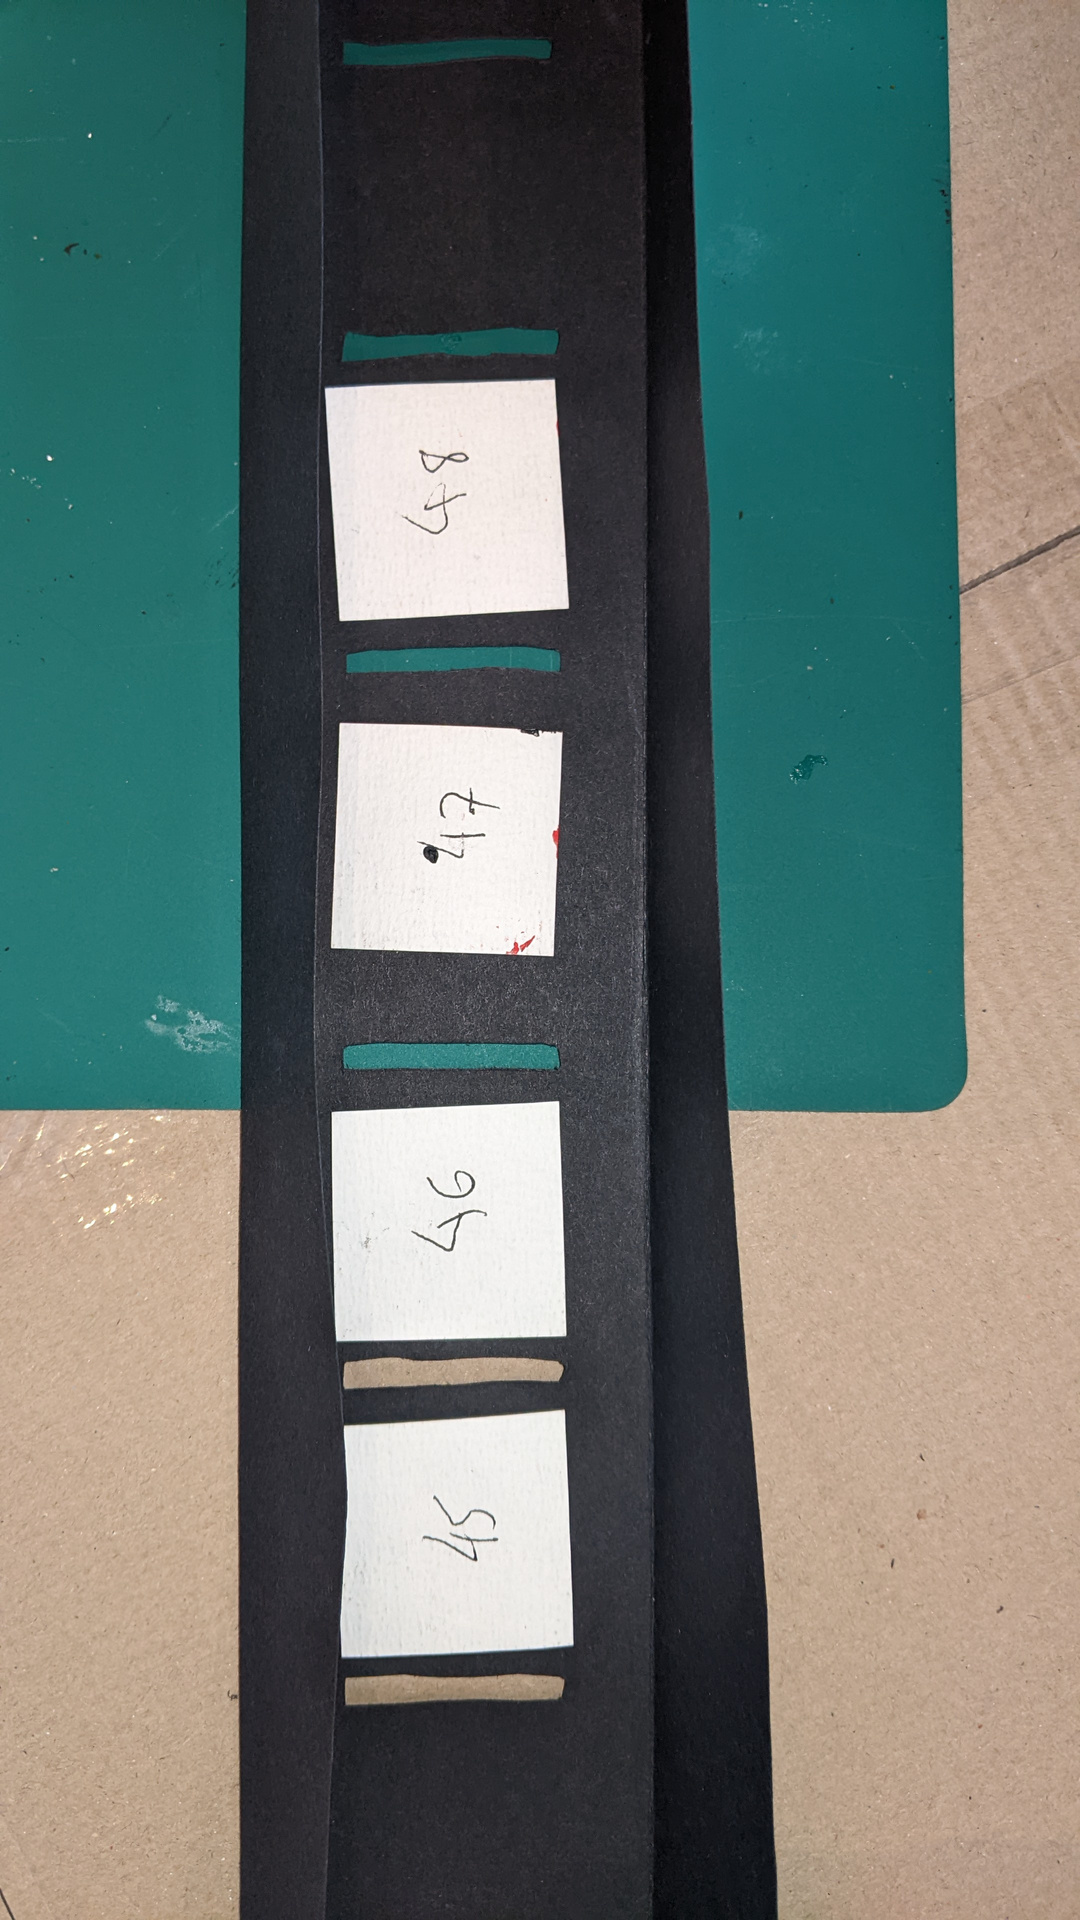
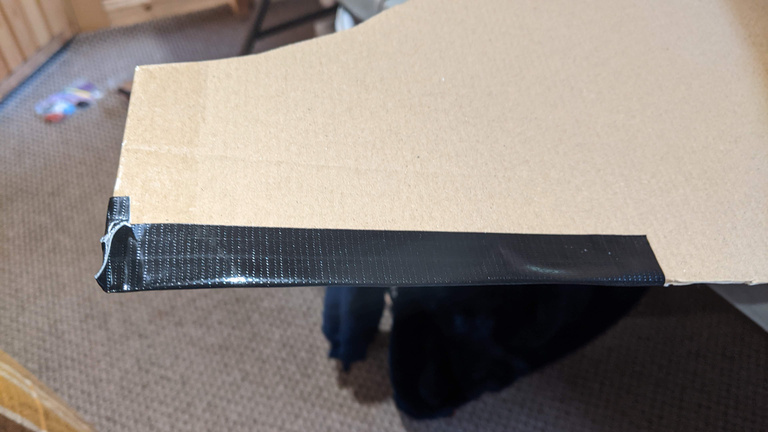
I measured out the dimensions I had previously worked out, which was the same as the test zoetrope, on one strip of black card. The only change I made was to increase the distance between the frames and the bottom of the walls from 0.5cm to 1.5cm so the frames were further from the floor of the zoetrope. I then used a craft knife to cut out the viewing slits and cut the excess card off of the top of the zoetrope wall piece. I cut out more pieces of card that were the same height and width as the wall piece I had made. I then traced the outlines of the viewing slits onto the new pieces of card. I cut these out and made sure I had enough spaces for frames to go by having enough wall pieces, of which ended up needing 5 wall pieces.
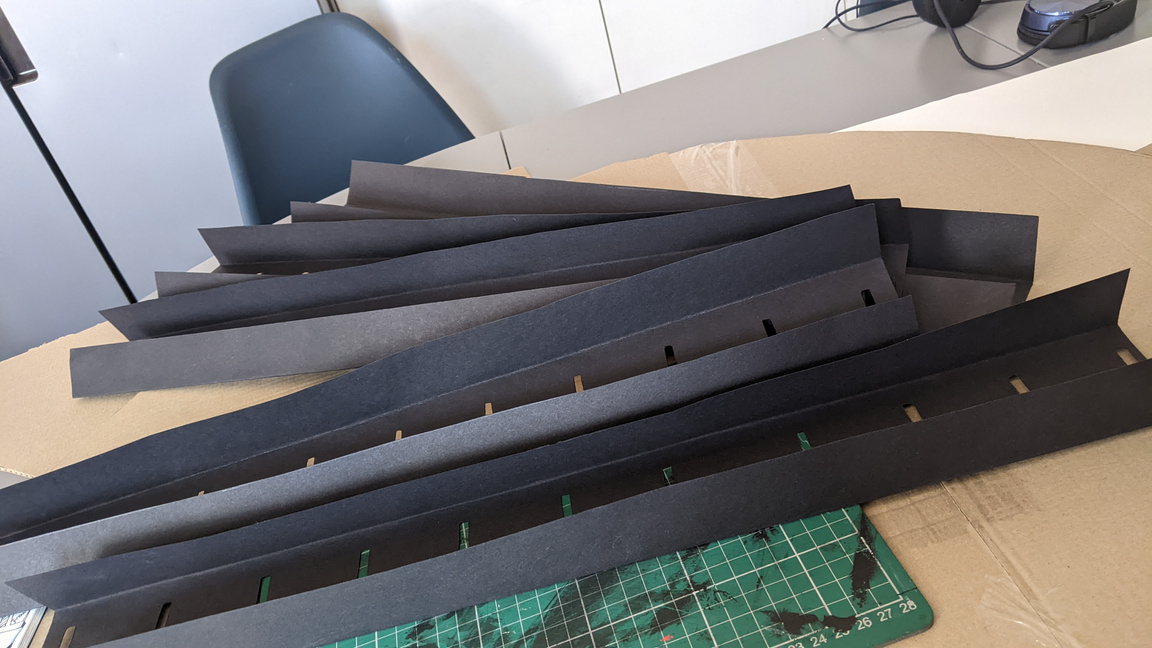
Folding the walls:
I folded my original wall along the measured line for where the bottom of the wall should be. I had added both an upper and lower allowance - approximately the width of my ruler - to the top and bottom of the wall, as I did with the test zoetrope. The lower allowance is to stick the zoetrope walls to the zoetrope base securely, and I added the upper allowance just in case I wanted to add a roof of some sort to hold the walls in place. After folding along the lower allowance line for the first wall section, I marked out this fold on all the unmarked wall sections and folded them in a similar fashion. I put all of the walls on top of each other to ensure that they all folded in the same place. I did the same with the upper allowance. I then erased the measurement lines on the outside of the template wall.
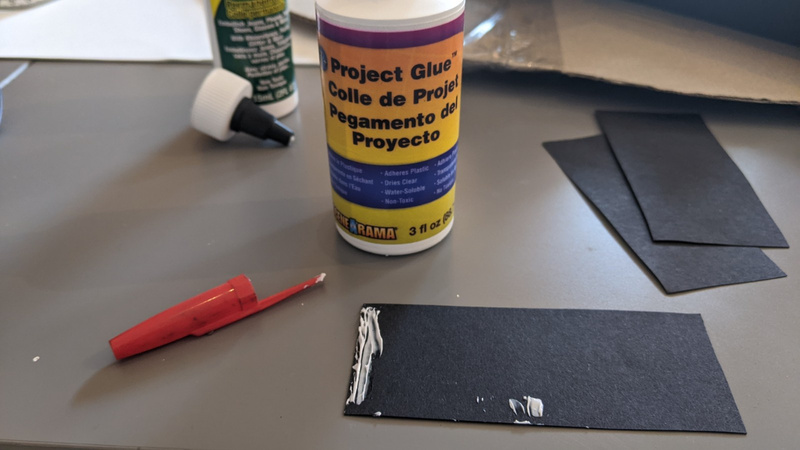
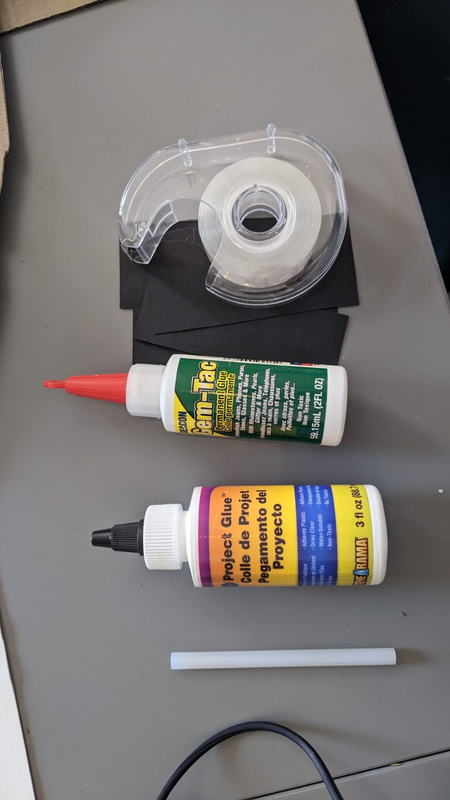
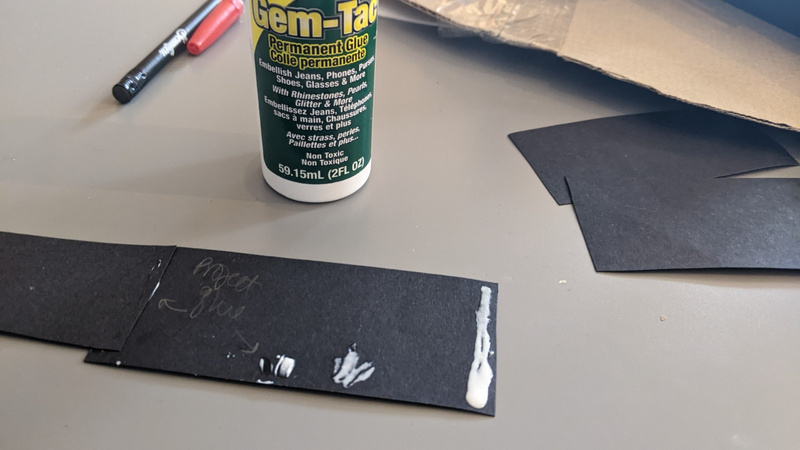
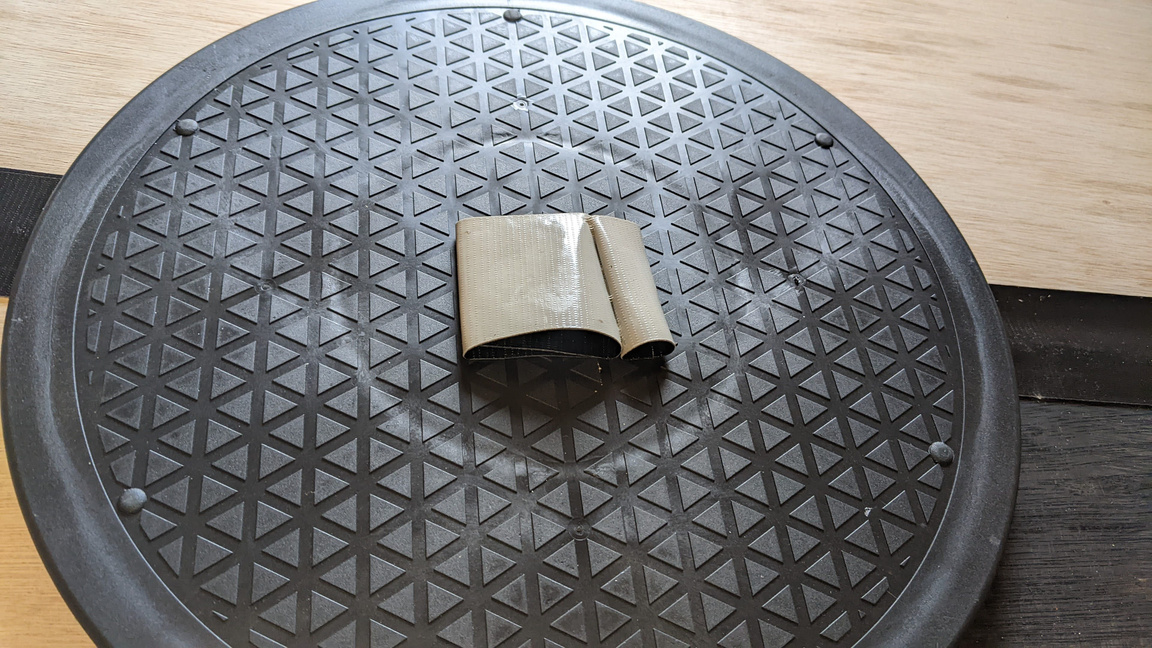
Glue tests:
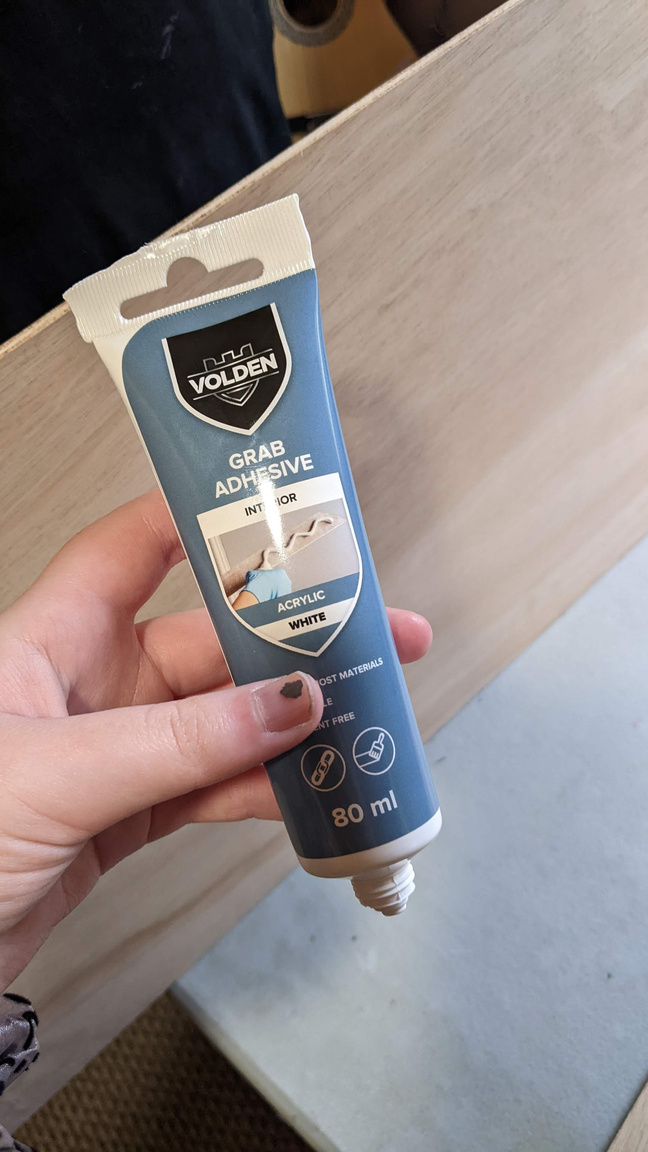
I tested out different ways of sticking the zoetrope walls together: project glue, Gem-Tac permanent glue, glue gun, tape, and double sided tape. I listed out the positives and negatives of each one, and decided that Gem-Tac glue would be the best to stick the walls together due to its more liquid viscosity and easiness to apply. Double sided tape was very quick and easy, so I planned to use that to stick the frames to the walls.
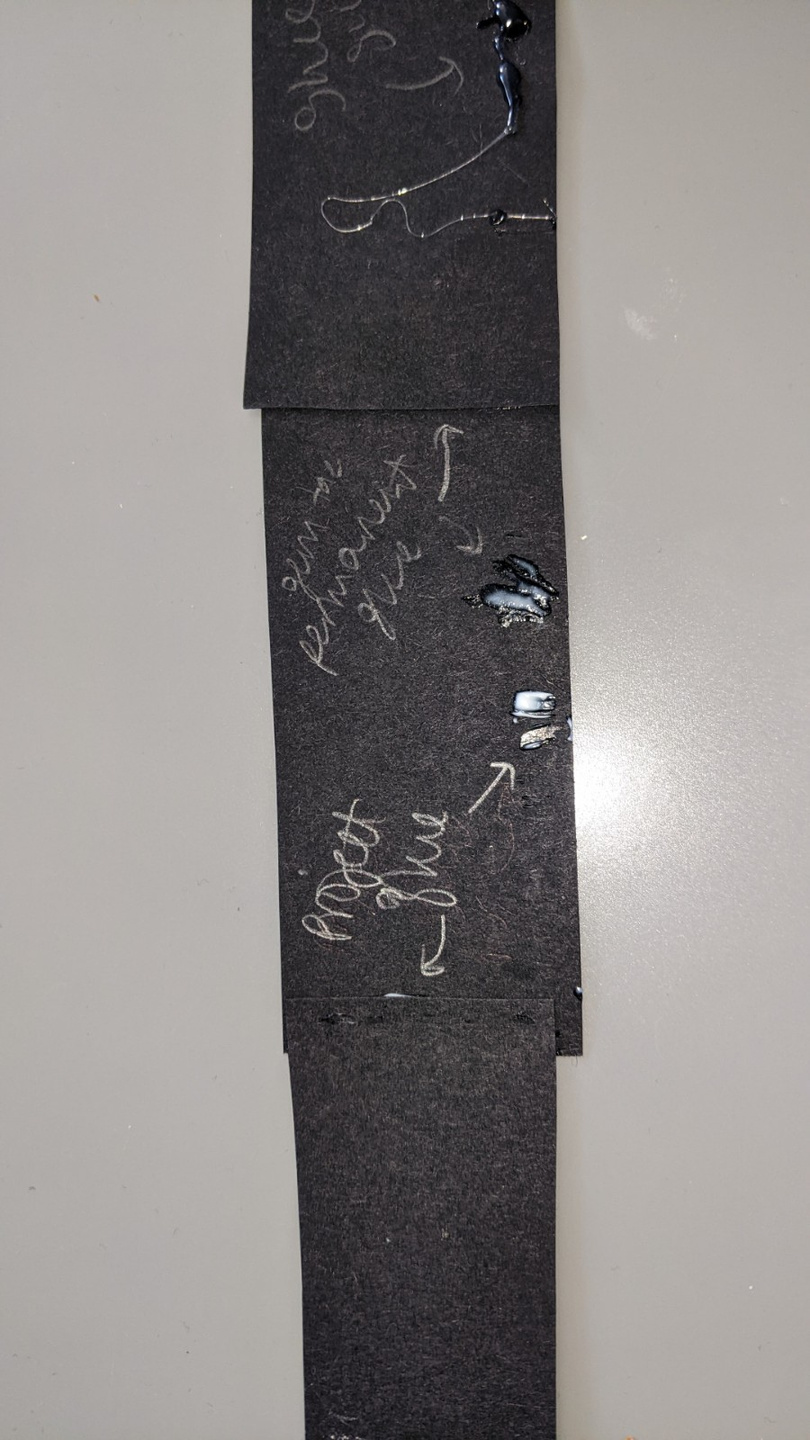
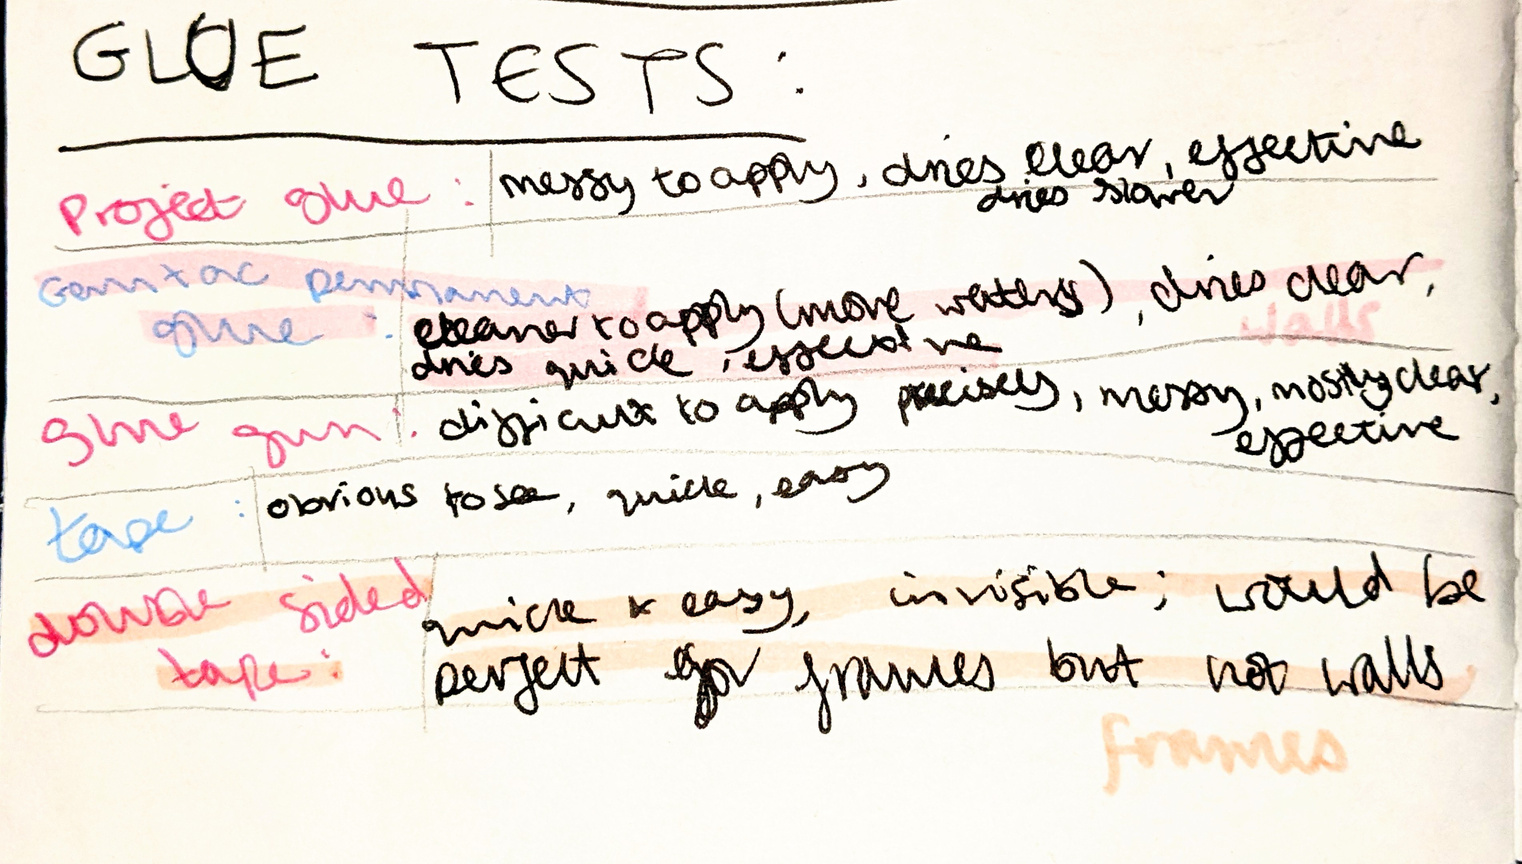
Test conclusion:
I used Gem-Tac permanent glue to stick the walls together, and double-sided tape to stick the frames together.
Sticking the walls & problem solving:
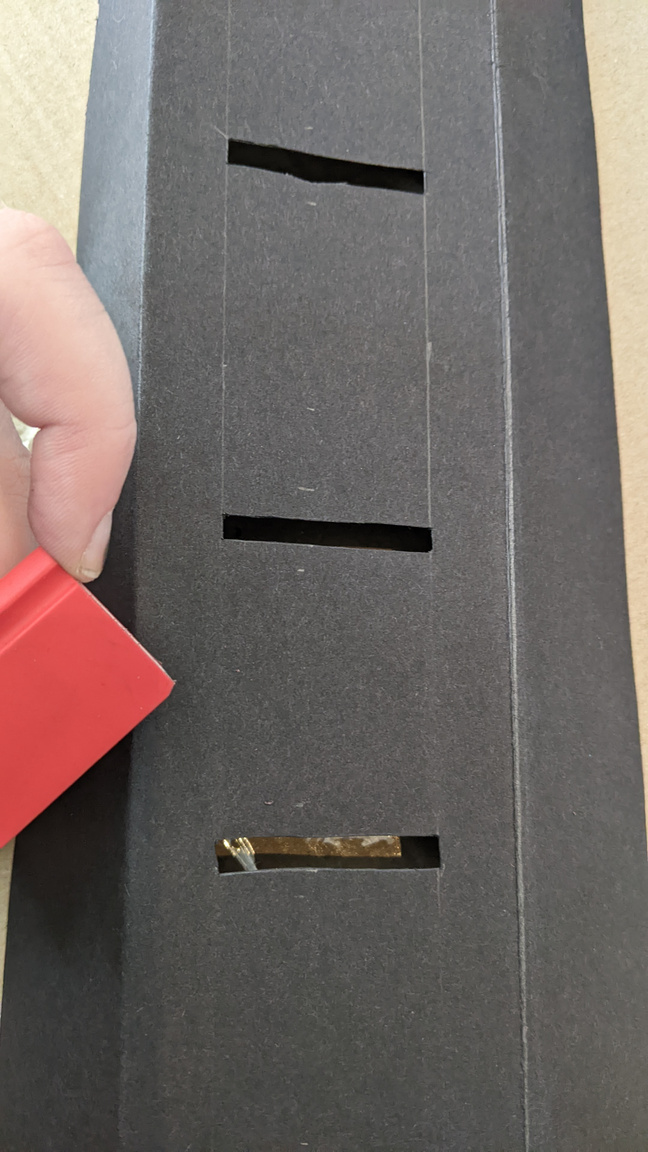
I applied a good amount of Gem-Tac glue on one end of the wall partition and stuck the adjoining wall on top. After leaving it for a few minutes the walls started to dry, so I laid out the rest of them sections and glued them as well. While the glue was drying I noticed that on each section there was a gap for the frame that was too long, which I seemingly measured incorrectly. To fix this I cut along the middle of the frame gaps that were too long and glued them closer together, measuring to make sure they were the same distance as the rest as intended.
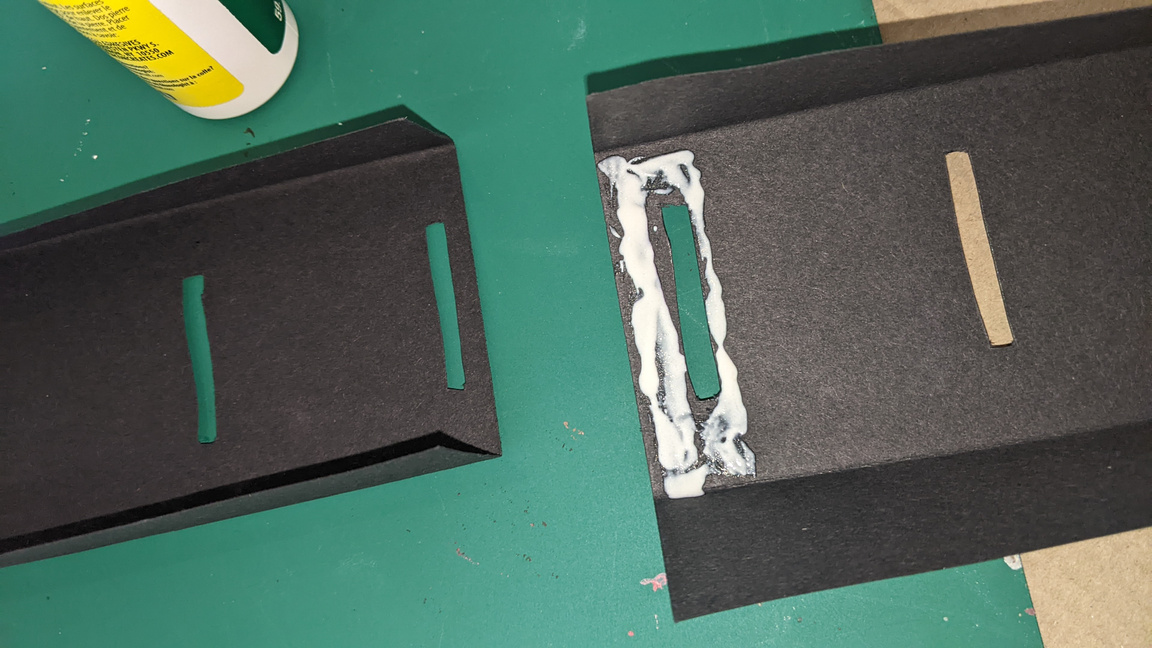

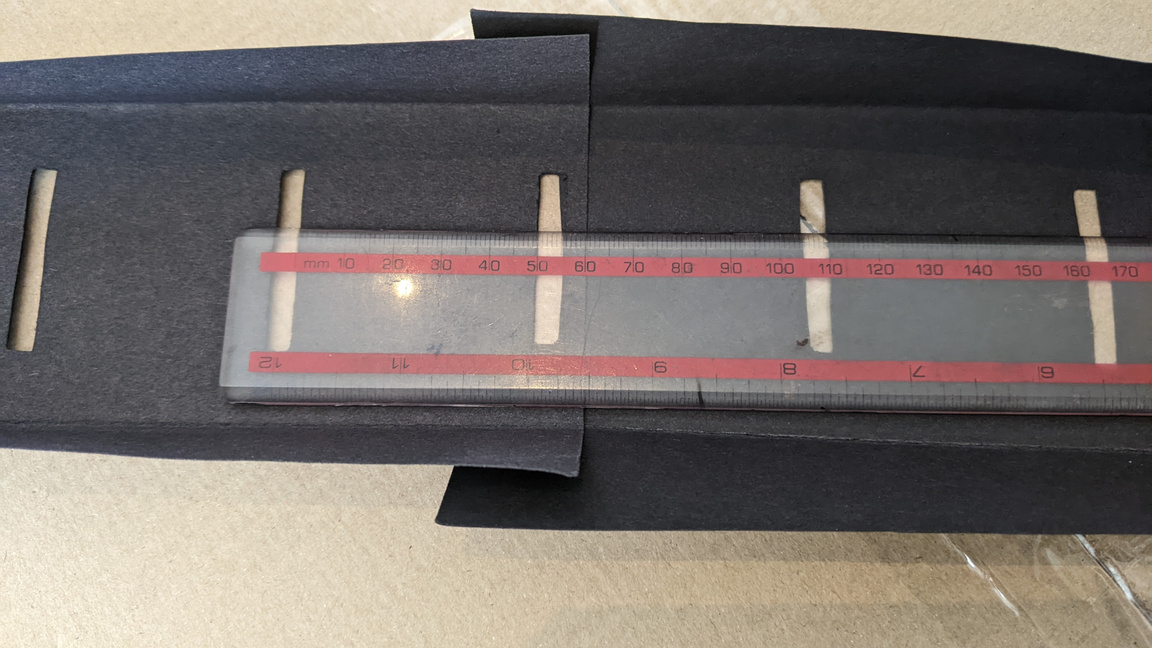

The gap was too wide on each wall section.
The fixed gap with the correct width.
Attaching the frames:
I attached two strips of double sided tape to the backs of every frame. Before sticking the frames on the walls, I recounted to make sure that I had enough spaces and it turned out that I had 50 spaces, so I had extra spaces just in case. Leaving a gap at the front, I then went through and attached every frame, making sure I put them on in the correct order and without missing any.
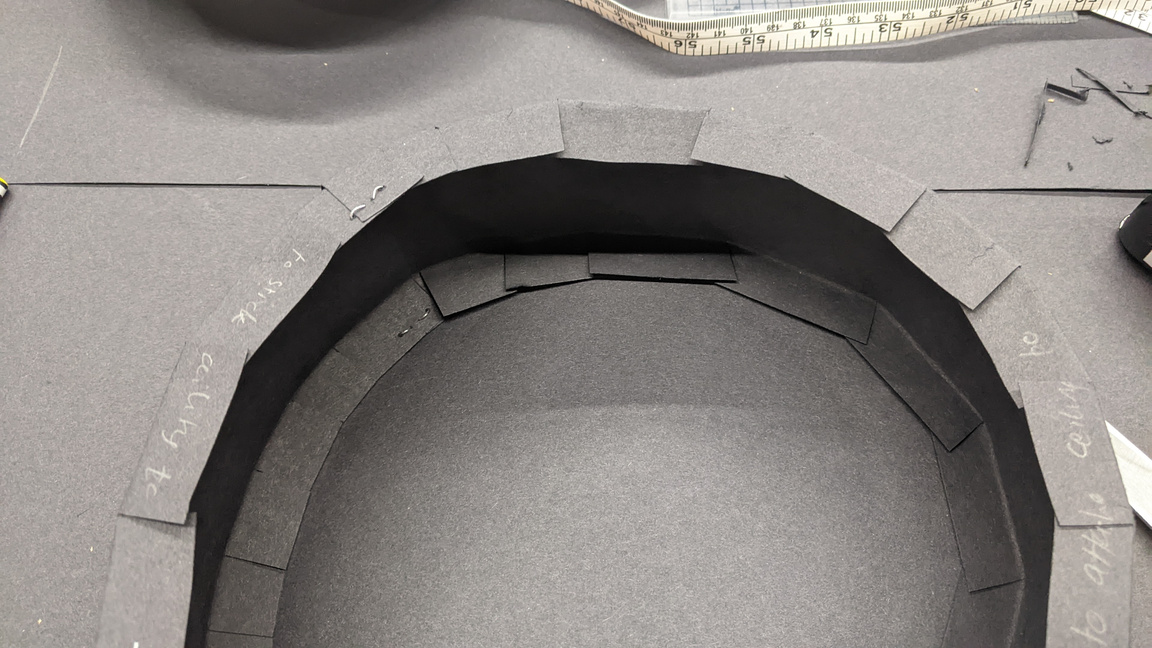
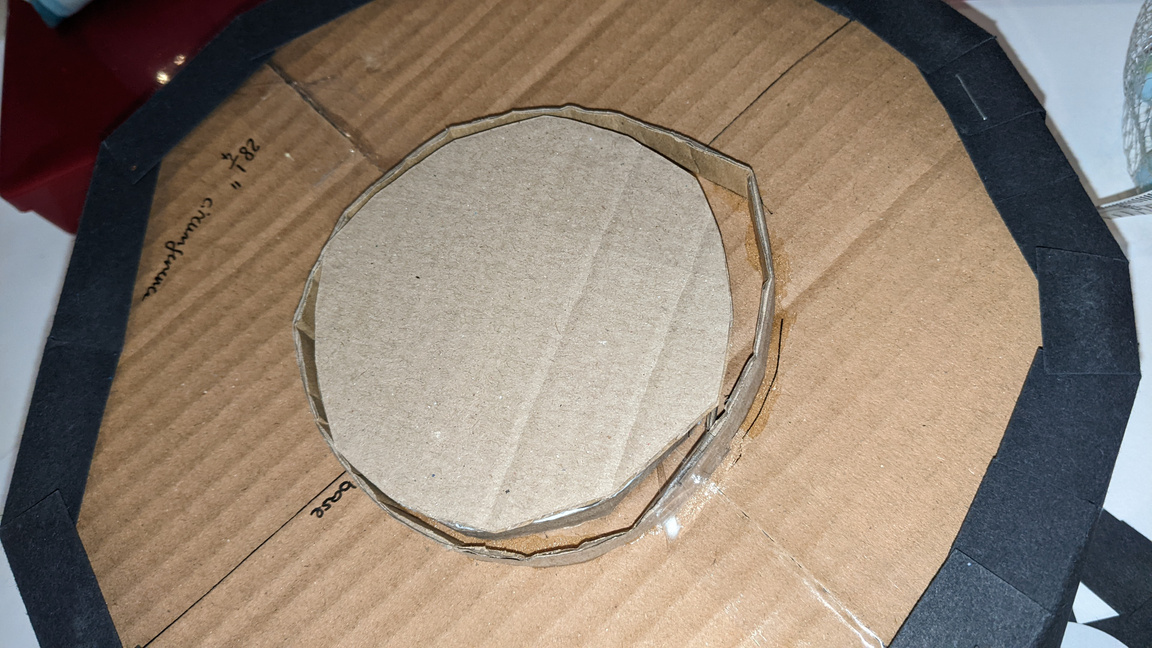
Curving the walls:
As with the test zoetrope, I cut slits into the bottom allowance in order for the walls to curve without creasing. I cut these slits below every other frame, and did the same to the top allowance for it to bend easily. I then checked that the walls would fit the circumference of the base - because I had added an extra few centimetres allowance when measuring the radius, my base was too large for the walls.
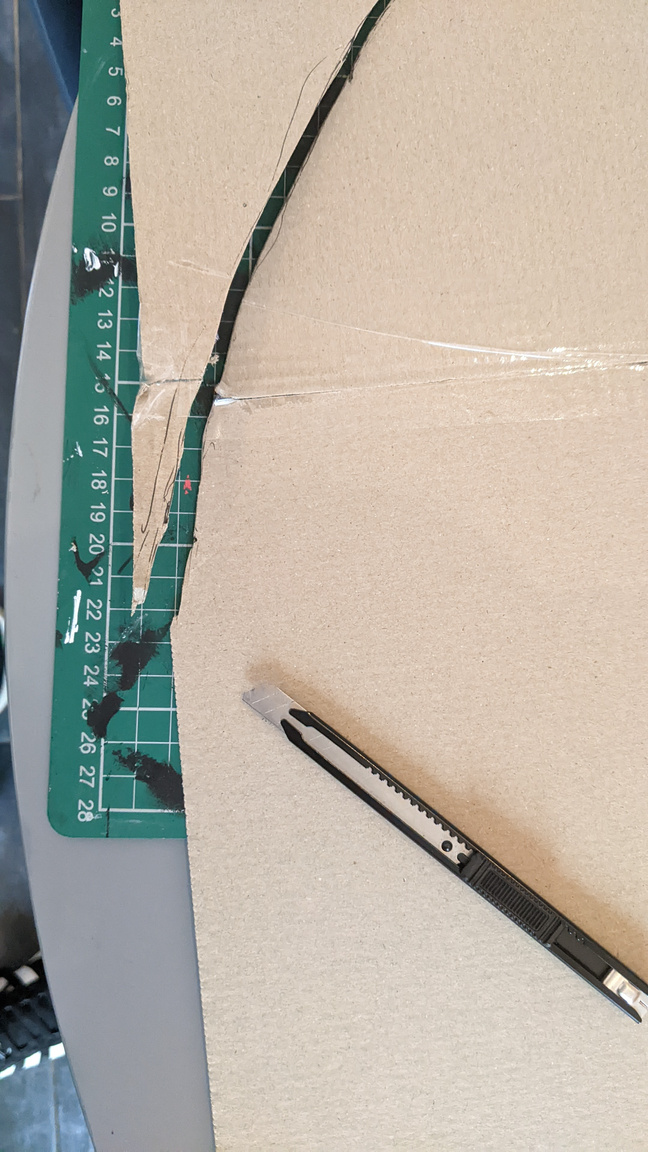
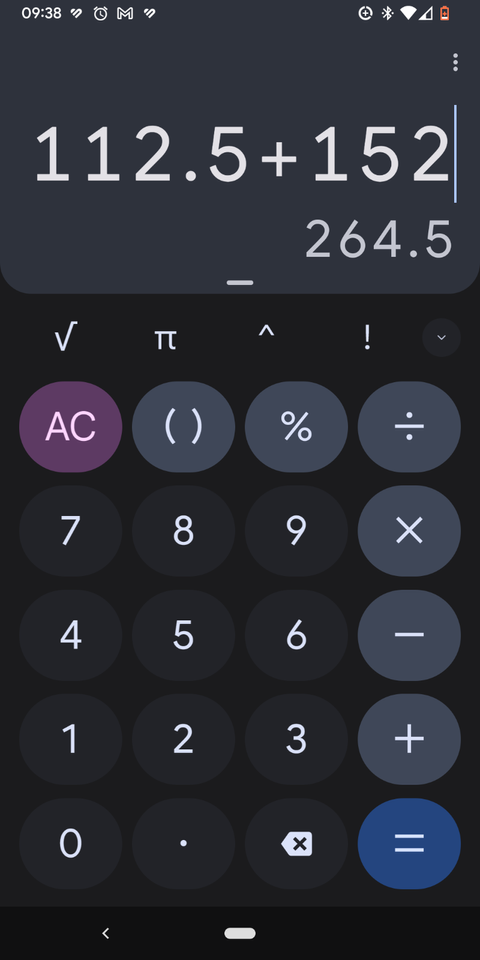
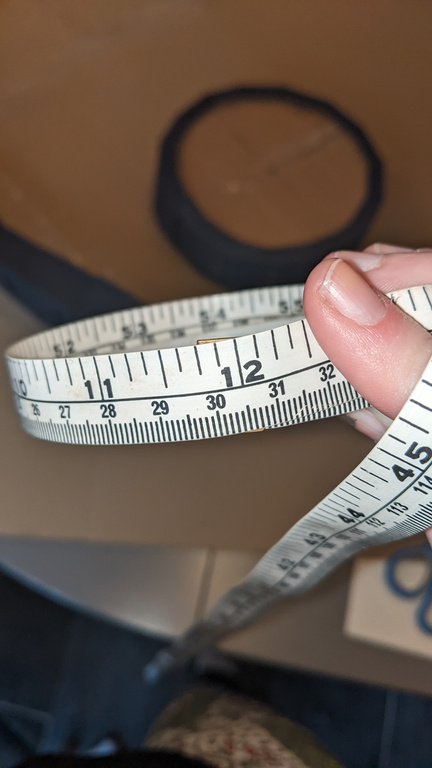
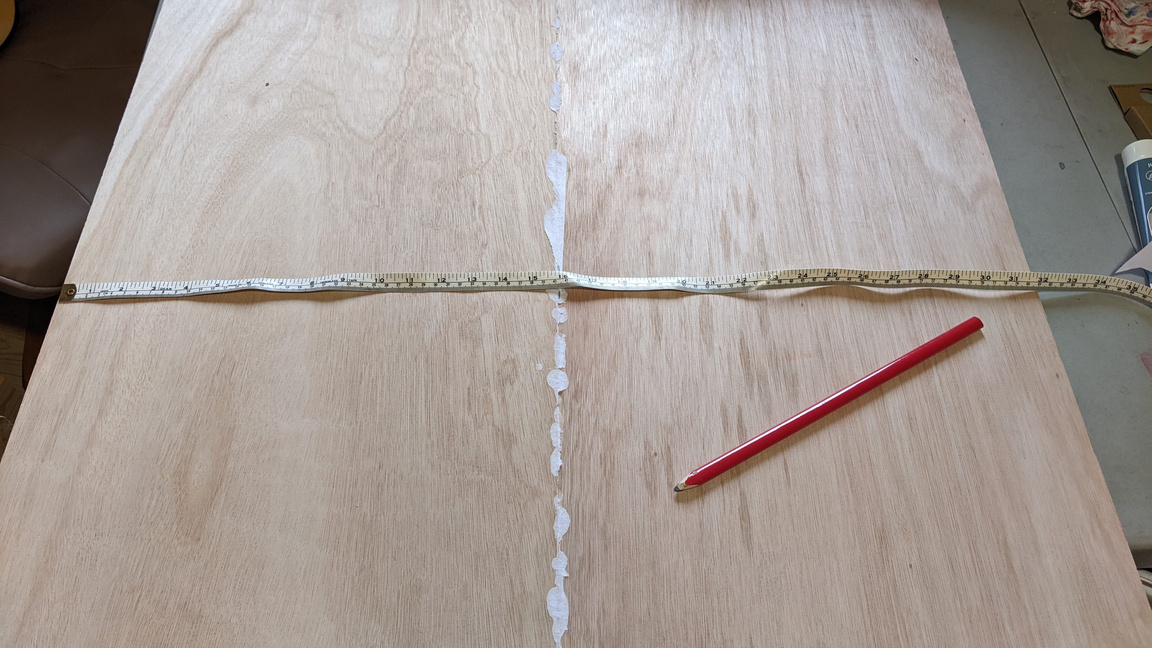
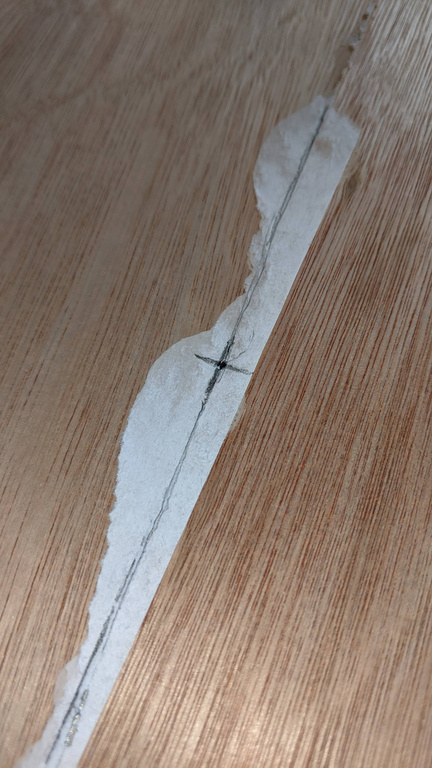
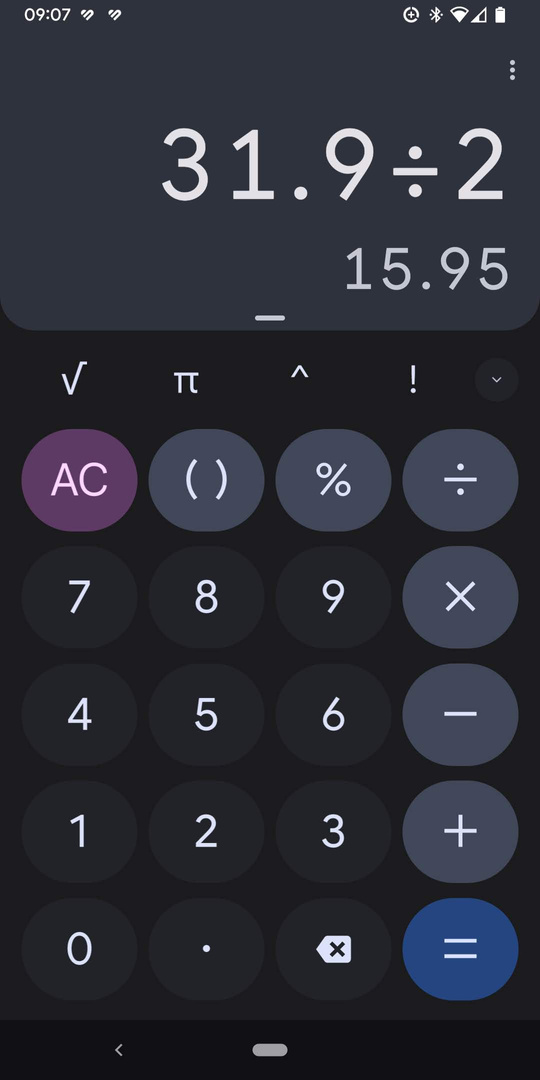
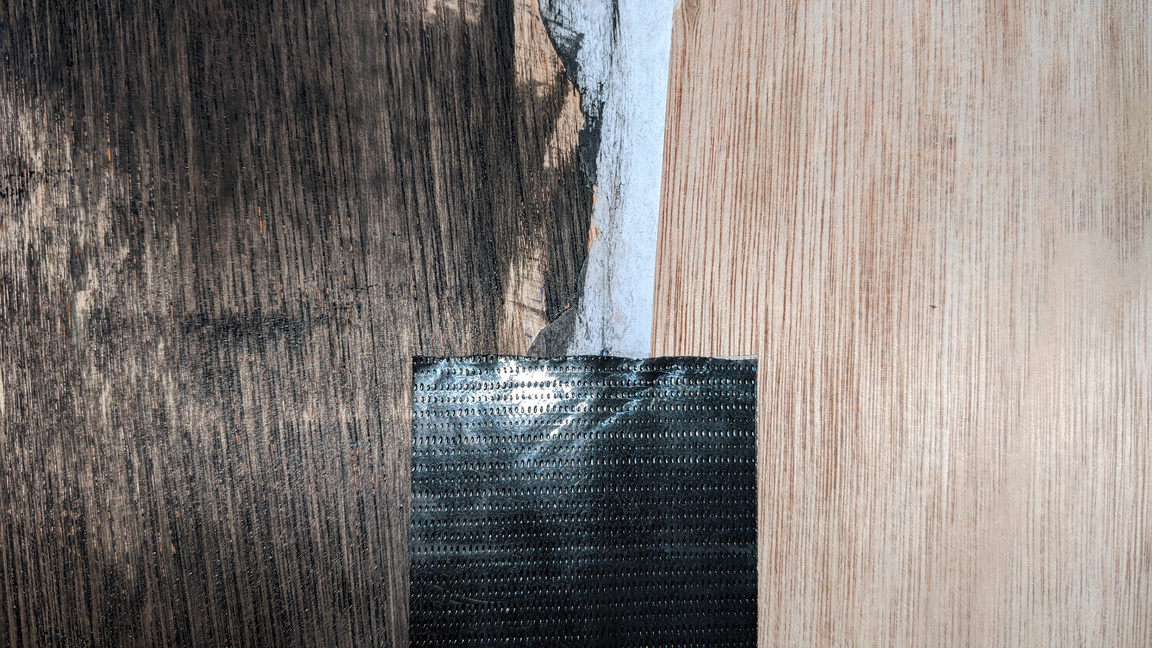
Problem solving - fixing the base:
I remeasured the circumference of the walls which came to 264.5cm. I then calculated the radius needed for this which was approximately 84.2cm. This was almost exactly how I had calculated it, so I needed to cut down the base to its original planned radius. I am still glad I added that extra allowance to begin with, as I would not have wanted to mess up and have to start again with a new base. I used the measuring tape as a compass again and cut the base smaller. I positioned the walls along the base's circumference and it fit a lot better, only slightly too long for the walls, but this would be fixed when gluing.
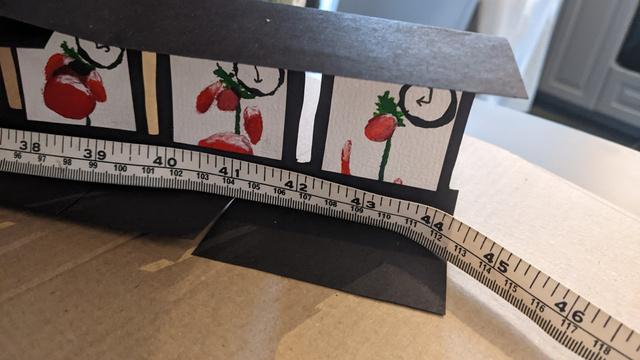
circumference
radius
Cutting the top off:
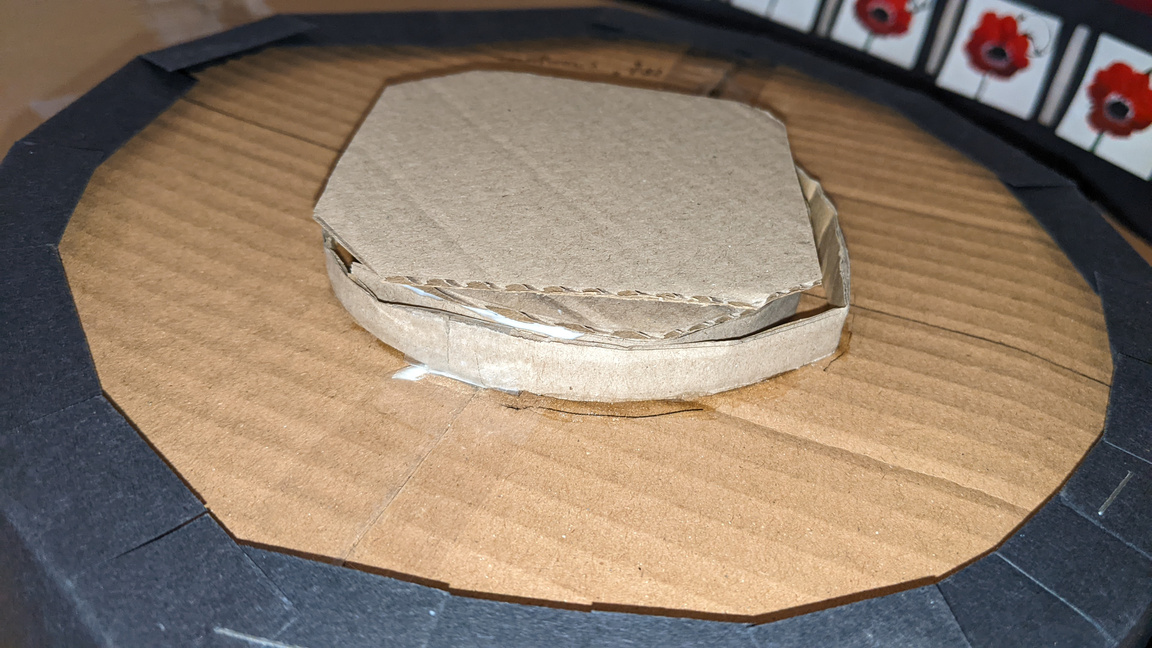
Before I could start attaching the walls to the base, I needed to decide what to do with the top allowance. In order to see how cutting the top off would effect the zoetrope, I removed the top allowance from my test zoetrope and looked at it spinning. This test confirmed that cutting the top allowance off would not negatively impact the viewing experience. I then cut off the top allowance off of the giant zoetrope's walls.

Gluing the walls to the base:
I decided to use project glue for sticking the walls to the base as it seemed to have set stronger than the Gem-Tac glue when I looked back at my tests. I also made tools out of spare black card to make it easier to apply. I first positioned the walls around the base and put glue on the top of the bottom allowance and pressed it against the underside of the base. Compared to the Gem-Tac, the project glue set hard and fast, so the more of the walls I stuck the more difficult it was to manoeuvre the edges to put glue on them. I managed to glue parts of the wall all around so the walls were secured to the base. I then flipped the zoetrope upside down and spread more project glue to reinforce the parts I could not reach from the inside. After each unsecured section was glued down to dry, I use my DIY card scraping tool to cover each join with a thin layer of project glue to make sure that the walls were fully reinforced against the base.
Reinforcing the base:
The final addition to my zoetrope was to add a piece of cardboard to the underside in order to reinforce the base's structure. When holding it up by a single central point, the sides drooped where the cardboard's structure was weaker. To fix this I used project glue to attach a rectangular cardboard support to the underside. Lastly, I poked the central hole through the cardboard reinforcement to be able to still poke a spindle through.
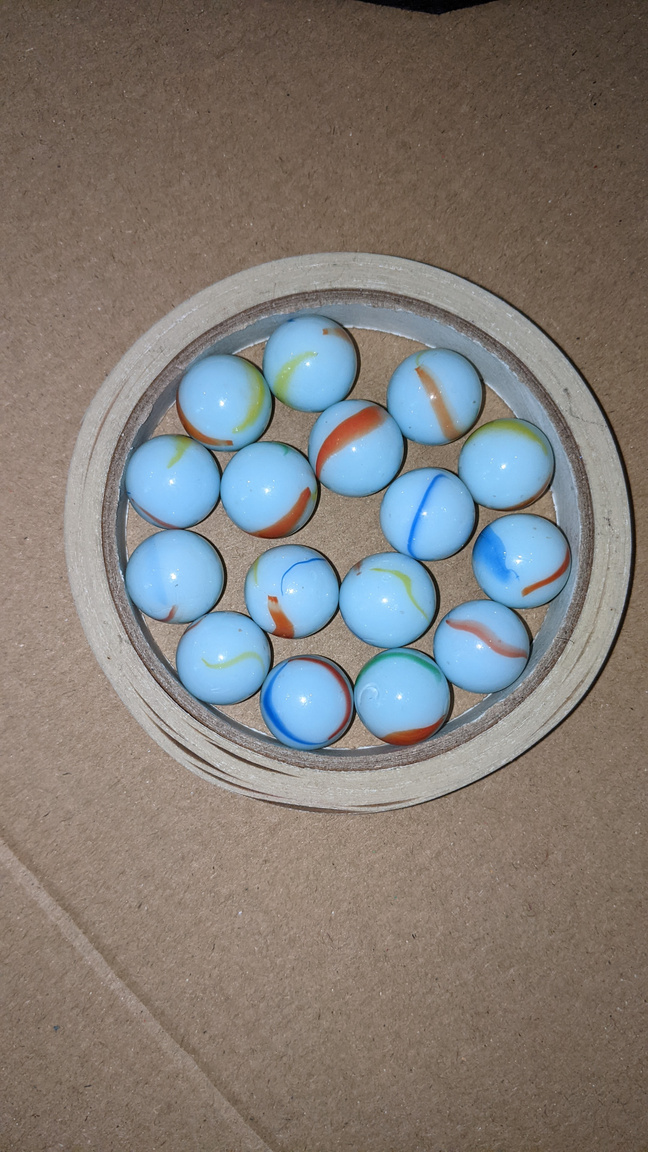
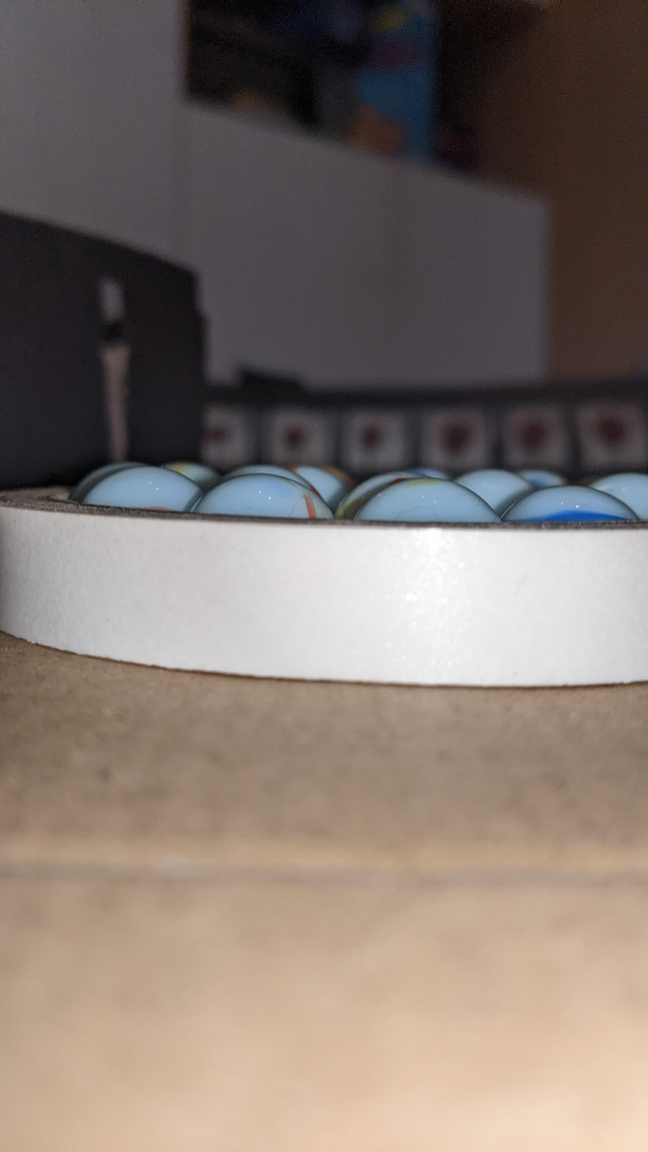
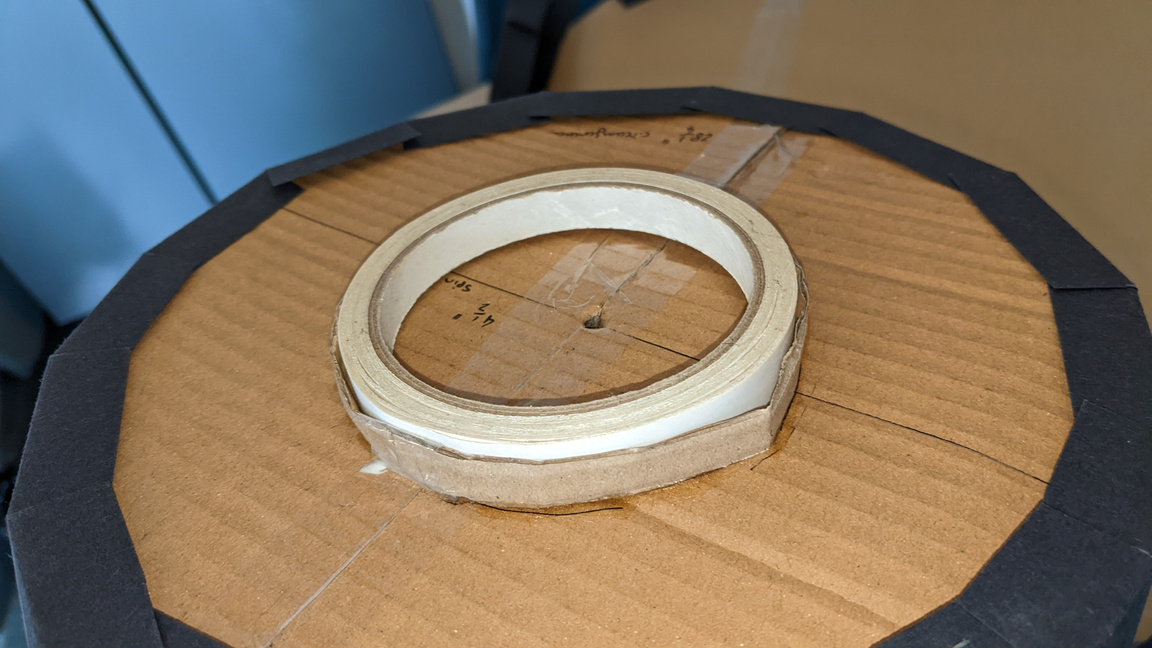
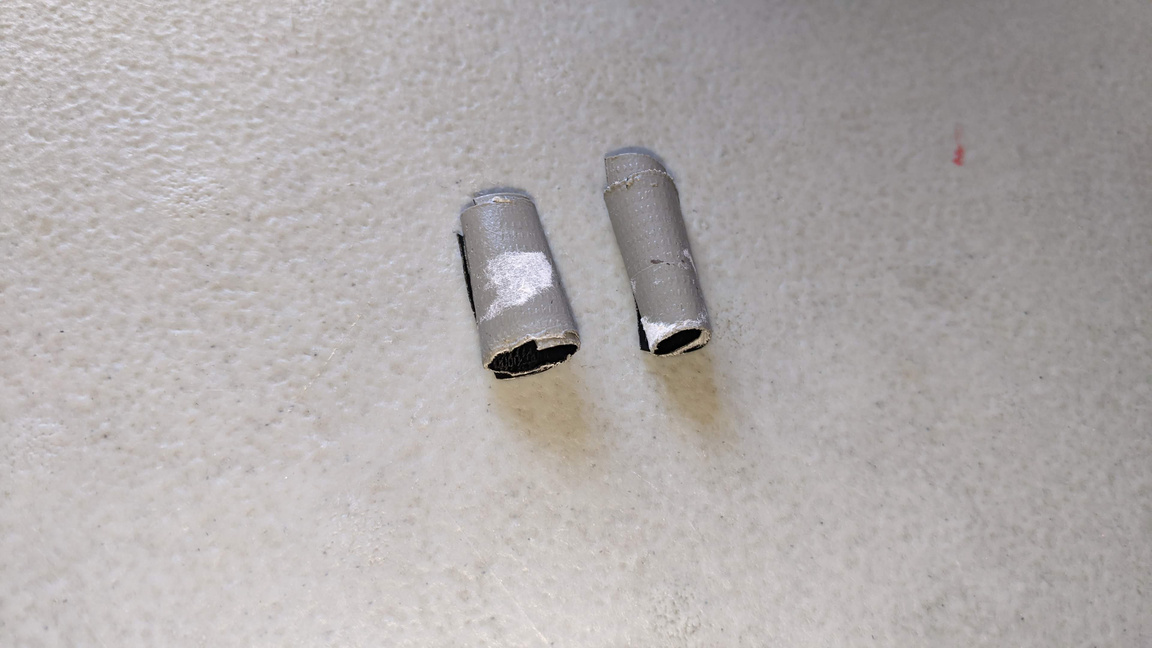
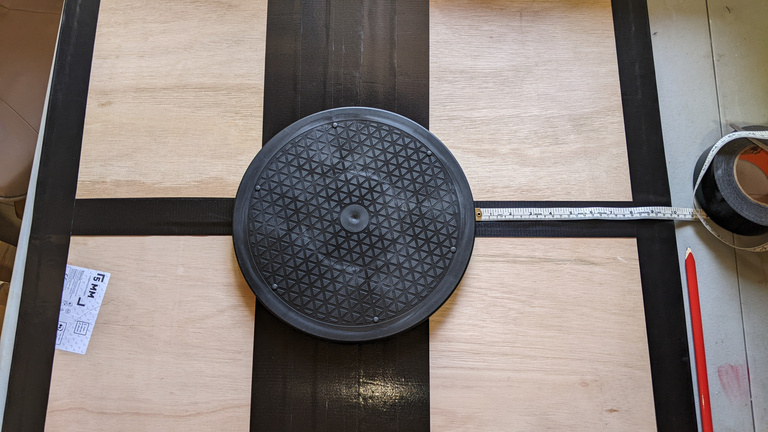
Spinning tests: MARBLE SPIN TEST:
Using marbles to create a make-shift spinning mechanism.
problem solving
practical skill
planning & production
Testing functionality:
I placed a bunch of marbles in my double-sided tape roll to simulate a make-shift spinning mechanism similar to a ball-bearing. This worked to spin the test zoetrope, but it needed something to keep the frame in place.
Making a proper one - version 1:
I measured the tape and created a cardboard version to hold the marbles in. I then glued this to the underside of the test zoetrope. I tried spinning it as it was, but there was nothing to keep it in place so it spun all over the place.
V1 Evaluation:
In order for this to work I needed to create a base for the marbles to sit in, and have this rim spin around the marble base.
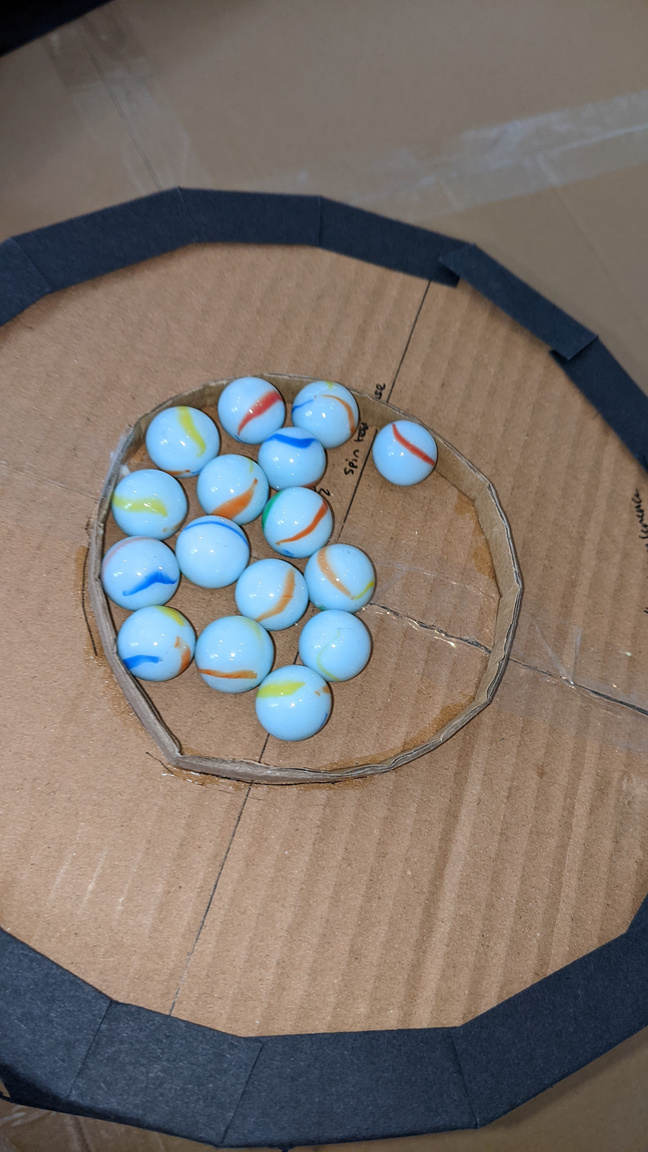
Making a proper one - version 2 & evaluation:
I created a base to put the marbles in by cutting out a cardboard circle and adding a rim to it. This turned out to not be tall enough for the existing rim (on the underside of the test zoetrope) to spin, so I cut out two more slabs of cardboard and glued them to the bottom for added height. This worked pretty well as a working spinner. I am not sure how it would be fast enough to spin and work, but to improve the stability and speed I would change the "pool" of marbles to a ring of marbles as seen in the digital sketch. I would also need a lot more marbles and would have to measure the frames accurately for it to be able to work.


Test conclusion:
Using marbles to create a spinner did work but the design would need to be a lot more sleek to get a smooth and continuous spin.
Making the Spinner:
Finding a solution for a large enough and weight-supportive spinner.
problem solving
practical skill
planning & production
The problem:
Lego could not be used to create the large spinner, like I originally planned, due to its lack of horizontal structural integrity and inability to support widespread weight evenly. Marbles would take too many marbles and would also need to be meticulously measured to create a working DIY ball-bearing, and would also need to be strong enough to support itself above the ground. The only material I have available for this within such a short time span is cardboard, which is flimsy and difficult to achieve smooth curves with.
The solution:
The solution I found was to order a tray spinner off of Amazon that would act as my weight-bearing supportive ball-bearing. This spinning base still needed to be wider though in order to properly support the zoetrope and reduce drooping, so I used a piece of 5mm plywood from B&Q as a starting base.
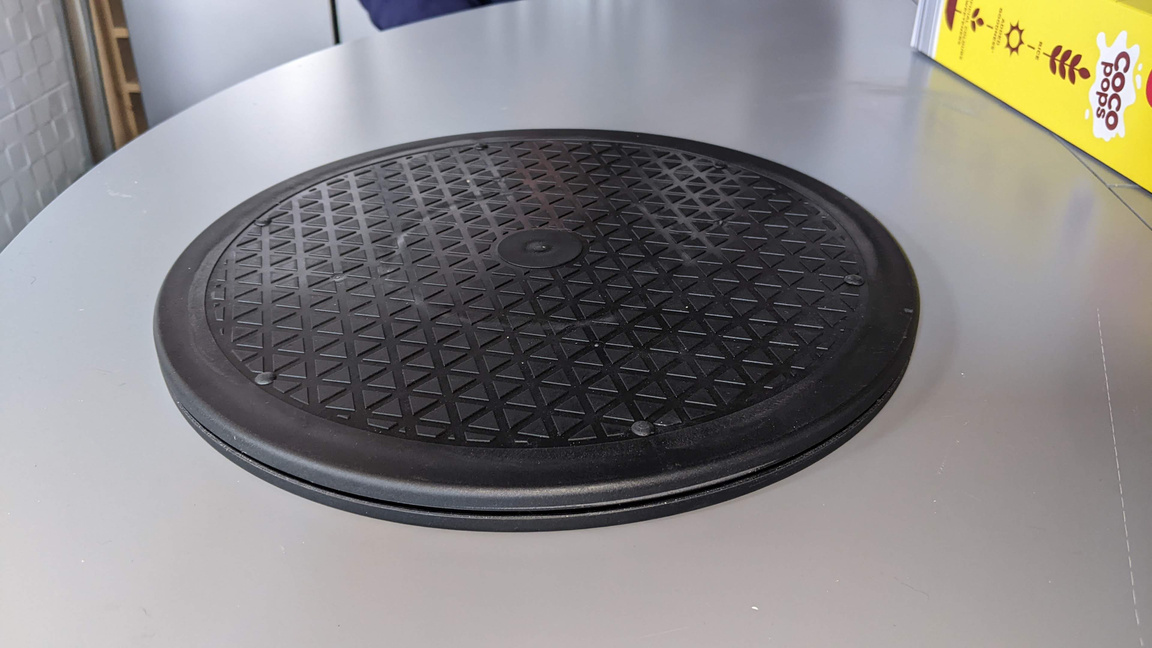

MAKING THE SPINNER
Making a larger base:
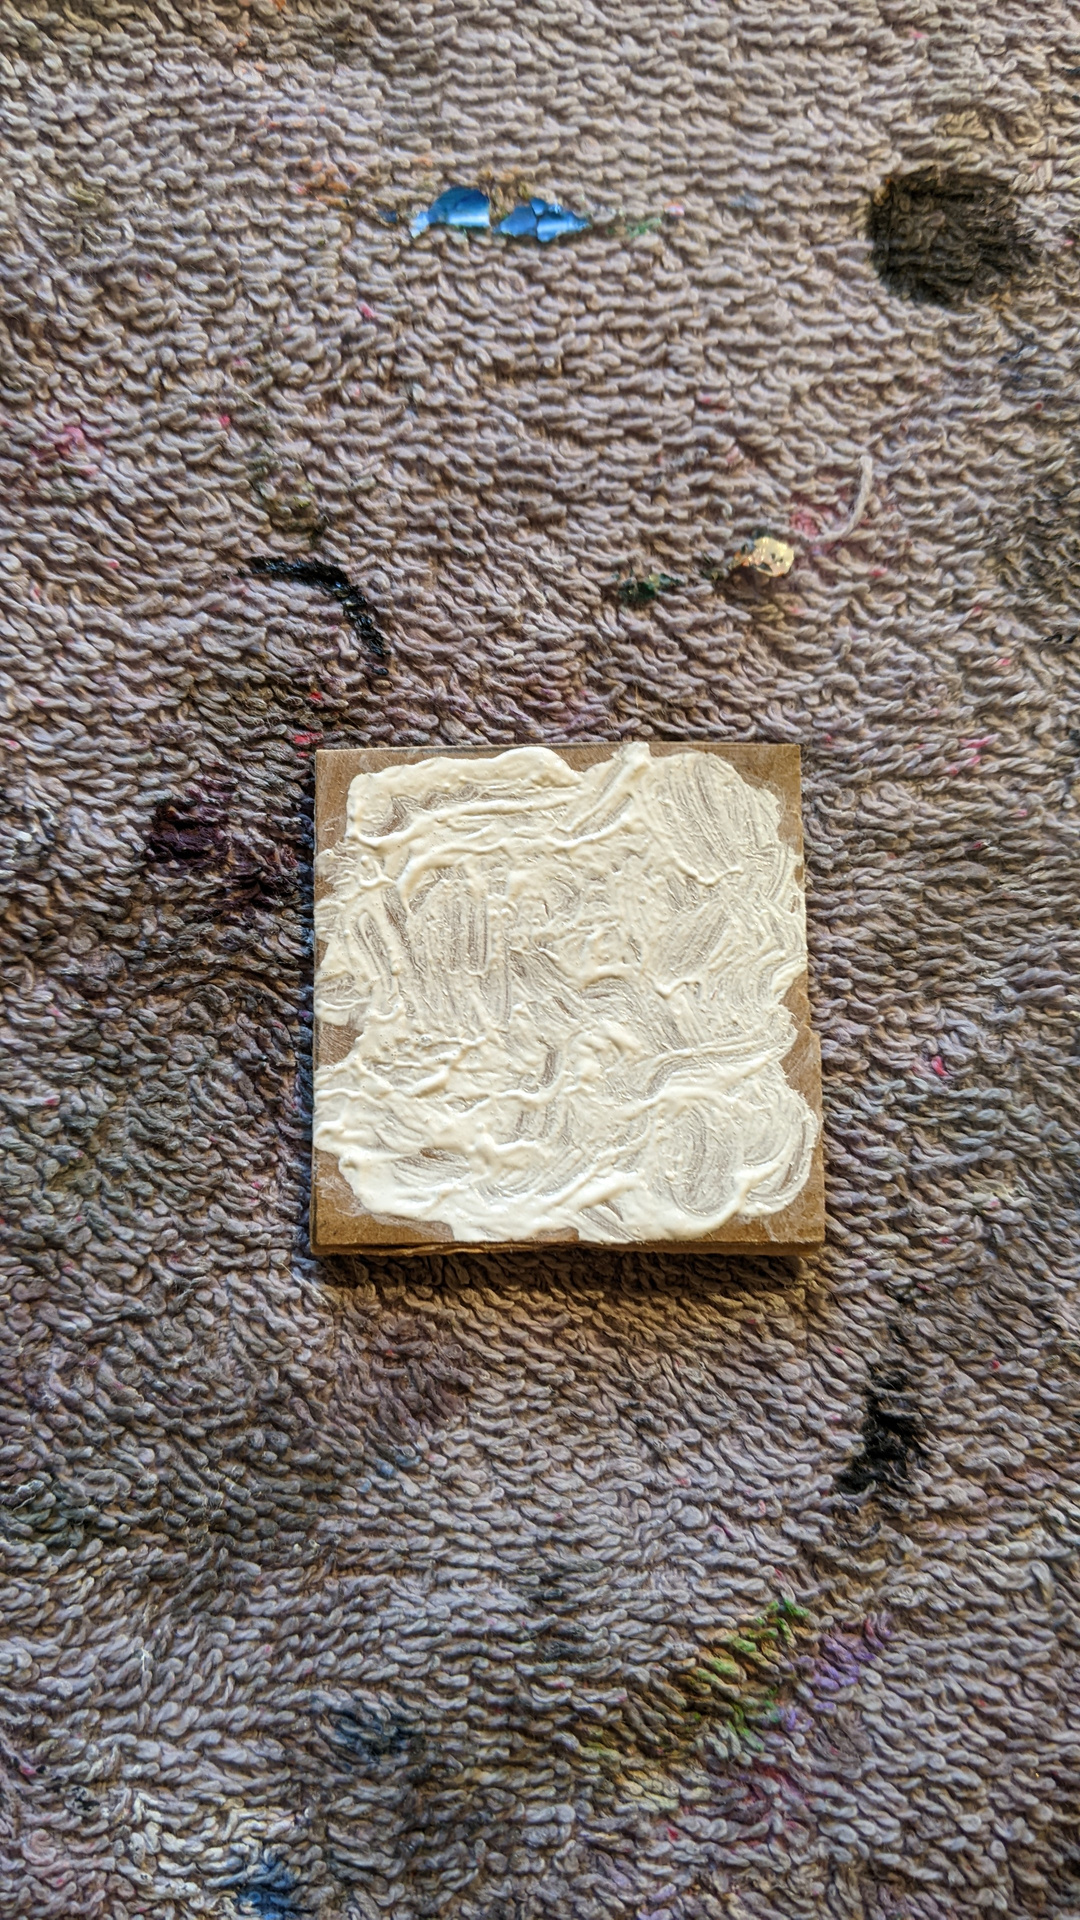
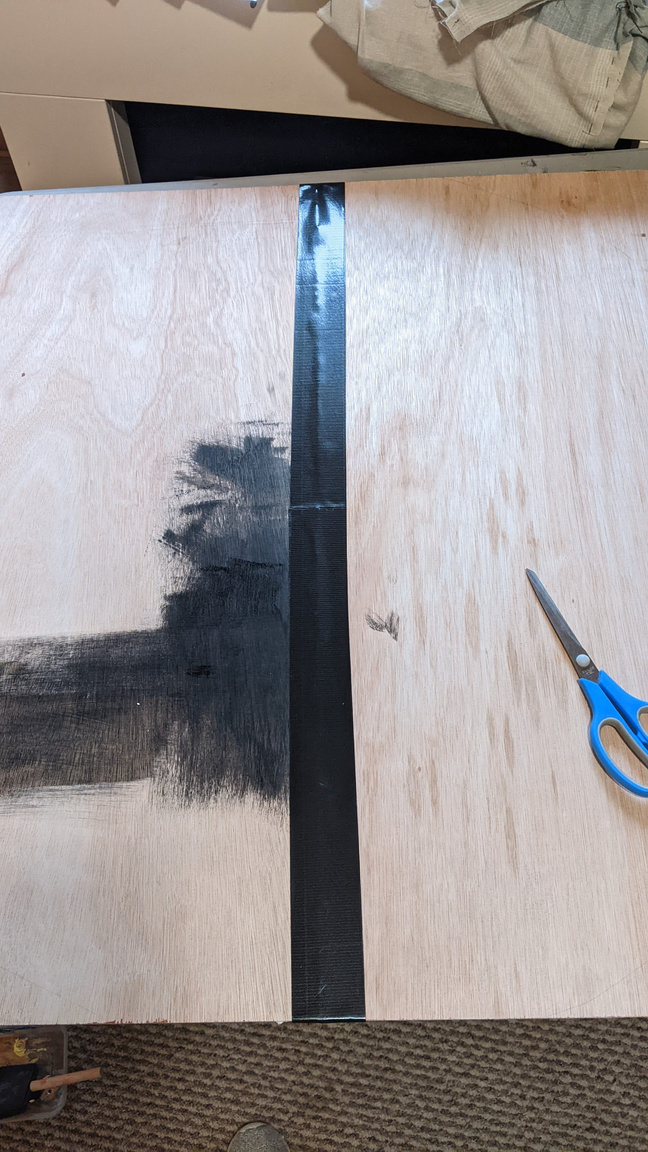
I got another identical sheet to create a more supportive base. I used wood glue to glue the two sheets together and left it overnight. I found the centre of the base and outlined where the zoetrope will sit. Knowing that the edges of the square base would be exposed I tested painting acrylic in the centre, but I decided that the wood looked nicer exposed, and I could cover the edges to make it neat. I then used Gorilla tape to reinforce the join of the two sheets of wood. The edges of the wood were fairly rough and splintered so I used more Gorilla tape to cover the edges so they would be more comfortable to grab, as this is where the zoetrope will be pushed to spin from. I added another layer of Gorilla tape on each side to secure the edge pieces, as I had not applied them evenly so some were less secure than others.


Paper got stuck to the glue when drying to protect the table
Finding the centre

Starting tape in the centre to not have to remeasure.
Edge test
Painting layers - 1 (top) to 3 (bottom)
Using water to spread the paint
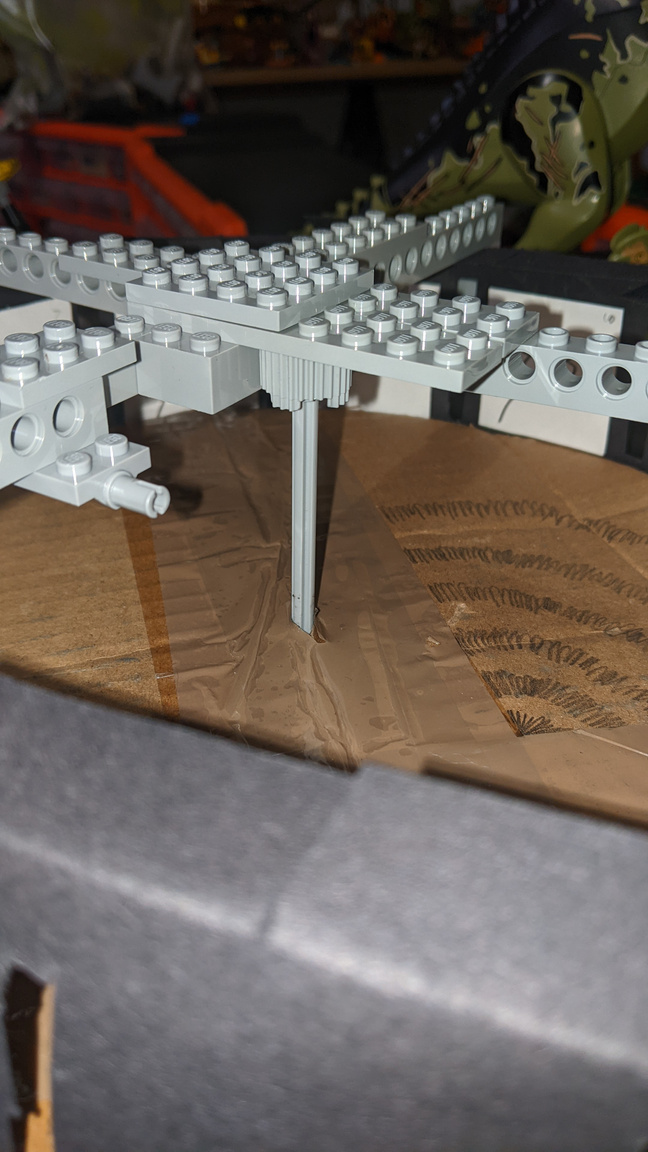
Finalising/Attaching the Spinner:
I added cardboard to the underside of the zoetrope to fill out the gaps between the cardboard base and the wooden base. I then tested the spinner with doubled over Gorilla tape and securing it to the centre of the wooden base. I found that the wood drooped a bit, so I attempted to secure the join with more widespread Gorilla tape. I then remarked the centre and used multiple doubled rolls of tape to firmly secure the spinner to the base's centre. I made sure to measure it accurately so that the spinner was in the exact centre. I placed the zoetrope on top of the base and again used Gorilla tape to keep it in place. With this, my physical outcome is complete.
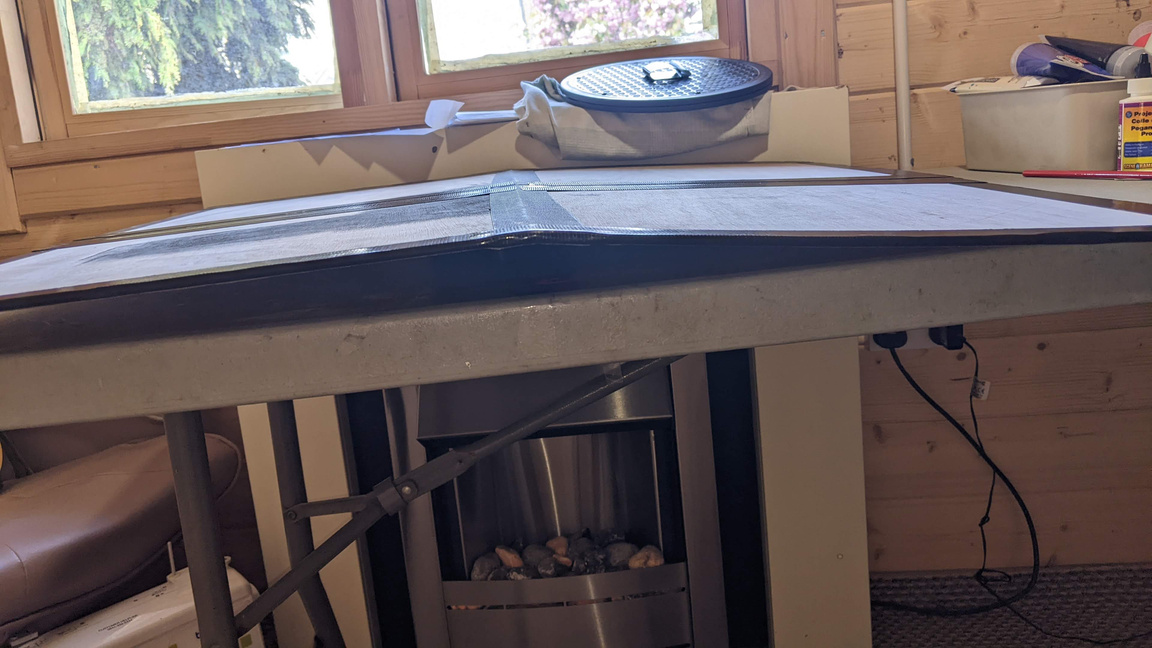
Using tape to secure the zoetrope to the base.
presentation
practical skill
planning & production
evaluation
Making My Final Video:
Recording and editing shots of my physical outcome to make my final video outcome.
Filming my outcome:
I will be submitting a video of my piece rather than the piece itself, so I started filming different shots I thought would be interesting. I made a rough storyboard, of which I made a neater version when editing. While filming, I noticed that the zoetrope moves up and down while spinning, which wasn't intended but I quite like the wave-like motion, it makes it feel more life-like and alive.
An unused shot. In this shot it looks as if you were looking at the frames from standing in the "room".
An unused shot.
Storyboards.
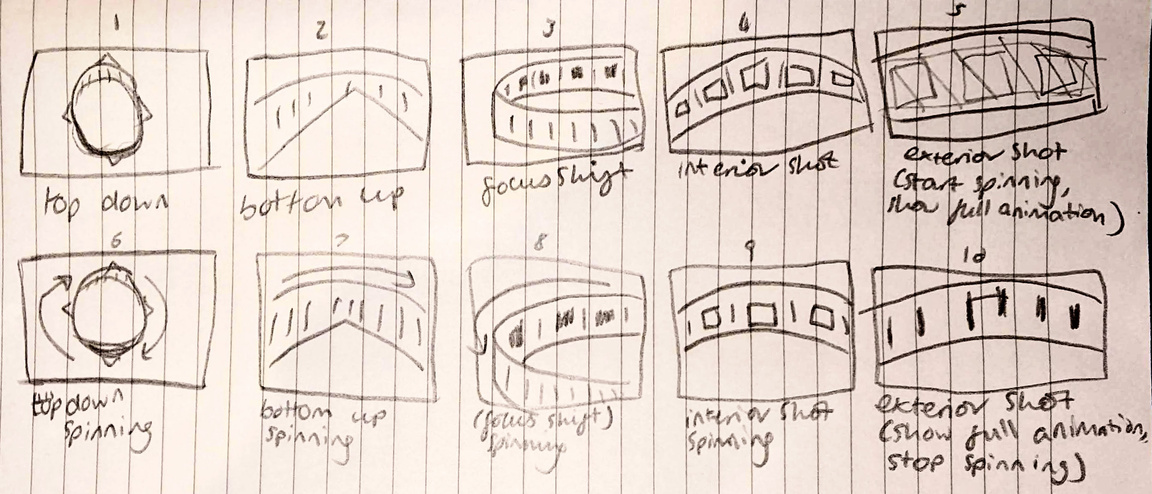
Editing my outcome & Evaluation:
I put all of the shots into Premier Pro and arranged them how I envisioned. Some shots were automatically zoomed in due differences in resolution, so I had to refilm a couple of them, while I kept some in as they cut out unnecessary background, or wouldn't make much of a difference zoomed out. I designed my video to loop, as this is how I would present it in an exhibition. I overlapped the sounds of some of the shots for clearer transitions or to remove unwanted noises. I am pleased with my final video, but I would refilm it with a better camera and a more plain/neutral backdrop if I had more time.
Editing my film (I had to re-upload the red file due to file issues).


FINAl outcome
presentation
evaluation
FINAL EVALUATION:
Overall, I am very proud of my final piece. It is the first fully coloured animation I have made, which has been a goal of mine in terms of developing my technical ability. It is also entirely hand-painted, which took a lot longer than I expected but allowed me to achieve minute detail and keep a painterly texture for each frame. When I was painting them I thought that some frames were better than others, and while I do still have favourite frames, after seeing the zoetrope in motion I now feel entirely happy with my animation. I am also proud of the physical scale of the project and the amount I have been able to achieve in this fairly short time period.
Looped version:
This version loops three times. I would exhibit an infinitely looping version if this were in an exhibition.
I feel content with the video outcome and pleased with the looping contrast of quiet stillness and continuous motion, although the visual quality of the video could be improved. I have very much enjoyed this project - I have been wanting to pursue more analogue and tangible works and through this project I achieved that. I expanded my interest and knowledge in flowers, particularly with floriography, which has been fun to learn about. I also now have a much deepened understanding and appreciation for analogue animation practices and machines due to my targeted research and experimentation. Conclusively, I am utterly proud of my achievements and excited by the potential of this project; while I acknowledge that some areas of the outcome could be improved, I have very much enjoyed this project and developed both my skills and my artistic self through this experience.

bibliography
A to Z Flowers (n.d.). Viola (Violet). [online] A to Z Flowers. Available at: https://www.atozflowers.com/flower/violas/ [Accessed 16 Mar. 2023].
Bloom and Wild (n.d.). Bloom & Wild Flower Delivery | Flowers & Gifts. [online] Bloom & Wild. Available at: https://www.bloomandwild.com/primrose-flower-meaning [Accessed 16 Mar. 2023].
Bos, M. (n.d.). Winter Sunshine in disguise: the Winter Aconite. [online] Miriam Bos - illustration and surface design. Available at: https://miriambos.com/blogen/winter-sunshine-in-disguise-winter-aconite#:~:text=being%20one%20of%20the%20earliest [Accessed 16 Mar. 2023].
Canale, S. (2017). The Symbolic Meaning of the Butter Cup. [online] blog.exoticflowers.com. Available at: https://blog.exoticflowers.com/blog-0/the-symbolic-meaning-of-the-butter-cup#:~:text=Because%20the%20buttercup%20is%20so [Accessed 16 Mar. 2023].
Cosgrove, J. (2021). Stargazer Lilies for Sale - Buying & Growing Guide. [online] Trees.com. Available at: https://www.trees.com/flowers/stargazer-lily#:~:text=The%20flowers%20bloom%20from%20mid [Accessed 14 Mar. 2023].
FTD Fresh (2016a). Anemone Meaning and Symbolism. [online] FTD.com. Available at: https://www.ftd.com/blog/share/anemone-meaning-and-symbolism#:~:text=Anemone%20Meanings&text=Due%20to%20its%20wild%20nature [Accessed 16 Mar. 2023].
FTD Fresh (2016b). Iris Meaning and Symbolism. [online] FTD.com. Available at: https://www.ftd.com/blog/share/iris-meaning-and-symbolism#:~:text=The%20iris%20commonly%20means%20wisdom [Accessed 16 Mar. 2023].
FTD Fresh (2016c). Lilac Meaning and Symbolism. [online] FTD.com. Available at: https://www.ftd.com/blog/share/lilac-meaning-and-symbolism#:~:text=White%20lilacs%20symbolize%20purity%20and [Accessed 16 Mar. 2023].
Funny How Flowers Do That (n.d.). Freesia. [online] Funny How Flowers Do That. Available at: https://www.funnyhowflowersdothat.co.uk/freesia [Accessed 20 Mar. 2023].
Funny How Flowers Do That (n.d.). Hyacinth. [online] Funny how flowers do that. Available at: https://www.funnyhowflowersdothat.co.uk/hyacinth#:~:text=Symbolism [Accessed 16 Mar. 2023].
Gaumond, A. (2021a). Anemone Flower Meaning and Symbolism. [online] Petal Republic. Available at: https://www.petalrepublic.com/anemone-flowers/ [Accessed 17 Apr. 2023].
Gaumond, A. (2021b). Ultimate Guide to Crocus Flower Meaning, Symbolism, and Uses. [online] Petal Republic. Available at: https://www.petalrepublic.com/crocus-flower/#:~:text=What%20do%20crocus%20flowers%20symbolize [Accessed 16 Mar. 2023].
Gaumond, A. (2021c). Ultimate Guide to Forsythia Flower Meaning. [online] Petal Republic. Available at: https://www.petalrepublic.com/forsythia-flower-meaning/#:~:text=In%20the%20language%20of%20flowers%2C%20the%20forsythia%20flower%20carries%20the [Accessed 16 Mar. 2023].
Gaumond, A. (2022). Ultimate Guide to Rhododendron Meaning and Symbolism. [online] Petal Republic. Available at: https://www.petalrepublic.com/rhododendron-meaning-and-symbolism/#:~:text=Rhododendrons%20symbolize%20a%20sense%20of [Accessed 16 Mar. 2023].
Glover, H. (2019). An Enquiry into Tacit Knowledge within Animation practice. [Thesis] Available at: https://researchonline.rca.ac.uk/4566/1/HGlover_Animatory_Thinking_Thesis.pdf [Accessed 20 Mar. 2023].
Kindow1 (2018). Freesia Flowers - Time Lapse. [online] www.youtube.com. Available at: https://youtu.be/bkGlnoZ4kEE [Accessed 10 Mar. 2023].
Leaves and Spines TIME LAPSE (2022). PURPLE ANEMONE EXPLOSION IN 31 SECOND! | Time Lapse. [online] www.youtube.com. Available at: https://youtu.be/FPmZUYciI6M [Accessed 14 Apr. 2023].
McClenaghan, L. (2022). April Birth Flowers & Meanings: Sweet Pea & Daisy. [online] Floraly. Available at: https://www.floraly.com.au/blogs/news/april-birth-flower-meanings-sweet-pea-daisy#:~:text=In%20floriography%2C%20the%20language%20of [Accessed 16 Mar. 2023].
National Records of Scotland Web Team (2013). National Records of Scotland. [online] National Records of Scotland. Available at: https://www.nrscotland.gov.uk/research/archivists-garden/index-by-plant-name/grape-hyacinth#:~:text=In%20the%20Christian%20faith%20it [Accessed 16 Mar. 2023].
Neveln, V. (2023). Jasmine Makes a Great Fragrant Plant to Gift. [online] Better Homes & Gardens. Available at: https://www.bhg.com/gardening/plant-dictionary/vine/jasmine/ [Accessed 20 Mar. 2023].
Phelps, S. (2020). Birth flowers and their meanings. [online] Susan Phelps. Available at: https://www.susanphelps.co.uk/blog/birth-flowers-and-their-meanings#:~:text=Snowdrop%3A%20The%20small%20and%20fragile [Accessed 16 Mar. 2023].
Raven, S. (2021). how to plant, grow & care for freesias. [online] Sarah Raven. Available at: https://www.sarahraven.com/articles/how-to-plant-and-grow-freesias#:~:text=when%20do%20freesias%20flower%3F [Accessed 14 Mar. 2023].
RimstarOrg (2018). How to Make a Zoetrope. [online] www.youtube.com. Available at: https://youtu.be/u2v-L-1Kctk [Accessed 21 Mar. 2023].
Sears, C. (2022). How to Grow Winter Aconite Plants. [online] The Spruce. Available at: https://www.thespruce.com/winter-aconite-plant-profile-5069907 [Accessed 16 Mar. 2023].
The Editors of Almanac.com (2022). March Birth Flower: The Daffodil | What Does it Mean? | The Old Farmer’s Almanac. [online] www.almanac.com. Available at: https://www.almanac.com/content/march-birth-flower#:~:text=where%20he%20died.- [Accessed 16 Mar. 2023].
The Garden of Bob (2022). TIMELAPSE Anemone Flowers Blooming. [online] www.youtube.com. Available at: https://youtu.be/t_Li8ivskdg [Accessed 14 Apr. 2023].
The Petal Republic Team (2020). Ultimate Guide to Dahlia Flowers (Meaning & Symbolism). [online] Petal Republic. Available at: https://www.petalrepublic.com/dahlia-flowers/#:~:text=Dahlia%20Flower%20Symbolism [Accessed 16 Mar. 2023].
The Petal Republic Team (2022a). Ultimate Guide to Hellebore Flower Meaning and Symbolism. [online] Petal Republic. Available at: https://www.petalrepublic.com/hellebore-flower-meaning/#:~:text=In%20the%20Victorian%20language%20of%20flowers%2C%20hellebore%20symbolized%20delirium%2C%20according [Accessed 16 Mar. 2023].
The Petal Republic Team (2022b). Ultimate Guide to Magnolia Flower Meaning & Symbolism. [online] Petal Republic. Available at: https://www.petalrepublic.com/magnolia-flower-meaning/#:~:text=Magnolias%20flowers%20represent%20many%20qualities [Accessed 16 Mar. 2023].
The Petal Republic Team (2022c). Ultimate Guide to Pansy Flower Meaning & Symbolism. [online] Petal Republic. Available at: https://www.petalrepublic.com/pansy-flower-meaning/#:~:text=Pansies%20don [Accessed 16 Mar. 2023].
Wisconsin Horticulture (n.d.). ‘Stargazer’ Lily. [online] Wisconsin Horticulture. Available at: https://hort.extension.wisc.edu/articles/stargazer-lily/ [Accessed 20 Mar. 2023].